Boatworks

  • Main
  • Louve
  • Typewriters
  • Workshop
  • Meritaten
  • Glypto
  • Motoko
  • Inspirations
  • About

Barr Universal. Slightly different animal

April 19, 2025 by Lukasz Kumanowski

Two of these landed on my bench: one in Pica, one in Elite. Both had several problems, apart from dust and dirt.
Common problem for both were smashed paper-feed rollers.

It usually is no issue to remove these but not on Barr.
Here, for some reason, they decided to thread both ends of each axis, leaving no place where one can grab it and try unscrewing. Entire length of all axis is covered by rollers or spacers (also rolling).
Moreover - even if you manage to get hold of the axis - you cannot unscrew them. Thread is too short to unscrew on one side and it gets screwed into the other side while you try.
In short: they did not plan to replace these, it seems. To remove them one needs to disassemble almost the entire carriage.

Well, after struggling to find a way to do it properly I finally gave up. No way I’m gonna remove rivets etc to dismount them from the carriage.
I decided to cut them out and make new, modified for future service.

Measurements of existing parts. In case of rollers I needed to guess their diameter - they were so deformed.

Cleaned old rubber on a lathe. It turns out that big rollers were mounted on brass pipes while small ones on steel.

I leave spacer rollers with their patina (brass). Freshly cleaned rollers will be covered with new rubber so shiny metal will not be seen.

Turning two sets of axles, for both machines. I use steel rods from old IKEA bookshelf.

It turns out that metric thread M2.5 is perfectly matching UNC thread which is originally on the machine (I suppose). I threaded my rods so one side of machine supports can be used with their threads. The other side got its thread removed and will accept new axles as THRU. They will be secured with nuts on both sides anyway.

New rollers were made from silicone tubing with heat-shrink cover, for period-correct color and to fine-tune required diameter. Mounted on the machine.

Next problem: snapped draw band.
Spring motor on Barr is located on left side, under the cover. I made a new string from strong twine, re-used original fastenings used with cotton band.

To add tension to the motor one does not need to wind it by hand while holding the drawband. No, on Barr this is civilized: firstly remove the locking screw.

Then just wind the spring until it is enough to draw a carriage all the way. Service manual gives exact value for tension: min 2lbs when carriage on position 40. I eyeballed it on my machine.

Next problem: carriage binding when trying to move with carriage release controls. For that I needed to remove the carriage, suspecting problem down there. It is easy on Barr - just two screws, one on each side. After detaching draw string the whole assembly is simply lifted straight up.

It turned out to be slightly bent bracket which is being pressed by carriage rail gliding above, when carriage release is used. Formed it back into shape.

One of my machines was having problems with typing in red. It was either totally crazy and unreliable or causing the ribbon vibrator to jam.

Jamming was especially dangerous when in shift - since Barr is a basket-shift machine it was causing the whole basket to jam below derailed ribbon vibrator.

To adjust it one needs to find a sweet spot in two places, adjusting each one of them separately and VERY SLIGHTLY at a time.
It costed me many hours and lots of cursing to find the spot for my machine. It can be done but requires lots of patience.
First we need to adjust position of the plate below, by easing the pointed screw. We aim at having ribbon vibrator erecting links to form a straight line when the key is pressed. I cannot show it on the picture but service manual describes it.

Once this is done we move to another spot, under the machine. By adjusting these two nuts we increase or decrease the throw for ribbon vibrator.
A word of caution: it requires very small adjustments, like 1/2 turn of a nut, to reach the proper position.

Well, with that fixed all the rest was easy.
Both machines had busted rubber feet. Luckily our local typewriter-supply shop could provide me with exactly matching rubber feet replacement. Originals, hard as plastic, look like that:

Modern, state-of-the-art replacement from Biltema looks like that:

They do the job perfectly and fit in carrying case alright. What not to like?

Ribbon spools on Barr are slightly narrower than modern Pelikan, plastic spools. I managed to find steel spools fitting perfectly.
Fresh, nylon ribbon from stock roll:

… and both machines are ready to fly!

Barr-typewriter is one of these underrated and looked-down machines which is utterly unfair.
They are different from all other but typing action, at least on both mine machines, is perfect. I would compare it to old Remingtons or Royal Portables: snappy, responsive, very satisfying.

Most of controls are housed on the carriage. Barr has additional handle on the right side, used if one wants to just move the carriage but not advance the line. Line advance lever is on the left, like on most other machines.

Feed-rollers pressure release lever has additional, pinch-action lock. It hooks on the back of the carriage and keeps rollers in disengaged state. No other machine has such feature, as far as I know.

Line advance selector is an arc of holes:

Speaking of line advance: I admire shape of the line advance arm! Reminds me sophisticated lines of Groma N!

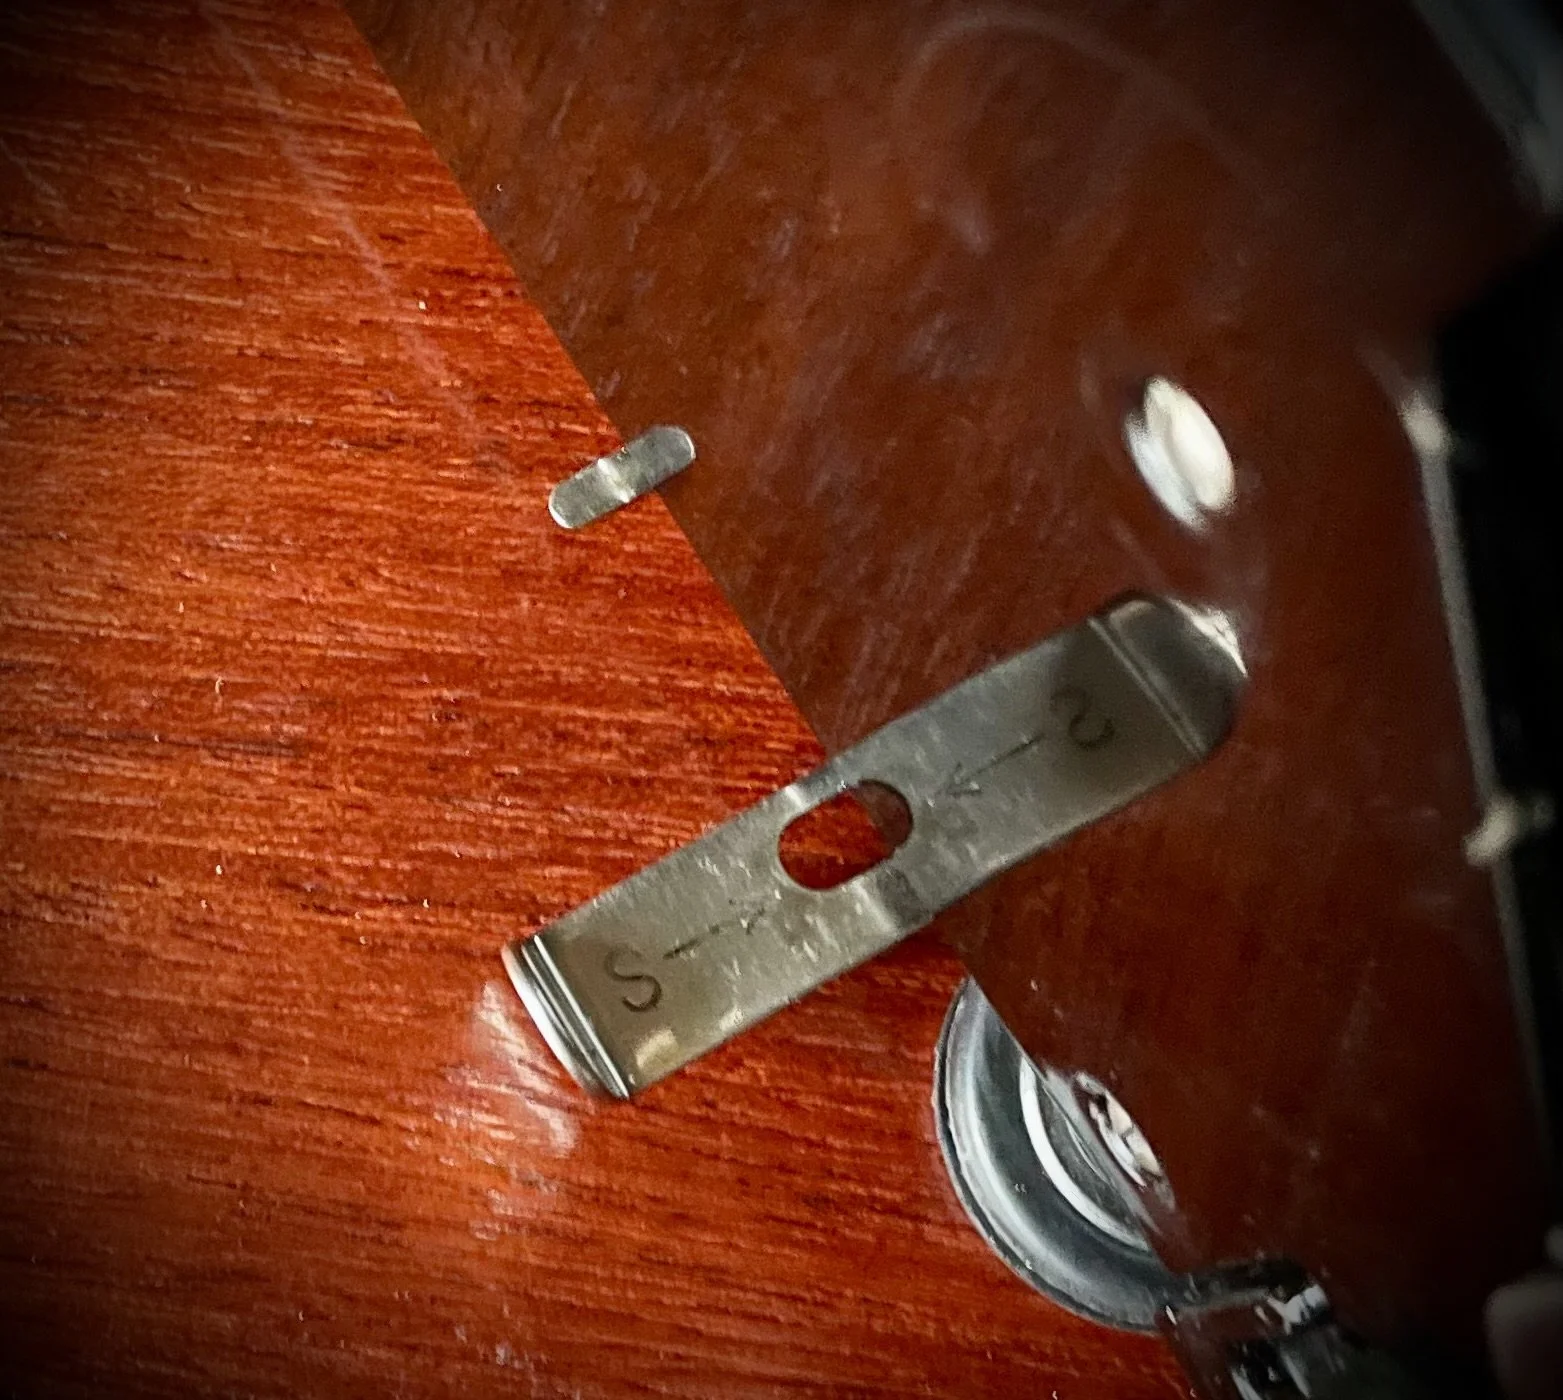
Ribbon selector is located in usual place, on the right, above keyboard. There one can chose between top and bottom position. To chose Stencil mode we need to draw a separate lever on the right, bottom side of the machine:

View fullsize IMG_4046.jpg
View fullsize IMG_4047.jpg

Small lever marked with yellow is ribbon direction selector. Machine will reverse ribbon direction automatically as well, of course.

Carriage lock is implemented by means of pressing down line advance axis. It looks solid and bulletproof.

View fullsize IMG_4039.jpg
View fullsize IMG_4040.jpg

Margin and Tabulator rack is hanged on hinges, spring-loaded. One can lift it up, to see better while setting controls. Rack´s digits are etched up-side-down for that purpose.

View fullsize IMG_4044.jpg
View fullsize IMG_4045.jpg

Will Davis has an interesting article about this type of TAB solution.

Keyboard is more or less standard 4-bank layout. What stands out is that Shift.lock is on the right side only (but released by both Shift keys) and that Margin Release button is vertical.
In my writing it works equally well.

View fullsize IMG_4054.jpg
View fullsize IMG_4055.jpg

All in all - very sexy machine.
Typing feel is perfect, controls are straightforward even if a bit different than what we are used to.
Robust, no-nonsense machine for heavy writing. I totally agree with Robert Messenger on that.

View fullsize IMG_4037.jpg
View fullsize IMG_4043.jpg
View fullsize IMG_4052.jpg
View fullsize IMG_4051.jpg
View fullsize IMG_4053.jpg
April 19, 2025 /Lukasz Kumanowski
1 Comment

Sharp PA-1050. New ribbon for thermal typewriters

February 22, 2025 by Lukasz Kumanowski

I guess I am a bit late to this game of thermal typewriters. When I researched my machine I found articles and typecasts of Ted Munk and Joe Van Cleave from a decade ago.

Well, better late than never.
The reason I picked this machine was my need for a very silent typer. And one which will not cause me troubles when flying. Call it my bad luck but on my recent flights to Germany security control was a PITA, both in Sweden and in Germany.
Imagining that I need to explain myself to carry a contraption like Erika 5 on a plane just gives me a rush.
Sharp PA-1050, on the other hand, looks like an old laptop and - being mostly plastic, with standard D-cell batteries - should not cause any alarm-bells ringing.

Called baby-wedge by Ted Munk, you can see why from a side:

Mine came with manual (in Swedish), a few cassettes and an additional RAM-module which extends its internal memory and enables storing several A4-pages inside, to be printed later.

View fullsize IMG_3343.jpg
View fullsize IMG_3345.jpg

I was saving these cassettes for a later, typing on thermal paper instead (no cassette needed then). My favorite thermal paper became this Brother one:

View fullsize IMG_3346.jpg

It gives very nice, dark print and I cannot find anything to complain about but… I want to type on my all-time favorite paper, Sweden-Bond!
It is slightly off-white and has a delicate texture with a water mark. On picture below it is an ark on top, laying on Brother thermal paper ark (extra-white).

View fullsize IMG_3347.jpg

Well, thermal transfer ribbons are still made today and widely used. We use Brother printers for labels etc, thermal ribbon comes in plenty of sizes and lengths. The challenge is that my machine uses 6mm wide ribbon and the narrowest one sold today is 9mm and it is just 10m long.
The cassette can be opened easily. I checked how things are routed inside and how wide the new spool should be.

View fullsize IMG_3302.jpg
View fullsize IMG_3307.jpg

I could not help reading the old ribbon left in the cassette. Seems that the last time this machine was used was 1995:

View fullsize IMG_3314.jpg

The choice of bulk ribbon is very wide. I bought one of these and started making a jig to cut it. The idea was simple: a row of blades through which the tape will be drawn, resulting in simultaneous cut of many 6mm pieces.

View fullsize IMG_3285.jpg
View fullsize IMG_3286.jpg
View fullsize IMG_3287.jpg

It kind of worked for a while but inevitably was derailing after a while.
The tape is too thin and too fragile for that. Besides - so many threads become unmanageable.

I dumped the idea and tried something more radical: cutting on a lathe!

View fullsize IMG_3298.jpg

To keep the ribbon from accidental unwinding I taped it with masking (paper) tape.

It is mounted on a lathe so that when it turns and meets the knife it is “winding itself”.

I made the knife from rotary cutter blade, mounted on a simple shaft.
The trick is to use as thin blade as possible - at the same time as stiff as possible so that it will not diverge to side during the cut.

View fullsize IMG_3299.jpg

I could not avoid some problems:

  • first cut became too narrow because the blade diverged from an initial line (yellow arrow)

  • second cut was too abrupt: knife movement vs rotation speed (blue arrow)

  • the third cut yielded acceptable results but not perfect yet.

View fullsize IMG_3335.jpg

Unmatched rotation vs knife movement caused the ribbon to heat and loose parts of the resin, visible as reflective stripe above. It is a Mylar-base without the resin which is showing through.

View fullsize IMG_3336.jpg

Once I got these parameters dialed-in I continued cutting with no further problems.
Next step was to wind the ribbon onto cassette spool.

View fullsize IMG_3318.jpg
View fullsize IMG_3319.jpg

It is a bit fiddly to mount this back into the cassette. Routing this tape through all nooks and crannies is taking time but can be done with patience.

View fullsize IMG_3320.jpg

Finally time for test-type!

View fullsize IMG_3322.jpg

Well, it works!
So there is hope for these cool “baby-wedges” out there!

The procedure is quite straightforward and after going through all possible mistakes it becomes a routine. As always with everything.

At least the material is not expensive: I bought a bulk ribbon for 25 USD, it can yield around 30 such cassettes. Maybe more.

So if something goes wrong - stop crying and just move on.

View fullsize IMG_3337.jpg
February 22, 2025 /Lukasz Kumanowski
Comment

Erika 2 foldable - platen removal, ribbon position adjustment

February 09, 2025 by Lukasz Kumanowski

Always a joy to work on one of these little gems.

There was not much wrong with this specimen, mostly very dirty and with cracked platen. I don’t mention petrified paper-feed roller since this is always the case on machines as old as 114 years.

Removing the platen is easy: one plunger screw is holding platen knob.

Now, platen axis-rod has a key which needs to be aligned with a slot to come out.
So: no hammering if things don’t move!

Platen.
Removed the old, hardened and cracked rubber. Wooden core - beech wood.

I recovered the platen with heat-shrink tubing, back to original 32mm diameter.
Turning on a lathe is a must for such operation, heat-shrink tubes shrink too non-uniformly to rely on that to be concentric.

Line advance is a pinch-action on this machine. The ratchet did not come to home position, the spring was too tired. I changed to new, stronger spring and it works perfectly again.

It is a small and very light machine so good rubber feet are essential for comfortable typing. I made mine from Biltema components.

Key-tops were so dirty that I thought that they are damaged. Luckily these are made of real glass so it was possible to clean. I use Fulgentine - carefully to not flood the key. Just enough to soften the dirt and scrape from the glass with toothpick.

Lastly - new ribbon.
Nominally these machines use 16mm (5/8 in) ribbon. I was buying mine from Holland but right now I had none left.

Well, there is a way to use standard 12.5mm ribbon on these, too. As long as it is single-colour ribbon.
One just needs to adjust how high the ribbon vibrator rises upon key strike.

Shifting this latch left or right (red arrows) is causing height change for the vibrator (green arrow). Tighten the screw once done so it stays put in this position.

And so she types again, after many decennials of idling in the attic.

Very pleasant typing action!

I took her out for a photo session (the plank on which she is sitting is just to protect her from snow on the table).

Playing with filters for a bit more “posh” effect.

February 09, 2025 /Lukasz Kumanowski
1 Comment

Erika 8 disassembly - body panels removal

December 01, 2024 by Lukasz Kumanowski

Every now and then I need to work on Erika 8 or Erika 10 and I never remember the procedure to remove the body from the mechanism.

Searching the typosphere brought no relief so I decided to describe my way - so that I don’t need to search for it again and possibly some other desperate soul can find it helpful.

Of course, one can just remove the carriage and then all becomes easy but for times when carriage removal is not necessary - here is what I do.

  • Grab type-arms together, middle ones are in a way when wiggling with the body.

  • Unscrew four bolts on the underside (Erika 8)

  • Unscrew margin rack

  • Set Shift-lock, to lift the carriage. Move the carriage all the way to the right

  • It is worthwhile to put some electrical or masking tape on the back of the panel - this part which will be wiggled around the carriage. It is tight fit but with some practice one can remove the body without any scratches.
    Lift the body from space-bar up and then left side: up. Mind the back side, to clear the carriage rear extensions

  • Voila!
    Assembly in the opposite order.

This works the same on Erika 10 and probably on other Erikas with unibody, like Erika 9 or Erika 12.

December 01, 2024 /Lukasz Kumanowski
2 Comments

Survivor! Oliver 9 aka "Rusty"

July 04, 2024 by Lukasz Kumanowski

I bought this fellow in UK when I was working on my other Olivers with intention to use it as spare parts reservoir.
It was in so neglected shape that no one else was bidding and shipping to Sweden was cheaper than shipping same thing within Sweden…
I got this rust bucket and never needed to shift any part from it. It was waiting in the workshop for its destiny until last week. At first I thought about scraping it.

Olivers are known to have poor quality paint- and chrome work and this machine was apparently left somewhere humid and dirty for a long time.
Apart from surface rust and dirt the mechanism was complete. It was not working but there was a potential.
I decided that it’s never too late to give up so I might as well try to save it.
Removed spider webs and dirt, blew with compressed air - to prepare it for Evaporust bath. Keys removed as I’m not sure how they will react to chemistry. All the rest is steel.

I doped the machine in Evaporust and left it there for a few days, only changing position to expose most of the mechanism.

Most crude rust was dissolved, next step is cleaning with high-pressure water.

Water blown out with compressed air and directly afterwards the machine is being dried with hot air.

At this point I decide to remove rests of paint on iron casting. It is anyway in poor shape, sloshed with some white paint here and there.
To gain access I remove carriage rail and escapement assembly. It is easy on Oliver, it’s just a few screws and levers to disconnect.
I scrape paint with a blade - it sits so poor that almost no pressure needs to be applied to chip it.

It starts to look interesting!
Carriage rail assembly is very rusty, ribbon color selector is seized with rust.

I dump it into Evaporust and leave for 24 hours. Cleaning with water and drying in the sun.

In the meanwhile I dope keys in Ajax and let them soak it for a few minutes. One needs to be careful not to leave them too log in this chemistry, especially black keys - they become soft and porous after a few hours.

Lots of “elbow grease” with wire brush and sanding pads. Finally all is clean so I put the machine together. I decided to leave towers and cover plate with original paint as it was in good shape and decals are well preserved.

Type-arms shield was bent on the right tower which also caused bend on a few type arms. I straighten it roughly and leave fine-tuning for later.

Time to take care of the carriage.

View fullsize IMG_1562.jpg
View fullsize IMG_1565.jpg

Disassembled as much as needed to de-rust it. I leave it in chemistry for 30 hours.

Cleaning with lots of water - most rust is dissolved into green sludge, water-solvable. Drying in the oven in 100 degrees C (there are plastic knobs on some parts).

Wire-brushed and clean, ready for assembly. Paper tables left with original paint - in reasonable (for Oliver) shape.

I’m always unsure if I will be able to put this together again. This time I cheated and used another carriage as a guide. All back in place and mounted on the machine. All rollers are clean and lubricated - carriage moves smoothly on clean rails.

Looks good.
Next step is manufacturing draw band clip. I use original one as a template and make mine from brass. Much easier to work on and strong enough for the job.

In situ.

Main spring is (surprisingly) not broken so I don’t open it, just lubricate through provided hole. After some exercise it works smooth.
The machine is assembled!

Ribbon color selector is back in operation. After carriage rail assembly removal I needed to adjust its span so that letters are not printed in duo-chrome. It is done in two places: rough adjustment under the machine:

Fine adjustment accessible after removing front cover:

And it types! What is left is adjusting every type bow to bring all signs into line - it is very often that these are bent, mine has most problems on the right tower where protection plate was bent. It takes some time and patience but is easy.

I take her out into the garden and use sunset for photo-session.

I 3D printed ribbon covers, they turned out a bit too small. I’ll need to adjust the model and print new ones.

Lots of “patina” even after removing most of the paint. I think it turned out pretty well. Seems to be worth all these hours of work!

I kept original feet, for a time. I’ll probably make new in fresh rubber or cork - this machine is so heavy that modern cork-composite works equally well as rubber and is easier to form.

One more survivor from the long gone mechanical era!

July 04, 2024 /Lukasz Kumanowski
1 Comment

Hermes Baby - typeface transplantation

June 12, 2024 by Lukasz Kumanowski

I had this project in mind since long time: to make a metal-body Hermes Baby with script typeface. As far as I know there was never such machine in production - script typeface was only available after Hermes changed the design and started using plastic body panels.

My “naked typewriter” is one of them, plastic-body Baby. Since I found it I was hunting for another Baby (or Rocket) with similar construction but with old-style, aluminum body panels.
The hunt was finally over and I bought such machine, with same spacing and standard typeface.

It was almost the same, with some differences in body anchoring points and frame shape. So simple switching “skins” was not an option. Instead I hit the bullet and decided to transplant typearms from my “naked” typer to this metal fellow with mint-green keys.

While the segment is free from typearms it is a good idea to clean everything before installation.

While testing the mechanism before proceeding I found that ribbon lift is not working properly - it was getting stuck in erected position. Nothing in ribbon lift mechanism was bent or dirty so I dig deeper and eventually found that the whole frame was lightly bent!

Now - these machines seem to be rather simple and non complicated at first sight. Unfortunately they are built with very tight tolerances - like Swiss watches almost - and if anything gets slightly out of shape they stop working. In my experience this applies to all Hermes machines, not only to tiny ultraportables. That gives them bad reputation among mechanics who get frustrated trying to troubleshoot them.

Anyway - I managed to true the frame with some moderate force.

There was too much friction on a junction between the frame and vibrator’s pivoting axle.

I diagnosed this by loosening these screws on both sides.

I did not want to overdo frame bending so I shimmed these last 2mm around center reinforcing beam, to remove compression from pivot points.

View fullsize IMG_9776.jpg
View fullsize IMG_9777.jpg

The vibrator started to work properly again.

I transplanted all type arms and tested alignment. Far from perfect.

I aligned the cylinder to get equal imprint for lower letters.

Better but still not perfect. The imprint was weak, even though I was using fresh ribbon.

Well, the reason was that the crown on this machine was slightly higher than on the “donor” typewriter!

It was not much - probably 0.2mm difference. The normal gap between typeslug and platen, when typearm is in maxed position, should be around 0.1mm, so that this last bit is done by metal springing (snapping) onto paper due to inertia. On my machine it was too far to make proper, distinct imprint.

I took them out again and removed this difference with file. It took exactly 4 strikes of file on each typearm.

Polished, to remove any burrs.

The difference was directly noticeable - here the same letter typed before and after modifications.

I assembled the segment and tested typing again. All good!
Moved on to final assembly. Some standard replacements were needed, as on all these machines: new rubber feet.

Adjusted Shift position. Very narrow to put tools but can be done.

Ribbon advance was not working but it turned out to be an easy fix: holding finger, side by tension spring, was bent. I formed it back into shape and that solved the problem.

I test-typed a few sentences but noticed another issue - there was a strange resistance at the beginning of key action. It turned out to be a rest collar - where typearms lie in resting position. It needed to be shifted back a bit, so that arms don’t grab it when they fly towards the platen.

That made the trick.
Lastly I decided to re-coat the platen. Original was hard and dented so I removed top layer and replaced it with thick heat-shrink 3:1 tubing.

Turned into original diameter and sanded smooth.

All put back together and I can finally test this new machine.

It turned out rather nice!

One other cool feature of this machine is that it has three positions for ribbon: upper, lower and middle. So no STENCILS but instead complete utilization of the ribbon - like on its bigger brother Hermes 3000.

Do I like this machine? After all these hours of rebuilding it?
Well, I wrote a few letters with it and it works fine - like any other Hermes Baby of that era. However, I found older Hermes Baby much more snappy and pleasant to use.
I had a few of these: later Hermes Baby machines, and all of them are mushy and wobbly compared to old Baby (one with round, plastic keys). This one is no different.

June 12, 2024 /Lukasz Kumanowski
Comment

Juwel Fix

May 26, 2024 by Lukasz Kumanowski

It was Wednesday who started all this.

I recently refreshed my friendship with Masz, whom I lost from my horizon after moving to another country. When catching up on our hobbies and projects I mentioned my typewriter madness and it turned out that his daughter would like to have Wednesday’s typewriter.

Who the heck is Wednesday??? As I live an isolated life in the woods - I had to catch up on latest poppis and checked that this character is indeed using a typewriter: a Juwel.
Call it a coincidence (vide Paul Auster’s books) but there actually was a Juwel on Swedish auction site. I did not plan to bid on it - it did not look anyway special to be worth adding to my collection.

But since there was a teenager girl who wanted a typewriter - my call of duty was on! I placed a bid and won with no other bids. Only that the machine would arrive just a day before I was about to travel to Poland, to meet Masz.

Backup plan was to prepare very alike Continental, to act as Wednesday machine. This was at least a certainly very good typewriter so if Masz’s daughter should “catch a bug” then this machine will definitely be a proper one.

My Juwel came an afternoon before our departure, dirty and with non-functioning backspace. I went with plan B and Continental became Wednesday machine in Masz’s home.
Juwel was put on waiting list for me to fix it.

Many months later I finally grabbed it and took care of all problems. Backspace link was missing so I made a new one. Otherwise it was mainly dirt which stopped it from working.
Once cleaned it started to work properly and needed no adjustments.
It cleaned pretty nicely, decals became visible again and so I could see that it is Juwel Fix I got in my hands.

My specimen was sold in Sweden so I’m lucky to have a qwerty keyboard.

According to Typewriter Database this is one of last machines from this line.

Typing feeling is a bit different from what I’m used to with other German machines, like Erika or Olympia. Key stroke is deeper but keys stay horizontal all the time so it is by no means uncomfortable.
It is snappy but not as stiff as Olympias. Due to longer key stroke I cannot say it is as snappy as Erika but it is very pleasant to type. I would compare it with Urania, given these two to chose I would go with Juwel.

I got intrigued by this pleasant typing action so I did some research on Internet. Not much information there, Richard Polt has a good article about Juwel Rapid which was interesting as my machine is quite different in details!

But the typing action - I found another resource, an excellent review with in-depth analysis of type bar action which is responsible for this typing-feeling. That got me really on toes - it is that which makes this machine so unique!

Well worth watching this video, deep-dive in engineering indeed!

Back to my machine - it is a pure typer without unnecessary gimmicks.

  • There is no ribbon color selector (who uses that today anyway? I mean - really?).

  • There is no right margin. Well, that’s disputable but as long as one uses standard size paper - like A4 in Europe - we need only a bell to warn us that the line is ending. Like on Blickensderfer 5 - a bell rings: prepare to advance to new line. No need to press Margin Release to finish a word, you just move on. Thoughts keep flowing down your fingers, no more distractions than strictly necessary.
    In short - I don’t mind not having a right margin.

  • No Tabulator. Well, I use Tab when I write letters so that’s a useful feature but it’s easy to live without it.

Other than that the machine has all what’s needed to comfortably type.
Ribbon reverse is automatic - if you have rivets (or knots) on your ribbon.

One can also manually reverse ribbon by pressing a small button on either side of the machine.

Line release (but with line memory) lever is on the left side of the carriage, together with 1 line and 1.5 line spacing control.

At the bottom of left side carriage end there is a red tab - carriage lock.

Right side features paper release lever (which also rises paper bale) and carriage release.

Car hood-type ribbon cover - so you will never lose it. Woody Allen should have this machine!

One other interesting feature is that the machine is carriage TILT. Like Hermes Baby / Rocket. Which means that shifting action is very light and smooth - and very simple to adjust.

Simplicity must have been a word they kept in mind while designing this machine. All is accessible and not cluttered like on Remingtons or Erikas. Yet the machine is very compact and lightweight!

Shift-lock is also far from fancy. Just a metal tab, with slot holes for adjustment. On my specimen this tab got very used so someone had to pinch it, to extend it due to usage.
A clear sign that the machine was used a lot - and yet it is still in very good mechanical and cosmetic condition.

On the back one can see left margin rail and end-of-line bell construction. It cannot be simpler!

So there we have it - very modest but utterly interesting machine from a small and relatively unknown German manufacturer.
I’m not a touch-typist but watching Haelscheir's Haven fast typing on such machine clearly shows that they are indeed capable, small machines.

Which is contradictory to some opinions on the Web who state that these are not capable of doing the job. Well, I tend to think that it is these mechanics who cannot tune them properly and instead blame Juwel engineers for not designing them properly.

It cannot be further from the truth. These are very decent, special-feel machines, very worth having in one’s arsenal.

May 26, 2024 /Lukasz Kumanowski
Comment

Bulbous rarity: Remington 3-bank

February 19, 2024 by Lukasz Kumanowski

Not many of these are around - according to Richard’s Polt research the production started during Great Depression in 1935 and lasted only 6 months. Only around 5000 machines were made.

The idea with this model was to offer a bare-bone typewriter, without any bells&whistles, to be able to sell to customers who were tight on budget during The Great Depression.

No backspace key, no Shift-lock key, no bi-chrome selector, no Tabulator.
Margin release is realized directly by the lever on left side of the carriage - like on old Remington Portable machines.

But the bell is there! Essential to typing, ain’t it?

The coolest of all is that this is 3 1/2 -bank machine!
Instead of limiting keyboard to 3 rows and using double-shift mechanism for accessing 3 characters per type-slug Remington 3B is using standard 2 character slugs but they saved on number of key levers and type-arms by compressing numerals into their own slugs.

Symbols marked with red are accessible with Shift (also marked red).
Standard on may typewriters of that era is using “O” as a “zero” and small “L” as “one”.
No other machine has it marked so clearly on keyboard!

My machine came from a family which had it since three generations. I feel obliged to be a keeper of such treasure!
What makes it even more interesting is noticing that Swedish characters were added with different type of slugs.

View fullsize IMG_0340.jpg
View fullsize IMG_0341.jpg
View fullsize IMG_0342.jpg

One can also see that keys with Swedish characters have real glass on top of paper legends while all the rest are standard coated-paper legends as on all Remingtons from that era.
That can mean that the machine was converted at the dealership in Sweden or was a special order from the US.
Looking onto the segment one can see that the company saved on a few non-present type-arms. They also saved by not machining all slots in the segment casting!

My machine was mostly dusty and keys were not reaching the platen. It turned out that ribbon vibrator was de-coupled and its springy catch was tangled. That caused the problem with type-arms. After repairing that the machine types like a dream!

It happens to be quite an early specimen: 56th!

What is also rare is that it still has both of its ribbon spools - both Left and Right. That is a sign of a machine which was well taken care of.

View fullsize IMG_0353.jpg
View fullsize IMG_0352.jpg

For cleaning I only removed the ribbon cover - or rather type-bar riser as this bulbous part serves that function. It is made of aluminum casting.

Comparing the mechanism with Remington Portable 2 one clearly sees that these are, indeed, the same machines. Or very similar. Instead of movable mechanism for rising type-arms prior typing the 3B is using its bulbous contraption.

It is worth noting that both these machines type completely fine even when type arms are in their lower position. It just takes longer for them to come back into resting position thus will influence how quickly one could type. Rising them, like on Portable, or keeping them high, like on 3B, avoids this problem.

After typing a few pages on this machine I saw absolutely no irritation that Shift-lock or backspace is not present. Especially in modern days - when we type mostly for ourselves and rarely use backspace anyway - these shortcomings of this very basic machine are absolutely not disturbing.

I dare to go even further and agree with Typewriter Justice: the lack of Backspace makes it to even more streamlined typing experience. One just types away and does not look back until the machine spits out a ready page!

February 19, 2024 /Lukasz Kumanowski
1 Comment

Bell for Underwood 3-bank

February 19, 2024 by Lukasz Kumanowski

One of the best 3-bank typewriters to use, IMHO. Not only is it small and beautiful but it is a very good & snappy typer.

I happen to have a few of these and one was lacking end-of-line bell. Apparently it was removed in anger since holding plate was bent and parts of assembly were torn.
In my arsenal the typewriter HAS TO have a bell. Period.
I’ve decided to make a new one for this otherwise very cool machine

The previous owner must have been a real butcher as the mechanism was completly covered with dried, sticky mess of dirt and oil. Not much was moving so I had to properly flush the segment and escapement mechanism.

Once clean and aligned the only thing left to fix was the bell.

I managed to find tiny bicycle-bell which mostly matched the original diameter. Brass, of course. Size needed to be adjusted to fit into the frame.

Paint removed and brass polished. I managed to find an old screw with matching thread and wide head (from old Remington standard donor-machine).

Fitting all parts together. I had to wind a new spring as the original was broken.

Bell hammer resting post was torn apart.

I made a new one and pressed it into the small frame.

And voila! Ring the bell, ring!

The machine workes perfectly. I made new platen in place of the old one which was cracked. Paper fingers are missing on this machine but it absolutely does not make typing any way less pleasant.

New rubber feet - this tiny bugger is very light so grippy feet are essential to hold it in place during carriage return.

Good old Pica, type alignment has nothing to complain about.

And the bell sound is nice and clear!

February 19, 2024 /Lukasz Kumanowski
Comment

Platen removal on Olivetti Lettera 35

February 04, 2024 by Lukasz Kumanowski

I had once such machine, with Norwegian keyboard and Pica-size typeface. I picked it because of her very interesting form. Industrial design at its best.
I liked typing on her but was always on watch for another one, with Swedish layout and possibly in Elite-size.
And there she popped-up!

I got her from the first owner who kept her covered for most of the time and never needed service the machine. All was working apart from ribbon reverse function. Some dust and dirt from normal usage only.

Removing body shell is quite easy, just 6 screws on top side. The machine has to be wiggled a bit to free the top cover from the carriage but nothing too difficult.

On platen removal I got surprised by a hybrid construction: left platen knob is unscrewed from the platen, standard right-hand thread.

One would expect that the right knob will work the same: there are no holding screws visible around it.

Well, wrong! Look under the machine - there is an inspection window where holding screws are visible and can be accessed.

There are two of them holding the shaft. Strangely enough they are spaced 60 degrees apart but the shaft is flat on opposite faces only.

Why did they do it this way is beyond me.

To lift the platen one needs to unscrew a small latch, to free extending platen axis on the right side. Remove the covering panel first.

And voila!
Line advance mechanism looks sturdy and no-nonsense on this machine. The only catch with it is that upon assembly one must align the platen inside the carriage (horizontally) so that left knob’s ratchet aligns with the mechanism. Which means that the platen is “floating” a few mm inside the carriage and after alignment is held in place with right knob and its massive two screws.
Would it not be easier to make the right knob with integral, threaded axle?

Dusting off the mechanism with brushes and compressed air. No excess oil or grease, no butchered screw heads. Pristine specimen!

Ribbon reverse mechanism needs rivets on the ribbon ends. Under the right spool resides the core of this mechanism and on my machine it was not disengaging properly upon reversing.

It turned out that the small spring holding a shaped metal piece which rides inside the V-shaped plate was too tired. I replaced it with stronger spring, oiled lightly the plate edges and the mechanism was working again.

It was sunny today so I took the machine out for a photo session.

I very much like all about her: color combination, typing feel and most of all: the design.
These toothpaste-white keys demand that you wash your hands before typing!

The dullness of back edge is broken by horizontal line (where panels meet) and bottom rectangular shape.

The machine is very much suited for lap typing - no part of the mechanism is exposed.

Contrasting sunlight exposes crinkled paint and smooth, streamlined shapes of this beauty.

February 04, 2024 /Lukasz Kumanowski
1 Comment
  • Newer
  • Older

Powered by Squarespace