Boatworks

  • Main
  • Louve
  • Typewriters
  • Workshop
  • Meritaten
  • Glypto
  • Motoko
  • Inspirations
  • About
IMG_6186.JPG

Riveting

April 21, 2019 by Lukasz Kumanowski

Temperature outside became summer-like: sunny and 16 degrees C. Seems like spring lasted only one week and now it is summer already. Too bad for the boat to be on hard still.

I gave epoxy 2 days to fully cure. After that I could back all M4 screws. It turned out that Farm on threads inhibited them from being permanently glued so with hammer whack they could be released. The cleanest was to remove them was to attach screwdriver from the outside and drive them out by unscrewing. This way the hole stayed nice and small. Unfortunately some screws buckled slightly after hammering so when they were driven out they enlarged the hole a bit.

IMG_6177.JPG

As this is my first time riveting I run a couple training samples to determine what hole size and which technique to use.
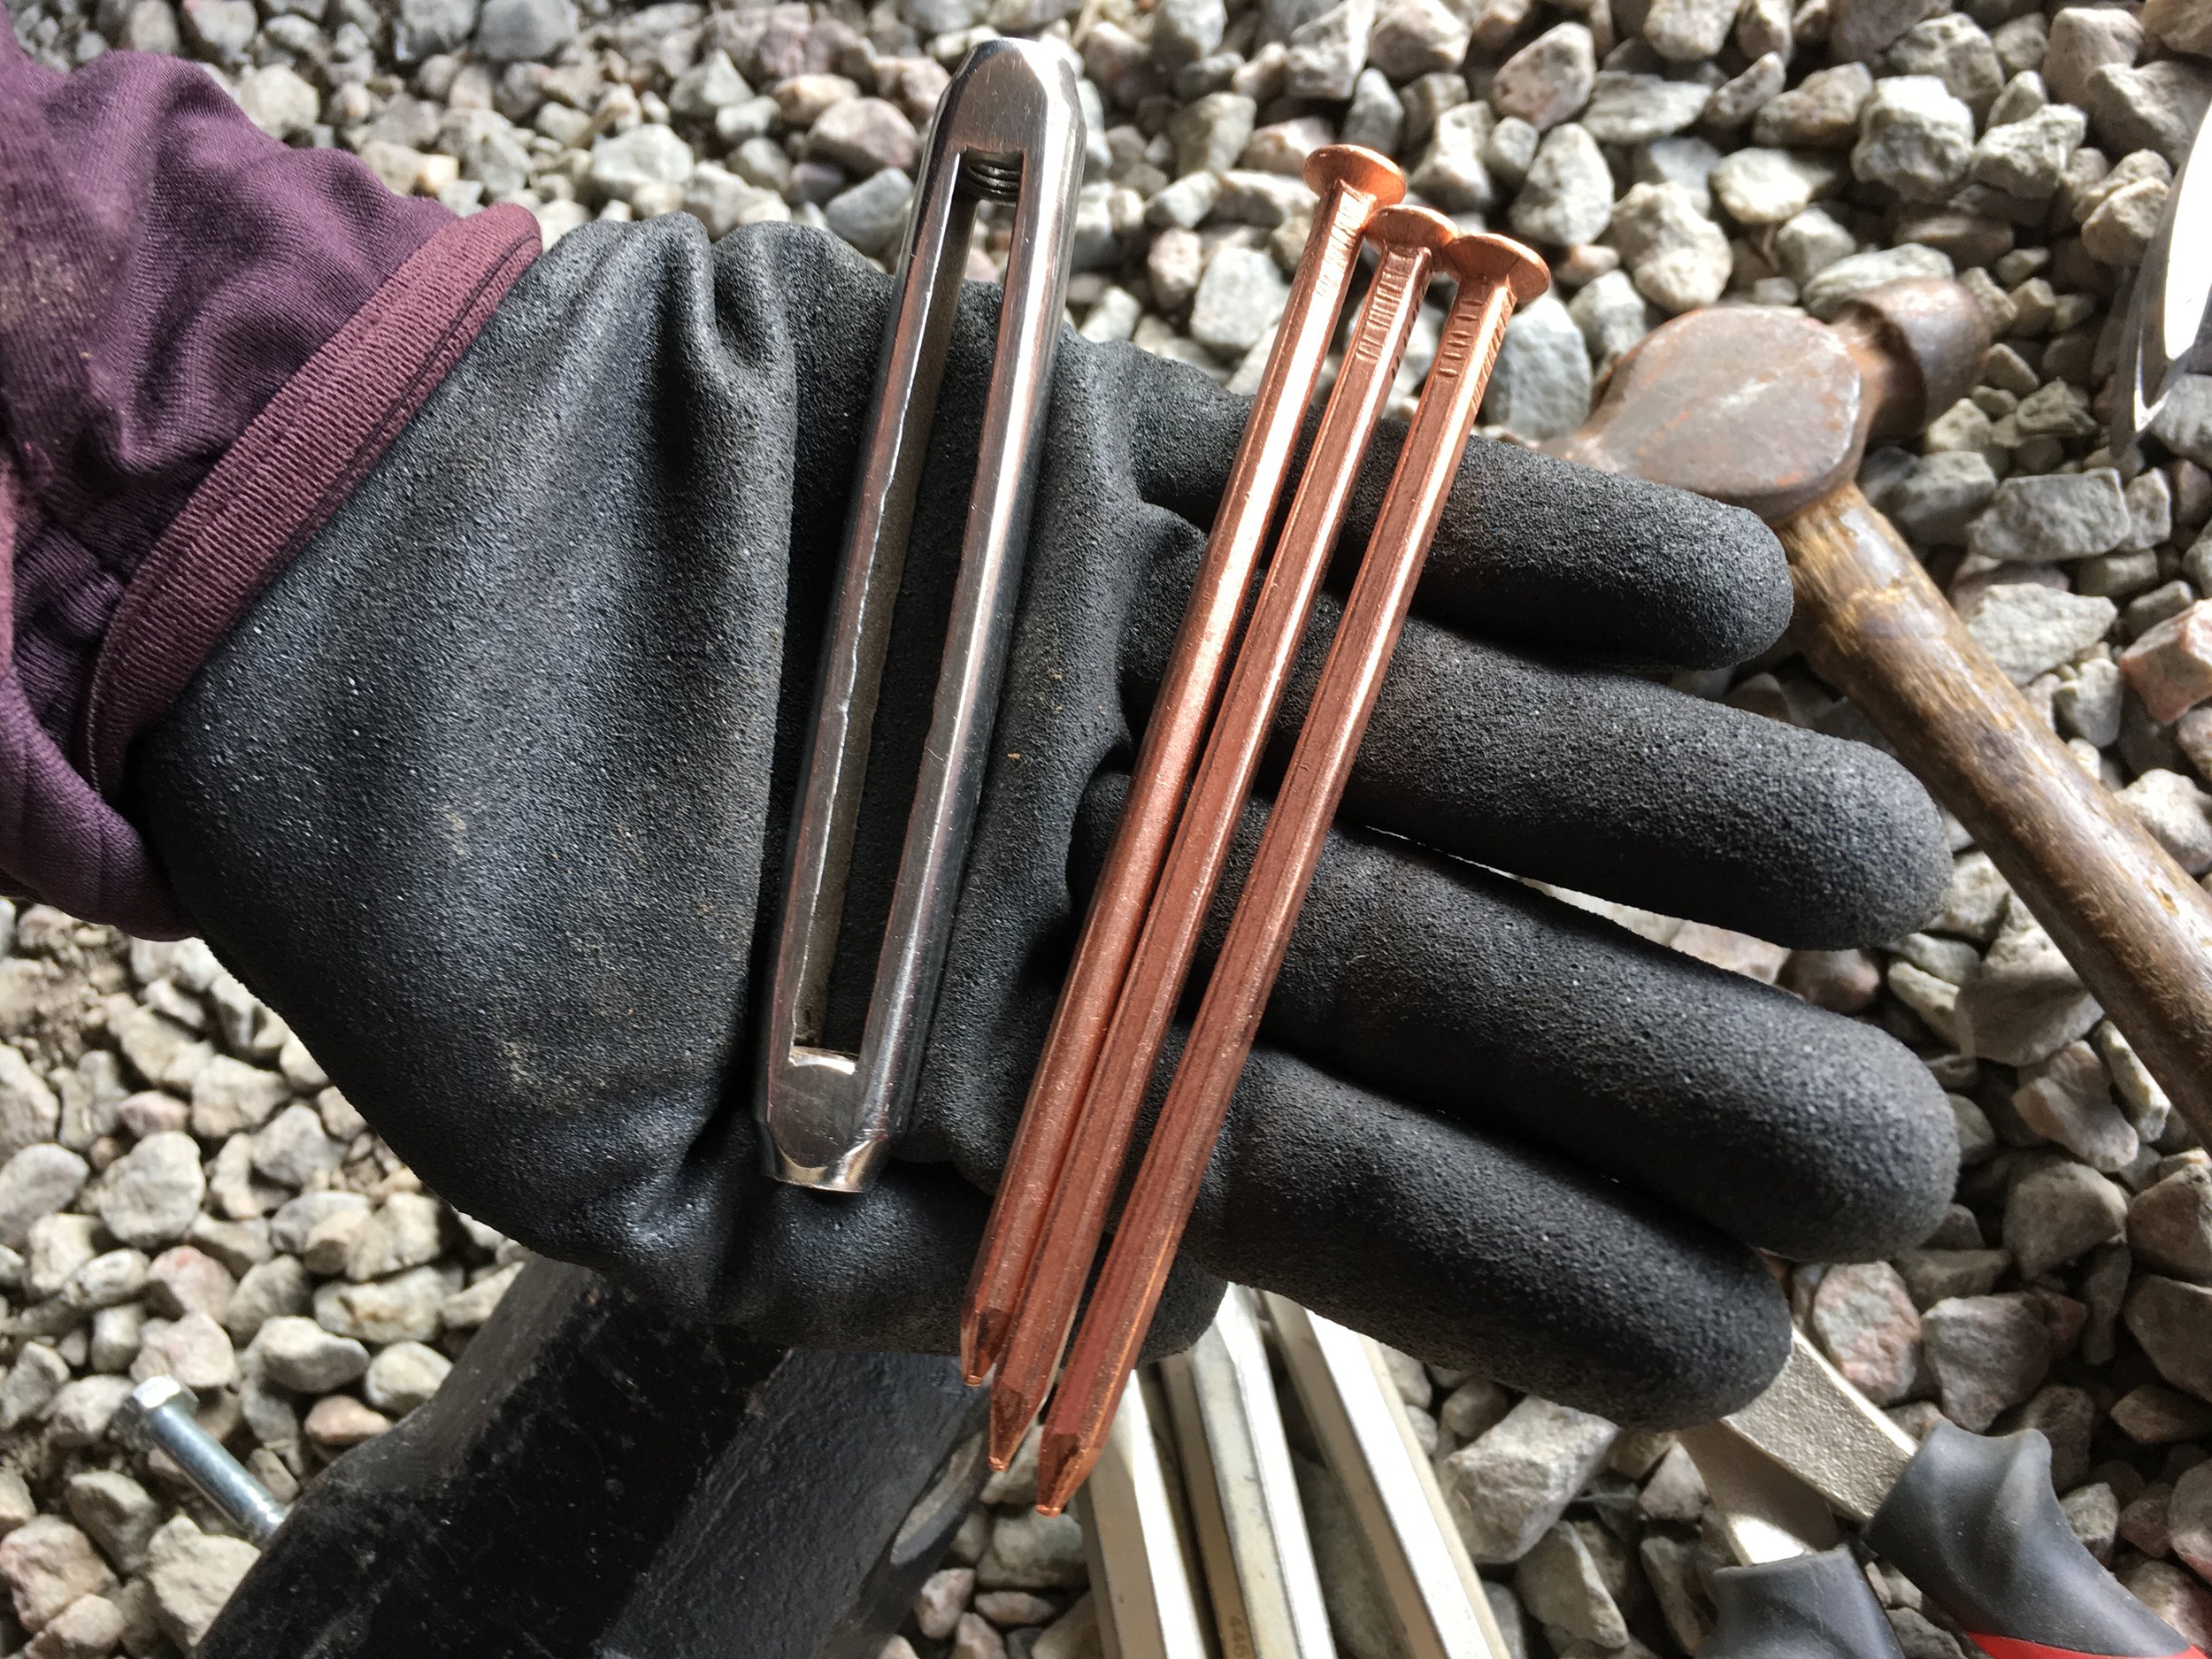
The rule of thumb says that the hole should be slightly smaller that the nail, so that it can not be pushed by hand. My nails are 3.8 and 4.8 diameter. Trying drilling 3.5 and 4.5mm holes proved too tight in oak - nails were bending half-way in the hole. I guess the rule is for soft woods or I am not skilled enough to strike the nail perfectly spot-on. In the end I used 4mm and 5mm drills. Still it was far from easy to drive them home.

The risk with too big hole is that the rivet will leak water, at least for some time until the wood swells. We’ll see but for safety I will put some Farm onto their heads before I plug the holes with wooden plugs.

For the riveting it is said that the cut nail should receive 5 to 6 gentle blows to form the rivet. Too much hammering and too strong will make the copper hard and brittle. Well, I stopped counting after 15 knocks - they were gentle but many. In the end I was pleased with the training result so we could finally move to the real job.

IMG_6179.JPG

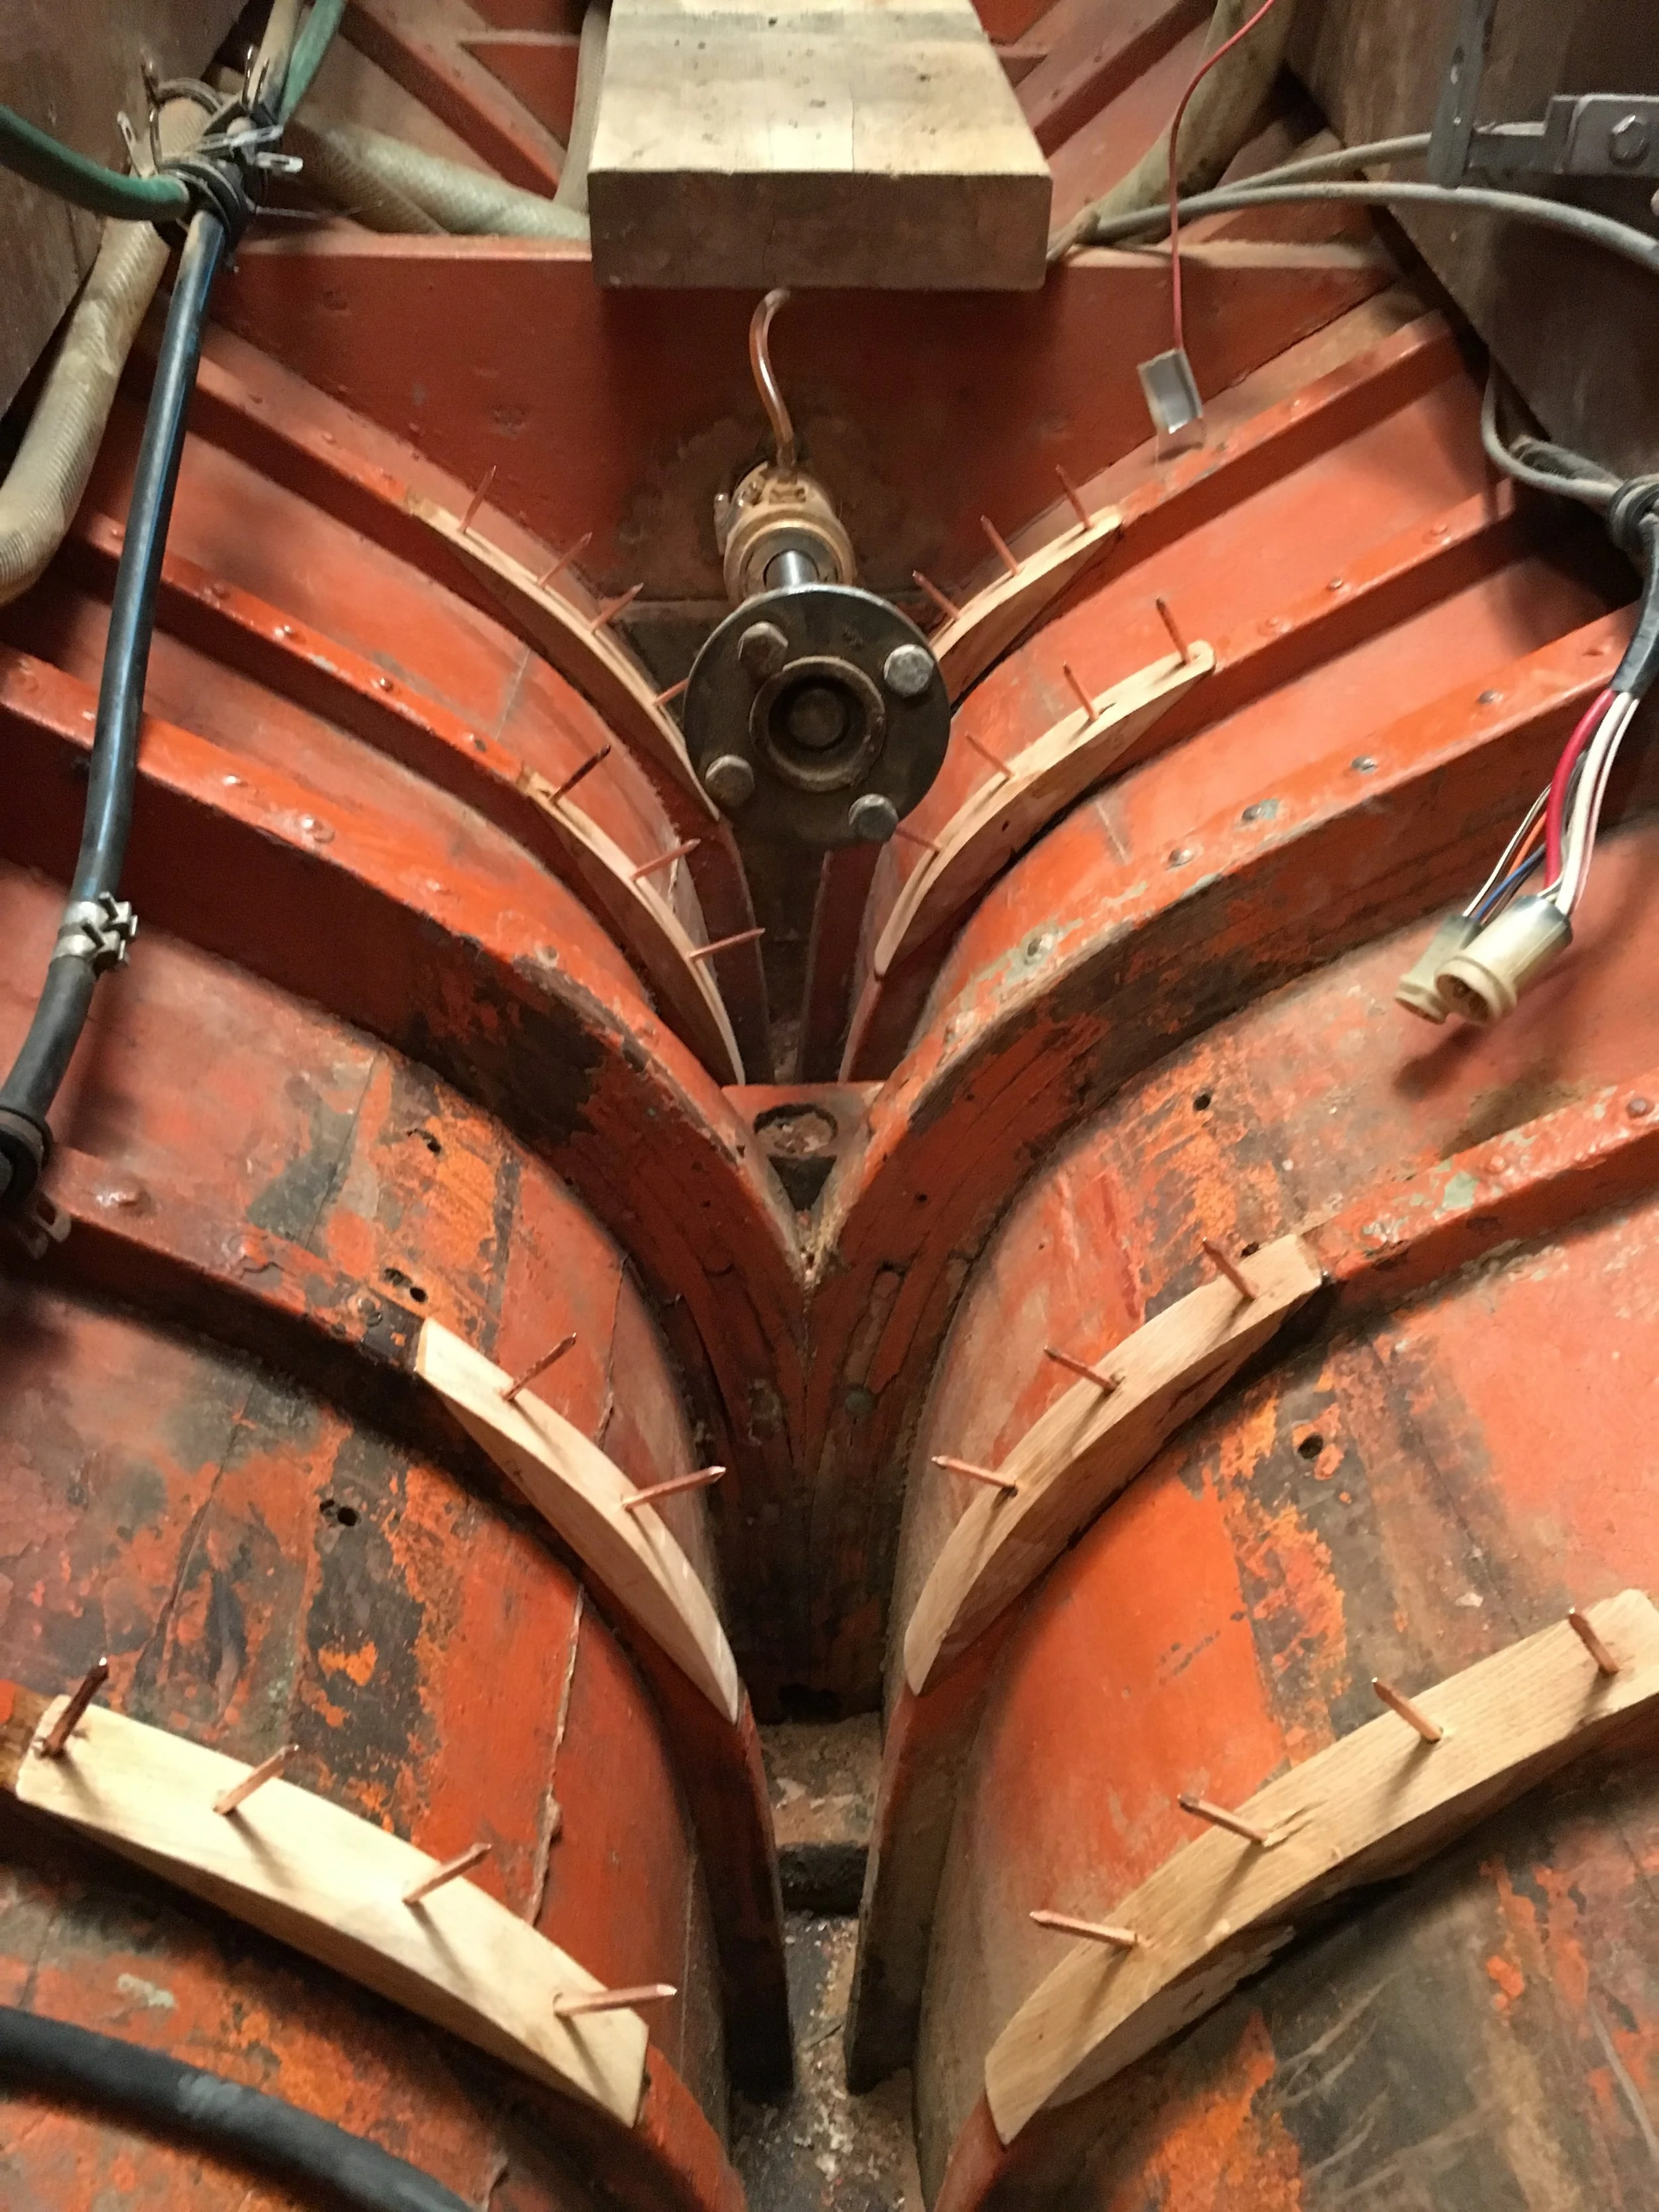
To drive nails into new frames first I backed them with modified clamps, to avoid stressing epoxy joints too much.

IMG_6180.JPG

In few cases nails have caused splinters on the exit hole so I drilled shallow countersinks to avoid that.

I found that the best method to drive cleanly these big nails was first position them in the hole with normal, carpenters hammer and then drive them home with heavy, 5kg hammer. This way I could strike the nail exactly parallel to its axis and there were no more bent nails to be backed from the hole.

Once this was done the engine room became a proper fakir bed.

IMG_6181.JPG

So we started with Jim installing rivets: Jim was below the boat, holding heavy hammer to back rivet heads while I was pushing roves and then forming rivets inside the boat.

Unfortunately we needed to stop the work after one frame - my tools were not suited for the job: side pliers were too weak to cut 4.8mm copper nails. Tool for setting roves was too shallow to do that in one step, forcing me to cut short sticking nails, yielding the work very hard and long.

The day after I bought proper pliers and made rove-setting tool from old turnbuckle. It worked beautifully.

IMG_6187.JPG

This time my wife and daughter were helpers: wife was backing nail heads from the outside, I was hammering the roves and forming rivets and my daughter was singing lauder than noise from my hammering.

At the end of the day all rivets were in place.

IMG_6184.JPG

It was a hard job so meal was tasting good!

I made a tiny fire in a small metal can, enough to make sausages. Firewood - dry oak - sourced from offcuts in my workshop.

IMG_6205.JPG

The next step is to clean the engine room and paint the bilge. Then instal engine beds and lift back my good-old Yanmar into the boat.

IMG_6185.JPG
April 21, 2019 /Lukasz Kumanowski
Comment
IMG_6174.JPG

Emerging from dust

April 20, 2019 by Lukasz Kumanowski

Even though temperature during the day reaches 16 degrees it is still quite cold in boat hall. After yesterday’s epoxying I didn’t expect the glue to fully harden overnight at these temperatures. Checking on some epoxy remains left on the tray proved to be the case: the glue could be easily dented with just a nail.

So I left glue work to fully harden before I will start riveting and instead I decided to clean my boat thoroughly. It is quite depressing to see all boats around being cleaned and almost ready for the season while on Meritaten it is still lots of dust and construction-site landscape.

Several hours of vacuuming and removing all the stuff needed during winter renovation has changed that entirely - she looks again like a proper boat! There is still quite a bit to finish before going to water but now it is mostly installation of things which I prepared long before: cockpit structures, new floor, new cabin entrance, riveting and driving new bronze screws plus engine re-installation.

Jim with his wife were working on Kaika, Börje also payed a visit so this afternoon became a social event rather than usual heavy work. Lots of boat-talk and useful advices.

I’ve checked with Börje that screws which I drove out of my boat are indeed bronze so these are good news: at least frames were screwed with proper metal. I have no idea why they used brass for floor timber but if all other screws are bronze, as it seems, then I have one big task off my head.

At the end of the day the test epoxy sample was fully cured so I dared to try removing few M4 positioning screws from yesterday’s work. To my relief, after hammer whack, they all could be backed from epoxied frames so Farm on threads indeed inhibited them from being permanently glued.

Tomorrow I will remove all temporary M4s and prepare holes for installing rivets. I’ll need to first do some tests on which hole size is the best to drive these rivets home. If time allows I’ll also fully screw new frame to the floor timber so that I can close the hull there and call it a day.

To do list before the season:

  • screw and rivet all frame repairs

  • screw laminated frame to floor timber #3

  • painting motor room - I’ll use traditional iron oxide instead of bilge paint. Seems to be better choice for timber health and I like to keep it traditionally red

  • close all rivet/screw holes with plugs - installed on Farm 80 or Sika, I haven’t decided yet

  • cockpit installation

  • durk adjustment in the main cabin to fit into new floor timber and frame

  • engine installation and trials - that’s a biggie but at least here Servicevarvet can help me if I get stalled

  • installing new mainsail track and anchoring it to the hull

  • hull varnish and bottom paint

And that should conclude this winter work. I still see it possible to hold the time plan and go to water by end of April. A week of delay, if needed, will not be the end of the world.

April 20, 2019 /Lukasz Kumanowski
Comment
FullSizeRender.jpg

Frames repair - epoxy works

April 19, 2019 by Lukasz Kumanowski

Nice and warm - perfect conditions to finally repair broken frames in the engine room.

I started the day with fine-tuning replacement bits which I made yesterday. Spoke shave was the best tool to use - taking thin shavings so that wood ends go to null thickness when they will meet existing frames.

IMG_6159.JPG

Then came epoxy session #1 for today - gluing the big frame and these four bits. All glued surfaces were prepared with 80-grid sandpaper and wiped several times with acetone, to remove any oils and oak acids.

To avoid gluing these parts to the planking I figured using shims which cover exposed parts of the hull. The shim acts as a filler between scarfs - or as a real shim in case of the big frame where I had some mismatch in shaping against the planking. I’ve ripped them from the same oak as the replacement bits. They are 2mm thick.

IMG_6162.JPG

Shims are bedded with Farm 80 on the side which is facing the hull. This is to prevent moisture creeping under them and to keep them in place while I glue the main replacement bit. While doing that I needed to be sure that I do not contaminate gluing surfaces which are directly adjacent to shims so I shielded them temporarily with tape.

IMG_6165.JPG

In case of the big, laminated frame the shim needs to be bent to sit on the bilge curvature so I stapled it into position with stainless steel staples.

IMG_6161.JPG

Then came the really messy job of spreading both epoxy and bedding compound onto the same component - and not contaminating one another. With several gloves changes I accomplished that pretty well.

IMG_6167.JPG

So went the big frame. Temporary M4 screws positioned the frame in right spot. Tightening the nuts pulled the component into position. I tighten nuts until I have glue squeeze-out on all edges but not more - otherwise there is a risk of glue starvation resulting in weak joint.
After clean-up the frame will sit until epoxy fully cures.
To avoid gluing M4 screws permanently to the frame I covered them also with Farm. This hopefully will allow me to pull them once the glue cures.

IMG_6169.JPG

Next went four frames on port side. The whole circus took long time due to me constantly running back and forth under the boat and into cockpit, to install and tighten M4 positioning screws.

Having this done I moved to shaping remaining bits for engine room starboard side.
To fully utilise the epoxy - as it is always too much mixture prepared - I prepared mahogany plugs to repair screw holes in the mainsail traveller beam.

Once all was ready I could start epoxy session #2. Although it got quite late - around 8 pm - the temperature is still high enough to use epoxy.

Now all 8 cockpit frames are glued. Excess epoxy was fully utilised to close all old screw holes and to repair the big hole left after corroded sail track anchoring rode.

Once all cures I can move on to frames’ riveting and painting. Then finally I will assemble back the cockpit so we can lift back the engine.

IMG_6168.JPG
April 19, 2019 /Lukasz Kumanowski
Comment
IMG_6150.JPG

Shaping frame replacements

April 18, 2019 by Lukasz Kumanowski

I’ve figured a way to clamp oak blocks in a secure way, so that I can drill into them from outside the boat. This is to position repair bits of oak on broken frames and hold them while gluing. Modified clamp does the job!

Today I’ve finished shaping scarves in remaining three cockpit frames which need repair. Next step was clamping and positioning of repair blocks and drilling from the outside (using the same holes in planking) to secure their position. M4 threaded rod, cut to size, was used to produce holding screws.

IMG_6152.JPG

Having first four parts in place I could scribe their frame shape for pre-shaping in vice. Small pencil on wooden block is my way of taking shapes.
Since most of these frames are slightly tilted I scribed both faces of wood.

FullSizeRender.jpg

Parts are numbered to keep track on where they belong because now I remove them for off-boat shaping.

IMG_6154.JPG

I could have use spoke shave and block plane to shape these bits but I was in a hurry - I hoped I can glue them already today and I didn’t want to start epoxying too late as the weather forecast for the night is minus temperatures.
So to save time I produced clouds of wood dust and hundreds of decibel noise with my angle grinder. Final finish was with sand paper. Then parts were moved back into boat, to check matching. Surprisingly they fit pretty nice.

FullSizeRender-2.jpg

Final shaping will be done with block plane and sandpaper - after epoxy cures.

In the end I’ve decided that I’ll postpone epoxy job till tomorrow - Long Friday!
I should be able to start working with glue around lunch time which will give it several hours of warmth - 8-10 degrees C - to kick off and start curing.

So I have 4 more wood blocks to attach and shape prior gluing. I’ll do that while the first 4 plus big frame is being glued.

IMG_6156.JPG

In the meantime I finally got my new mainsail control system - Barton. As a last job today I’ve removed old mainsail track and cut to shape oak plank which will level the mahogany crossbeam up to bench level. This way I will be able to have new sail track as wide as the cockpit width - so broader spectrum for sail adjustments..

April 18, 2019 /Lukasz Kumanowski
Comment
FullSizeRender.jpg

Afterwork in mechanical workshop

April 15, 2019 by Lukasz Kumanowski

Having access to a proper workshop is a blessing.

Tonight I re-worked mahogany plugs - on a stable and solid lathe it took less than an hour.

IMG_6146.JPG

I’ve made around 40 plugs which should do the trick for current repairs. Nominal diameter should be 13mm but since my boat is by no means a Hasselblad I kept some 100 micrometers more material.
Just in case.

FullSizeRender-2.jpg
April 15, 2019 /Lukasz Kumanowski
Comment
  • Newer
  • Older

Powered by Squarespace