Boatworks

  • Main
  • Louve
  • Typewriters
  • Workshop
  • Meritaten
  • Glypto
  • Motoko
  • Inspirations
  • About

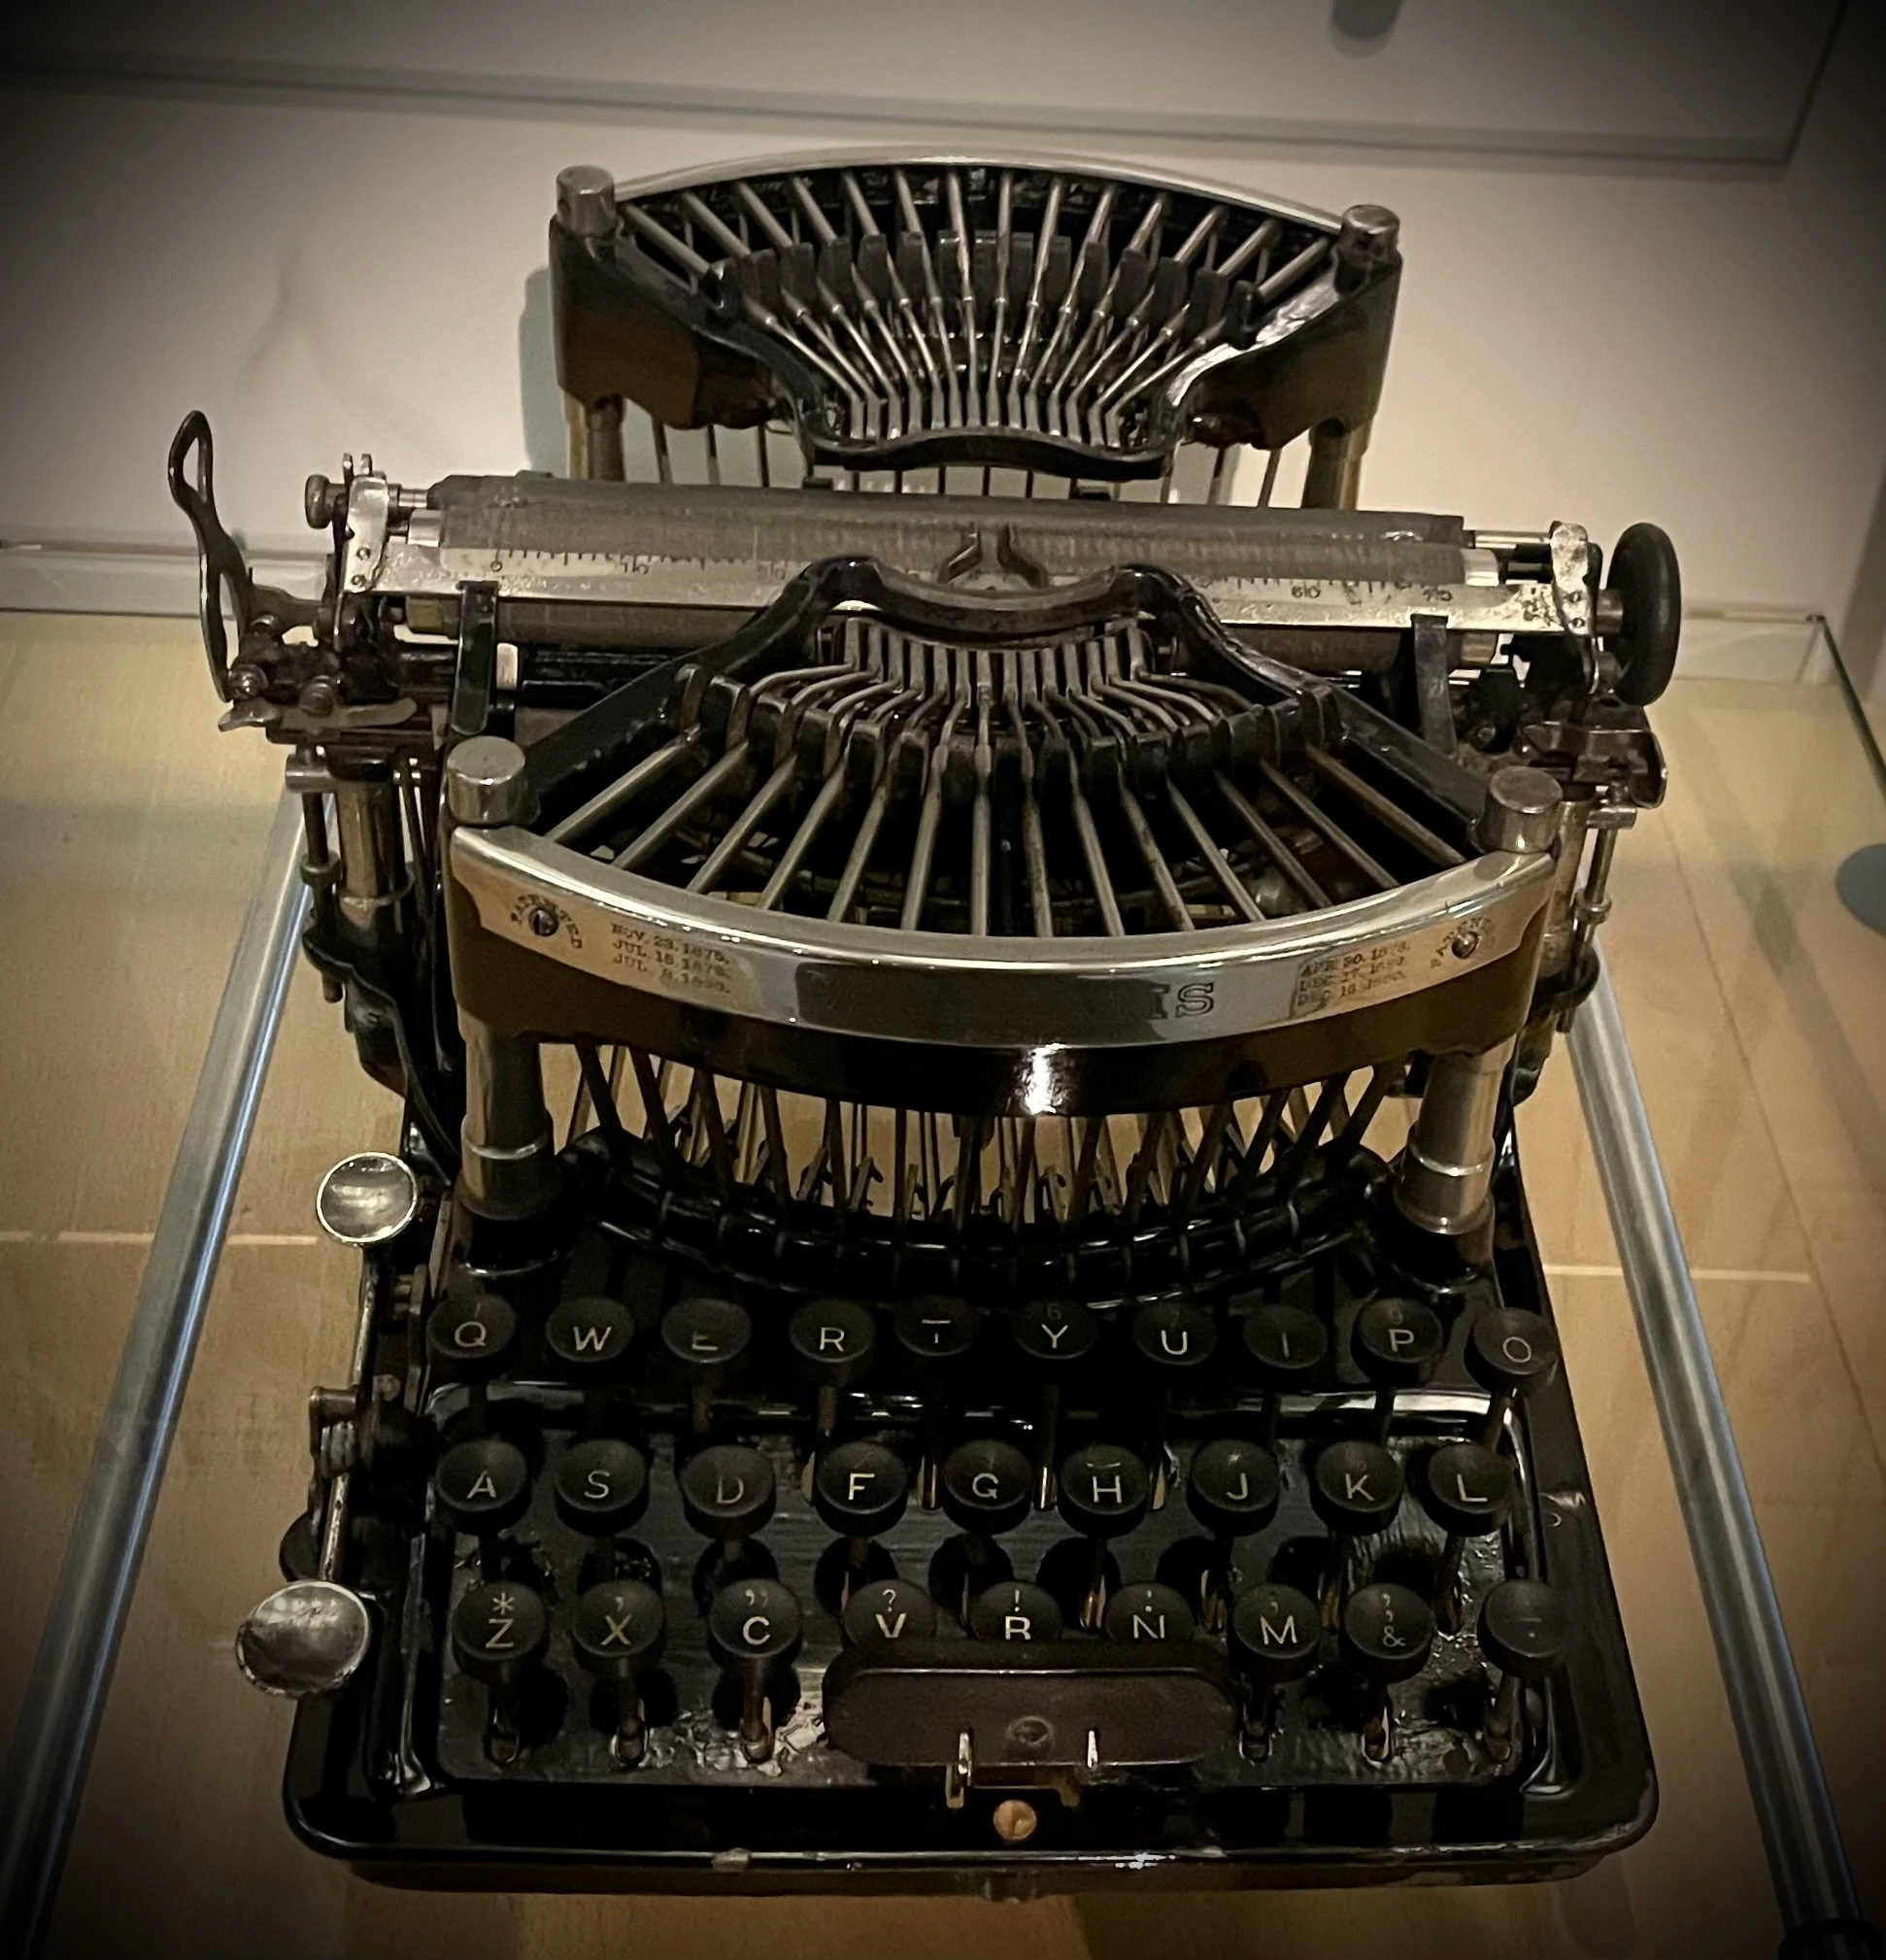
Survivor! Oliver 9 aka "Rusty"

July 04, 2024 by Lukasz Kumanowski

I bought this fellow in UK when I was working on my other Olivers with intention to use it as spare parts reservoir.
It was in so neglected shape that no one else was bidding and shipping to Sweden was cheaper than shipping same thing within Sweden…
I got this rust bucket and never needed to shift any part from it. It was waiting in the workshop for its destiny until last week. At first I thought about scraping it.

Olivers are known to have poor quality paint- and chrome work and this machine was apparently left somewhere humid and dirty for a long time.
Apart from surface rust and dirt the mechanism was complete. It was not working but there was a potential.
I decided that it’s never too late to give up so I might as well try to save it.
Removed spider webs and dirt, blew with compressed air - to prepare it for Evaporust bath. Keys removed as I’m not sure how they will react to chemistry. All the rest is steel.

I doped the machine in Evaporust and left it there for a few days, only changing position to expose most of the mechanism.

Most crude rust was dissolved, next step is cleaning with high-pressure water.

Water blown out with compressed air and directly afterwards the machine is being dried with hot air.

At this point I decide to remove rests of paint on iron casting. It is anyway in poor shape, sloshed with some white paint here and there.
To gain access I remove carriage rail and escapement assembly. It is easy on Oliver, it’s just a few screws and levers to disconnect.
I scrape paint with a blade - it sits so poor that almost no pressure needs to be applied to chip it.

It starts to look interesting!
Carriage rail assembly is very rusty, ribbon color selector is seized with rust.

I dump it into Evaporust and leave for 24 hours. Cleaning with water and drying in the sun.

In the meanwhile I dope keys in Ajax and let them soak it for a few minutes. One needs to be careful not to leave them too log in this chemistry, especially black keys - they become soft and porous after a few hours.

Lots of “elbow grease” with wire brush and sanding pads. Finally all is clean so I put the machine together. I decided to leave towers and cover plate with original paint as it was in good shape and decals are well preserved.

Type-arms shield was bent on the right tower which also caused bend on a few type arms. I straighten it roughly and leave fine-tuning for later.

Time to take care of the carriage.

View fullsize IMG_1562.jpg
View fullsize IMG_1565.jpg

Disassembled as much as needed to de-rust it. I leave it in chemistry for 30 hours.

Cleaning with lots of water - most rust is dissolved into green sludge, water-solvable. Drying in the oven in 100 degrees C (there are plastic knobs on some parts).

Wire-brushed and clean, ready for assembly. Paper tables left with original paint - in reasonable (for Oliver) shape.

I’m always unsure if I will be able to put this together again. This time I cheated and used another carriage as a guide. All back in place and mounted on the machine. All rollers are clean and lubricated - carriage moves smoothly on clean rails.

Looks good.
Next step is manufacturing draw band clip. I use original one as a template and make mine from brass. Much easier to work on and strong enough for the job.

In situ.

Main spring is (surprisingly) not broken so I don’t open it, just lubricate through provided hole. After some exercise it works smooth.
The machine is assembled!

Ribbon color selector is back in operation. After carriage rail assembly removal I needed to adjust its span so that letters are not printed in duo-chrome. It is done in two places: rough adjustment under the machine:

Fine adjustment accessible after removing front cover:

And it types! What is left is adjusting every type bow to bring all signs into line - it is very often that these are bent, mine has most problems on the right tower where protection plate was bent. It takes some time and patience but is easy.

I take her out into the garden and use sunset for photo-session.

I 3D printed ribbon covers, they turned out a bit too small. I’ll need to adjust the model and print new ones.

Lots of “patina” even after removing most of the paint. I think it turned out pretty well. Seems to be worth all these hours of work!

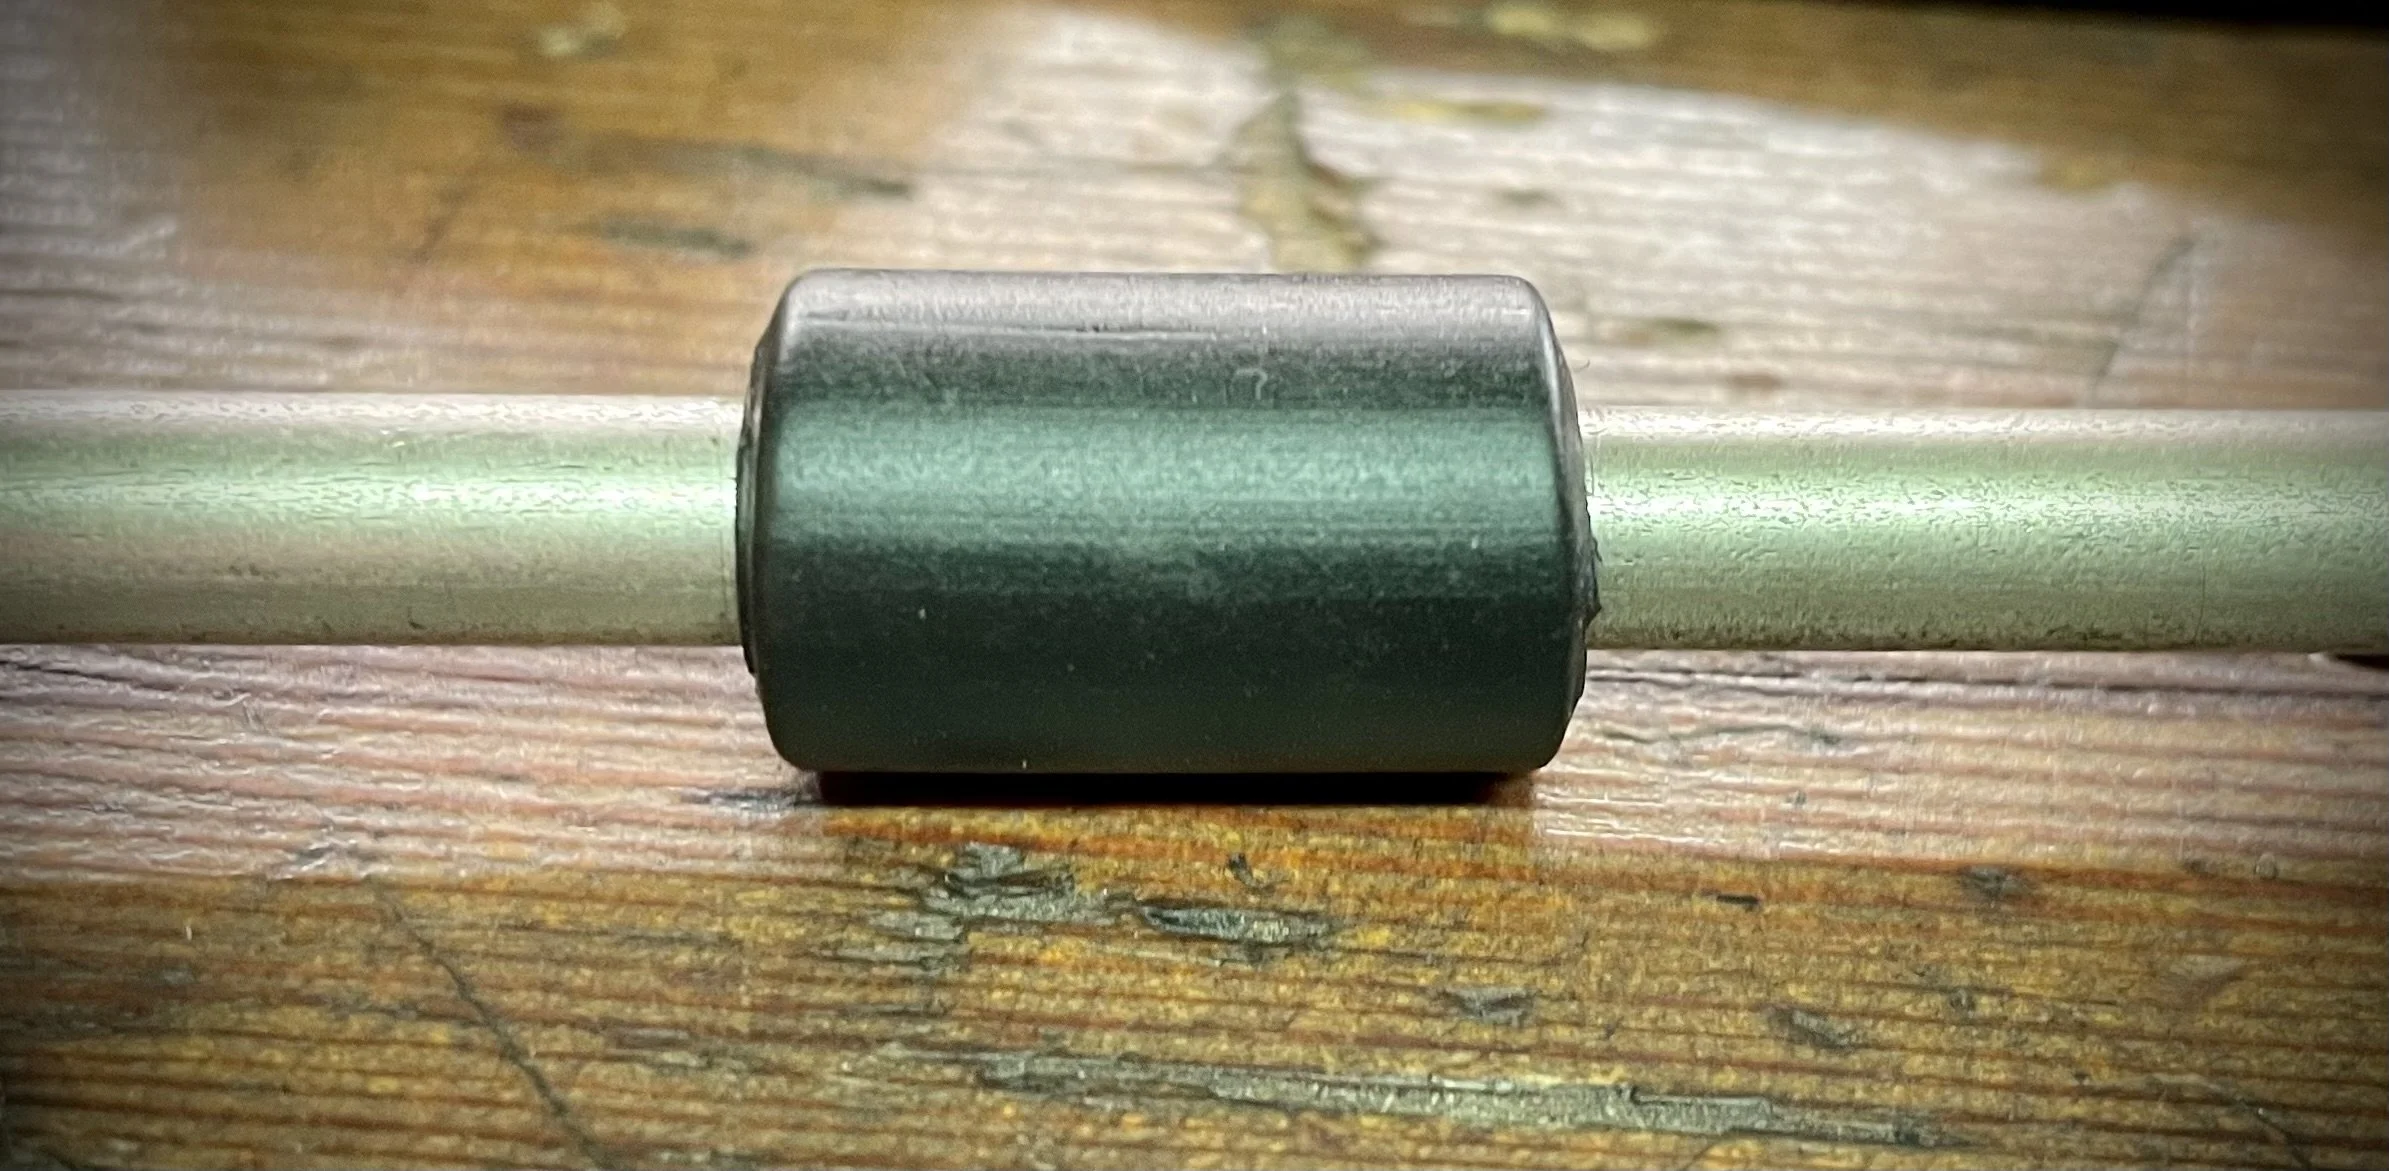
I kept original feet, for a time. I’ll probably make new in fresh rubber or cork - this machine is so heavy that modern cork-composite works equally well as rubber and is easier to form.

One more survivor from the long gone mechanical era!

July 04, 2024 /Lukasz Kumanowski
1 Comment

Hermes Baby - typeface transplantation

June 12, 2024 by Lukasz Kumanowski

I had this project in mind since long time: to make a metal-body Hermes Baby with script typeface. As far as I know there was never such machine in production - script typeface was only available after Hermes changed the design and started using plastic body panels.

My “naked typewriter” is one of them, plastic-body Baby. Since I found it I was hunting for another Baby (or Rocket) with similar construction but with old-style, aluminum body panels.
The hunt was finally over and I bought such machine, with same spacing and standard typeface.

It was almost the same, with some differences in body anchoring points and frame shape. So simple switching “skins” was not an option. Instead I hit the bullet and decided to transplant typearms from my “naked” typer to this metal fellow with mint-green keys.

While the segment is free from typearms it is a good idea to clean everything before installation.

While testing the mechanism before proceeding I found that ribbon lift is not working properly - it was getting stuck in erected position. Nothing in ribbon lift mechanism was bent or dirty so I dig deeper and eventually found that the whole frame was lightly bent!

Now - these machines seem to be rather simple and non complicated at first sight. Unfortunately they are built with very tight tolerances - like Swiss watches almost - and if anything gets slightly out of shape they stop working. In my experience this applies to all Hermes machines, not only to tiny ultraportables. That gives them bad reputation among mechanics who get frustrated trying to troubleshoot them.

Anyway - I managed to true the frame with some moderate force.

There was too much friction on a junction between the frame and vibrator’s pivoting axle.

I diagnosed this by loosening these screws on both sides.

I did not want to overdo frame bending so I shimmed these last 2mm around center reinforcing beam, to remove compression from pivot points.

View fullsize IMG_9776.jpg
View fullsize IMG_9777.jpg

The vibrator started to work properly again.

I transplanted all type arms and tested alignment. Far from perfect.

I aligned the cylinder to get equal imprint for lower letters.

Better but still not perfect. The imprint was weak, even though I was using fresh ribbon.

Well, the reason was that the crown on this machine was slightly higher than on the “donor” typewriter!

It was not much - probably 0.2mm difference. The normal gap between typeslug and platen, when typearm is in maxed position, should be around 0.1mm, so that this last bit is done by metal springing (snapping) onto paper due to inertia. On my machine it was too far to make proper, distinct imprint.

I took them out again and removed this difference with file. It took exactly 4 strikes of file on each typearm.

Polished, to remove any burrs.

The difference was directly noticeable - here the same letter typed before and after modifications.

I assembled the segment and tested typing again. All good!
Moved on to final assembly. Some standard replacements were needed, as on all these machines: new rubber feet.

Adjusted Shift position. Very narrow to put tools but can be done.

Ribbon advance was not working but it turned out to be an easy fix: holding finger, side by tension spring, was bent. I formed it back into shape and that solved the problem.

I test-typed a few sentences but noticed another issue - there was a strange resistance at the beginning of key action. It turned out to be a rest collar - where typearms lie in resting position. It needed to be shifted back a bit, so that arms don’t grab it when they fly towards the platen.

That made the trick.
Lastly I decided to re-coat the platen. Original was hard and dented so I removed top layer and replaced it with thick heat-shrink 3:1 tubing.

Turned into original diameter and sanded smooth.

All put back together and I can finally test this new machine.

It turned out rather nice!

One other cool feature of this machine is that it has three positions for ribbon: upper, lower and middle. So no STENCILS but instead complete utilization of the ribbon - like on its bigger brother Hermes 3000.

Do I like this machine? After all these hours of rebuilding it?
Well, I wrote a few letters with it and it works fine - like any other Hermes Baby of that era. However, I found older Hermes Baby much more snappy and pleasant to use.
I had a few of these: later Hermes Baby machines, and all of them are mushy and wobbly compared to old Baby (one with round, plastic keys). This one is no different.

June 12, 2024 /Lukasz Kumanowski
Comment

Juwel Fix

May 26, 2024 by Lukasz Kumanowski

It was Wednesday who started all this.

I recently refreshed my friendship with Masz, whom I lost from my horizon after moving to another country. When catching up on our hobbies and projects I mentioned my typewriter madness and it turned out that his daughter would like to have Wednesday’s typewriter.

Who the heck is Wednesday??? As I live an isolated life in the woods - I had to catch up on latest poppis and checked that this character is indeed using a typewriter: a Juwel.
Call it a coincidence (vide Paul Auster’s books) but there actually was a Juwel on Swedish auction site. I did not plan to bid on it - it did not look anyway special to be worth adding to my collection.

But since there was a teenager girl who wanted a typewriter - my call of duty was on! I placed a bid and won with no other bids. Only that the machine would arrive just a day before I was about to travel to Poland, to meet Masz.

Backup plan was to prepare very alike Continental, to act as Wednesday machine. This was at least a certainly very good typewriter so if Masz’s daughter should “catch a bug” then this machine will definitely be a proper one.

My Juwel came an afternoon before our departure, dirty and with non-functioning backspace. I went with plan B and Continental became Wednesday machine in Masz’s home.
Juwel was put on waiting list for me to fix it.

Many months later I finally grabbed it and took care of all problems. Backspace link was missing so I made a new one. Otherwise it was mainly dirt which stopped it from working.
Once cleaned it started to work properly and needed no adjustments.
It cleaned pretty nicely, decals became visible again and so I could see that it is Juwel Fix I got in my hands.

My specimen was sold in Sweden so I’m lucky to have a qwerty keyboard.

According to Typewriter Database this is one of last machines from this line.

Typing feeling is a bit different from what I’m used to with other German machines, like Erika or Olympia. Key stroke is deeper but keys stay horizontal all the time so it is by no means uncomfortable.
It is snappy but not as stiff as Olympias. Due to longer key stroke I cannot say it is as snappy as Erika but it is very pleasant to type. I would compare it with Urania, given these two to chose I would go with Juwel.

I got intrigued by this pleasant typing action so I did some research on Internet. Not much information there, Richard Polt has a good article about Juwel Rapid which was interesting as my machine is quite different in details!

But the typing action - I found another resource, an excellent review with in-depth analysis of type bar action which is responsible for this typing-feeling. That got me really on toes - it is that which makes this machine so unique!

Well worth watching this video, deep-dive in engineering indeed!

Back to my machine - it is a pure typer without unnecessary gimmicks.

  • There is no ribbon color selector (who uses that today anyway? I mean - really?).

  • There is no right margin. Well, that’s disputable but as long as one uses standard size paper - like A4 in Europe - we need only a bell to warn us that the line is ending. Like on Blickensderfer 5 - a bell rings: prepare to advance to new line. No need to press Margin Release to finish a word, you just move on. Thoughts keep flowing down your fingers, no more distractions than strictly necessary.
    In short - I don’t mind not having a right margin.

  • No Tabulator. Well, I use Tab when I write letters so that’s a useful feature but it’s easy to live without it.

Other than that the machine has all what’s needed to comfortably type.
Ribbon reverse is automatic - if you have rivets (or knots) on your ribbon.

One can also manually reverse ribbon by pressing a small button on either side of the machine.

Line release (but with line memory) lever is on the left side of the carriage, together with 1 line and 1.5 line spacing control.

At the bottom of left side carriage end there is a red tab - carriage lock.

Right side features paper release lever (which also rises paper bale) and carriage release.

Car hood-type ribbon cover - so you will never lose it. Woody Allen should have this machine!

One other interesting feature is that the machine is carriage TILT. Like Hermes Baby / Rocket. Which means that shifting action is very light and smooth - and very simple to adjust.

Simplicity must have been a word they kept in mind while designing this machine. All is accessible and not cluttered like on Remingtons or Erikas. Yet the machine is very compact and lightweight!

Shift-lock is also far from fancy. Just a metal tab, with slot holes for adjustment. On my specimen this tab got very used so someone had to pinch it, to extend it due to usage.
A clear sign that the machine was used a lot - and yet it is still in very good mechanical and cosmetic condition.

On the back one can see left margin rail and end-of-line bell construction. It cannot be simpler!

So there we have it - very modest but utterly interesting machine from a small and relatively unknown German manufacturer.
I’m not a touch-typist but watching Haelscheir's Haven fast typing on such machine clearly shows that they are indeed capable, small machines.

Which is contradictory to some opinions on the Web who state that these are not capable of doing the job. Well, I tend to think that it is these mechanics who cannot tune them properly and instead blame Juwel engineers for not designing them properly.

It cannot be further from the truth. These are very decent, special-feel machines, very worth having in one’s arsenal.

May 26, 2024 /Lukasz Kumanowski
Comment

Bulbous rarity: Remington 3-bank

February 19, 2024 by Lukasz Kumanowski

Not many of these are around - according to Richard’s Polt research the production started during Great Depression in 1935 and lasted only 6 months. Only around 5000 machines were made.

The idea with this model was to offer a bare-bone typewriter, without any bells&whistles, to be able to sell to customers who were tight on budget during The Great Depression.

No backspace key, no Shift-lock key, no bi-chrome selector, no Tabulator.
Margin release is realized directly by the lever on left side of the carriage - like on old Remington Portable machines.

But the bell is there! Essential to typing, ain’t it?

The coolest of all is that this is 3 1/2 -bank machine!
Instead of limiting keyboard to 3 rows and using double-shift mechanism for accessing 3 characters per type-slug Remington 3B is using standard 2 character slugs but they saved on number of key levers and type-arms by compressing numerals into their own slugs.

Symbols marked with red are accessible with Shift (also marked red).
Standard on may typewriters of that era is using “O” as a “zero” and small “L” as “one”.
No other machine has it marked so clearly on keyboard!

My machine came from a family which had it since three generations. I feel obliged to be a keeper of such treasure!
What makes it even more interesting is noticing that Swedish characters were added with different type of slugs.

View fullsize IMG_0340.jpg
View fullsize IMG_0341.jpg
View fullsize IMG_0342.jpg

One can also see that keys with Swedish characters have real glass on top of paper legends while all the rest are standard coated-paper legends as on all Remingtons from that era.
That can mean that the machine was converted at the dealership in Sweden or was a special order from the US.
Looking onto the segment one can see that the company saved on a few non-present type-arms. They also saved by not machining all slots in the segment casting!

My machine was mostly dusty and keys were not reaching the platen. It turned out that ribbon vibrator was de-coupled and its springy catch was tangled. That caused the problem with type-arms. After repairing that the machine types like a dream!

It happens to be quite an early specimen: 56th!

What is also rare is that it still has both of its ribbon spools - both Left and Right. That is a sign of a machine which was well taken care of.

View fullsize IMG_0353.jpg
View fullsize IMG_0352.jpg

For cleaning I only removed the ribbon cover - or rather type-bar riser as this bulbous part serves that function. It is made of aluminum casting.

Comparing the mechanism with Remington Portable 2 one clearly sees that these are, indeed, the same machines. Or very similar. Instead of movable mechanism for rising type-arms prior typing the 3B is using its bulbous contraption.

It is worth noting that both these machines type completely fine even when type arms are in their lower position. It just takes longer for them to come back into resting position thus will influence how quickly one could type. Rising them, like on Portable, or keeping them high, like on 3B, avoids this problem.

After typing a few pages on this machine I saw absolutely no irritation that Shift-lock or backspace is not present. Especially in modern days - when we type mostly for ourselves and rarely use backspace anyway - these shortcomings of this very basic machine are absolutely not disturbing.

I dare to go even further and agree with Typewriter Justice: the lack of Backspace makes it to even more streamlined typing experience. One just types away and does not look back until the machine spits out a ready page!

February 19, 2024 /Lukasz Kumanowski
1 Comment

Bell for Underwood 3-bank

February 19, 2024 by Lukasz Kumanowski

One of the best 3-bank typewriters to use, IMHO. Not only is it small and beautiful but it is a very good & snappy typer.

I happen to have a few of these and one was lacking end-of-line bell. Apparently it was removed in anger since holding plate was bent and parts of assembly were torn.
In my arsenal the typewriter HAS TO have a bell. Period.
I’ve decided to make a new one for this otherwise very cool machine

The previous owner must have been a real butcher as the mechanism was completly covered with dried, sticky mess of dirt and oil. Not much was moving so I had to properly flush the segment and escapement mechanism.

Once clean and aligned the only thing left to fix was the bell.

I managed to find tiny bicycle-bell which mostly matched the original diameter. Brass, of course. Size needed to be adjusted to fit into the frame.

Paint removed and brass polished. I managed to find an old screw with matching thread and wide head (from old Remington standard donor-machine).

Fitting all parts together. I had to wind a new spring as the original was broken.

Bell hammer resting post was torn apart.

I made a new one and pressed it into the small frame.

And voila! Ring the bell, ring!

The machine workes perfectly. I made new platen in place of the old one which was cracked. Paper fingers are missing on this machine but it absolutely does not make typing any way less pleasant.

New rubber feet - this tiny bugger is very light so grippy feet are essential to hold it in place during carriage return.

Good old Pica, type alignment has nothing to complain about.

And the bell sound is nice and clear!

February 19, 2024 /Lukasz Kumanowski
Comment

Platen removal on Olivetti Lettera 35

February 04, 2024 by Lukasz Kumanowski

I had once such machine, with Norwegian keyboard and Pica-size typeface. I picked it because of her very interesting form. Industrial design at its best.
I liked typing on her but was always on watch for another one, with Swedish layout and possibly in Elite-size.
And there she popped-up!

I got her from the first owner who kept her covered for most of the time and never needed service the machine. All was working apart from ribbon reverse function. Some dust and dirt from normal usage only.

Removing body shell is quite easy, just 6 screws on top side. The machine has to be wiggled a bit to free the top cover from the carriage but nothing too difficult.

On platen removal I got surprised by a hybrid construction: left platen knob is unscrewed from the platen, standard right-hand thread.

One would expect that the right knob will work the same: there are no holding screws visible around it.

Well, wrong! Look under the machine - there is an inspection window where holding screws are visible and can be accessed.

There are two of them holding the shaft. Strangely enough they are spaced 60 degrees apart but the shaft is flat on opposite faces only.

Why did they do it this way is beyond me.

To lift the platen one needs to unscrew a small latch, to free extending platen axis on the right side. Remove the covering panel first.

And voila!
Line advance mechanism looks sturdy and no-nonsense on this machine. The only catch with it is that upon assembly one must align the platen inside the carriage (horizontally) so that left knob’s ratchet aligns with the mechanism. Which means that the platen is “floating” a few mm inside the carriage and after alignment is held in place with right knob and its massive two screws.
Would it not be easier to make the right knob with integral, threaded axle?

Dusting off the mechanism with brushes and compressed air. No excess oil or grease, no butchered screw heads. Pristine specimen!

Ribbon reverse mechanism needs rivets on the ribbon ends. Under the right spool resides the core of this mechanism and on my machine it was not disengaging properly upon reversing.

It turned out that the small spring holding a shaped metal piece which rides inside the V-shaped plate was too tired. I replaced it with stronger spring, oiled lightly the plate edges and the mechanism was working again.

It was sunny today so I took the machine out for a photo session.

I very much like all about her: color combination, typing feel and most of all: the design.
These toothpaste-white keys demand that you wash your hands before typing!

The dullness of back edge is broken by horizontal line (where panels meet) and bottom rectangular shape.

The machine is very much suited for lap typing - no part of the mechanism is exposed.

Contrasting sunlight exposes crinkled paint and smooth, streamlined shapes of this beauty.

February 04, 2024 /Lukasz Kumanowski
Comment

Imperial B - steampunk machine

December 02, 2023 by Lukasz Kumanowski

I think I saw this machine at first from profile view, on Robert Messenger blog and I instantly fell in love with how awkward and steam-punk it is. Rounded keyboard, interchangeable type-module, crazy ribbon routing - all these were a promise of interesting mechanical dead-end, my favorite type of typewriters.

The one I finally managed to find came damaged due to negligence of proper packing it for shipping. Quite common story for many collectors, I’m afraid. The screw holding escapement pawls got sheered due to a knock onto the carriage (presumably) and the carriage was stuck.

Removing the type element (keyboard with type basket) is done by simple flipping of two catches and pressing Figure key.
To remove the carriage one needs to remove one screw and lift the horizontal bar where bell and type guide are residing. After pressing Figure button (to increase clearance between the carriage and the frame) the carriage can be removed towards the right.

So there is my escapement, hanging sadly in pieces.

Rough cleaning first - disassembly into three main modules.

Platen could not be rotated since paper rollers melted and glued themselves onto the platen. They sat probably in the same position for a century. I cut them off to free the platen.

Remaining part of escapement screw was sitting inside the frame. Luckily it had a bit of the thread outside so there was something to grip, otherwise I would need to drill it out and possibly tap a new thread.

To gain access I removed horizontal bar entirely.

Screw-rests removal went fine. Assuming I have all escapement parts (didn’t found any more metal pieces laying loose in the package) I figured how it was put together.
Witness marks from the rounded separation brick and oval key-hole help the investigation.

View fullsize IMG_9844.jpg
View fullsize IMG_9845.jpg

What we needed then was a new screw. The original one has imperial thread (of course) and was roughly 12mm long. Very important thou is the shoulder which allows the lower, loose dog, to glide thus allowing the carriage to move by one “click”.

Luckily I had a screw with such thread, leftover after disassembly of some derailed Remington standard. I could modify it to match the original screw and put back the escapement into one piece. It should look like that:

With that dodged I moved on to proper cleaning and then oiling the machine. The only place I needed to add oil were carriage rollers - their bearings were dry and noisy. Cleaned and oiled with thin gun-oil they came back to life.

Type basket assembly then. It had the leather type-bar rest placed strangely.

This thick piece of leather has three springs attached.

Judging by cutouts on the side and how these springs are placed I figured it belongs to the top part of the piece.

Key-legends are yellow but originally they must have been white - it is just paper which aged. Key-tops are made of glass, not celluloid. The highest row of letters has key-legends damaged by oil ingress - they are legible but not nice and would quality to be replaced.
Unfortunately key rings are not the simple press-fit or tabs type but they seem to be crimped upon installation.
I don’t have a tool to mount them back this way so I don’t attempt to remove them. Instead I just clean them from all grime accumulated.

The carriage then. Disassembly is easy and straightforward. I document each step, just in case I mess up later on.

View fullsize IMG_9874.jpg
View fullsize IMG_9875.jpg
View fullsize IMG_9876.jpg

Paper rollers were shot. I removed their remains and fabricated new rollers.

View fullsize IMG_9879.jpg
View fullsize IMG_9881.jpg

A small detail - here apparently they removed a bit too much metal from the paper-rollers rod. A tiny bit really. The machine would work perfectly well anyhow but they added a tiny shim of the same diameter to fill up the space. How cool is that?

It reminds me a story of a guy who worked on an exact replica of a sailboat. He was making a copy based on existing but derailed hull. He wanted to experience the feeling the original owner had when he got his boat delivered to him by Herreshoff.
At some point the builder found that original shipyard had cut a piece too short and they added a shim, to cover for the error. It was not visible as it was deep inside the structure. Natural thing would be to correct this error when building the replica but no: the guy replicated that, too, for the sake of originality.

Back to business: the platen. Apart from rests of paper rollers melted into the surface the rubber was petrified and damaged. I was also rotating around the core, yielding the platen unusable.

View fullsize IMG_9884.jpg
View fullsize IMG_9889.jpg

After recording the original diameter I removed the old rubber, exposing a steel (not wooden!) core.

I applied new rubber coating, matching the original.

All pieces cleaned and put back together.

Fresh ribbon in crazy routing.

So how is it to type with her? Not bad at all! It is, in fact, very pleasant machine to type. Not like on Erika 5 of course but equally nice to type as with Oliver 5.

Well, I think we have a survivor!

The metal case is covered with surface rust but otherwise sound. I considered restoring it to original glory but for now I leave it in original shape. It tells a bit about the life of this machine.

Profile picture which started it all.

Controls on this machine are as straightforward as on any ancient typewriter. They are different from what we are used to but very intuitive anyhow as one clearly sees “what happens in the works”.

Paper fingers doubling as margin setting. Long finger activates the bell, too.

Left side of the carriage houses most controls.

Blue arrow below points to line ratchet release.
Black is line space selector - 3 positions.
White arrow is pinched carriage release.
Green is line advance “pinch”. Both line advance and carriage release can be pressed simultaneously in one swept.

View from the side.

Since this is a 3-bank machine there is double shift mechanism and each type slug contains 3 signs. Unique to this machine is that upon shifting it is not the carriage which moves but the keyboard (with type basket) is moving slightly backwards.
It is absolutely not awkward when typing as the shift is very small. Below photos try to show the concept.

View fullsize IMG_9911.jpg
View fullsize IMG_9913.jpg

So in principle this is a basket-shift machine! Just that the basket is firmly attached to the keyboard.

Ribbon spools sit on sides, held in place with ingenious latches. Below the latch is closed and ribbon reverse rod is pulled - this ribbon spool will now take in the ribbon.

Ribbon direction reversed (with rod pushed in) and the latch opened for spool removal.

Under the keyboard there are additional two controls: green arrow is pointing to backspace lever. White is pointing to something which I interpret as ribbon expose mechanism, probably facilitating easier ribbon installation.

When this lever is switched the ribbon vibrator is pushed outwards thus exposing ribbon guides and making ribbon installation easy.
If one types in this position the ribbon will not move back (vibrator is uncoupled) but ribbon transport is working.

Ribbon in normal position:

The side effect of this is that one can type in red - or use duo-tone ribbon. I consider this as a feature!

Shift-lock and Figure-lock is done with the same lever, with comb-like form. Vertical posts beside are shift and fig- height adjustments, similar to ones used for example on Blickensderfers.

Very interesting machine to play with and an eye-catcher in any collection. Good typer, too, if one understands that it is 100+ year old design.

December 02, 2023 /Lukasz Kumanowski
2 Comments

Underwood 4-bank portable

November 24, 2023 by Lukasz Kumanowski

I am a big fan of Underwood early models. This machine came to me in pretty good shape, with some minor issues. Just dirty and dusty like she was put on a display for half a century. Which may be true.

I started with fixing type basket stop pad. It was swollen (influencing imprint) and partially gone. Duane has a good video about repairing this pad, on my machine it was too damaged to rescue.

I decided to replace it with dense felt. Just to try if it would work. Plan B was making it from rubber, as original. Turned out that dense felt is doing the job alright.

Friction-fit, no need for glue. Each strike of the typearm is setting it in place.

Rubber feet were shot.

Someone tried really hard to keep them alive but it was high time to do something about it.

I made new feet from a round stock.

Capitals alignment was very much off so I took closer look on regulation screws. Turns out that even here Underwood made an effort to make carriage shift as quiet as possible. The landing pads were covered in rubber. It became black pancake after all these years and caused the adjustment to be off.

Cleaned and filled with new cork-rubber compound.

That cost me some extra time in adjusting both lower letters (base position) and capitals from the scratch but it was well worth the effort: shifting is now almost silent, instead of unpleasant metallic clank.

After the whole mechanism was dusted off I removed the platen and lightly sanded it, to remove outside oxidation. It is hard, of course, but no cracks nor dents so I leave it in place.

New ribbon can be winded onto existing spools using Underwood-proprietary ribbon winding port. Electric drill with rubber adapter is compatible with it.

So there we go! She types like a dream!

A handsome machine indeed - reminds me a bit lines of Continental 350.

Less boxy shape than its older brother, similar to Royal P esthetics.

Margin release button in the same place, slightly more ergonomic on angled panel of the newer machine.

View fullsize IMG_9676.jpg
View fullsize IMG_9677.jpg

Still the older one has more charming controls - here ribbon reverse lever.

Certainly both machines will keep their place in my arsenal. Typing and looking on them is a pleasure.

November 24, 2023 /Lukasz Kumanowski
Comment

Treasures of Paderborn

November 16, 2023 by Lukasz Kumanowski

I happened to be in Paderborn, Germany, on job-related trip. We had some free time so, apart from getting lost in this beautiful city we went to HNF: Heinz Nixdorf Museum. It is advertised as the worlds biggest computer museum.

Now, I’m not the biggest fan of computers but while browsing the museum’s webpage I found an Underwood somewhere in the background. And printing press. That was enough to justify the visit.

Boy, how surprised I was when I found the entire first floor dedicated to typewriters and office environment of that era. Magnificent!

Of course there are many German machines - we all love them, ain’t we?

Proper machines! And beautifully restored - or maintained in good condition.

There are also some monstrosities like adders, magnificent machines.

The exhibition is not limited to German machines, I found even “my” Remington!

… and my Siemag!

Office furniture - something I’m still hunting:

Early ideas on portable typewriters ;)

Further I went more interesting it was becoming.

View fullsize IMG_9701.jpg
View fullsize IMG_9709.jpg
View fullsize IMG_9710.jpg
View fullsize IMG_9713.jpg
View fullsize IMG_9721.jpg

Seeing Elliott-Fisher book-writer “in flesh” was thrilling:

Book-writer cannot exist in such a collection without music-writers. I found Melotype (opening this post) and Olympia Musicwriter!

View fullsize IMG_9706.jpg
View fullsize IMG_9707.jpg

Going back in time - there is a great collection of really old machines.

View fullsize IMG_9711.jpg
View fullsize IMG_9712.jpg
View fullsize IMG_9714.jpg
View fullsize IMG_9716.jpg
View fullsize IMG_9717.jpg
View fullsize IMG_9718.jpg
View fullsize IMG_9719.jpg
View fullsize IMG_9720.jpg
View fullsize IMG_9722.jpg
View fullsize IMG_9723.jpg
View fullsize IMG_9728.jpg
View fullsize IMG_9727.jpg
View fullsize IMG_9724.jpg
View fullsize IMG_9729.jpg
View fullsize IMG_9732.jpg

Yes, there is Lambert, too!

No such collection can be complete without Sholes & Glidden. There are two!

View fullsize IMG_9725.jpg
View fullsize IMG_9726.jpg

Very early prototype of wooden machine, typeface consisting of dots instead of type slugs:

Biggest surprise for me was to see how small and beautiful is Williams, here Williams no.1.

View fullsize IMG_9730.jpg
View fullsize IMG_9731.jpg

So there you go: visiting computer museum can make you a surprise. In fact the museum is considering “computer” in much broader sense than we tend to think about it today. The exposition shows mechanization of information, from early typing machines, through typewriters until today’s digital processing.
Mechanical crank-heads like me will be occupied on two floors, looking onto ingenious ways humans used to store and to process words, numbers, thoughts and music.

Very worth visiting!

November 16, 2023 /Lukasz Kumanowski
Comment

Bulbous typewriter - Remington Quiet-Riter

October 29, 2023 by Lukasz Kumanowski

This fellow came from a good home - was certainly been cared for and used not too heavily. It was also lucky to be serviced by a proper mechanic - all screws are intact, no butchered slots and all alignment is spot-on. Moreover - it has a brand new platen! The rubber is fresh and springy, typing is silent and pleasant.

The only problem was dust and molded ribbon. Certainly the machine was put back into its case and forgotten for many years, stored in room temperature in a wardrobe, I suppose, not on cold attic. Good for her! No rust, no solidified grease, just dust.

Another minor issue was variable line spacing mechanism not working.

To keep her in tip-top shape I decided to transplant clean and fresh ribbon winding mechanism from a younger Quiet-Riter 11 which is my donor machine.

Removing ribbon winding mechanism is easy, only on left side one needs to unscrew pull-rod for backspacing. On younger machine this rod is formed to pass under but on older version it is just straight and is in the way. I marked amount of thread to be visible before unscrewing - for easier calibration afterwards.

Old spools were covered with ribbon rests and metal coating was damaged.

While at it I renewed type-arm rest. With fresh rubber it will be even quieter when slugs hit home position.

All body panels got proper cleaning and drying. Sound-proofing is in perfect shape and fresh so I leave it as is.

Mechanism dusted off, body panels clean - assembling back all pieces.

Serial number is found close to right ribbon spool, on the frame.

To remove the platen on newer Riter one just unscrews both knobs by twisting them, they screw out with partial axle on both sides and the platen can be lifted.

Not here. This older model still carries the old style construction, with platen axle being a full-length rod. But there is a twist: line-spacing ratchet de-coupling mechanism is operated by a separate rod which needs to be removed first, before the axle can be removed from the right side.

At least that’s how I done it. I wanted to check variable line spacing mechanism anyway.

The mechanism is simple: three toothed surfaces of the platen clutch engage with toothed band on the inside of platen’s left metal collar. Clutch engaged.

To disengage one presses-in left platen knob which pushes a short rod gliding inside platen axle which, in turn, pushes the clutch away from toothed surface. Clutch disengaged, line spacing becomes variable and permanently changed.

To assemble back the platen I inserted the axle from the right. Empty axle emerges from the left.

Insert the short rod into its channel…

… and rotate the axle by 90 degrees, to see surface for landing knob’s set screw.

This part is important, so that we don’t press the rod with set screw because it will block clutch mechanism. Which was exactly why it was not working when I got the machine.

With all assembled back together the machine was ready for work.

I much prefer this earlier version, with rounded, bulbous ribbon cover.

Newer versions have the logo made from plastic, here it is brushed metal. Nice detail.

Left side of the carriage houses most controls: carriage release, variable spacing with clutch release (platen knob) and without clutch release (thus non-permanent spacing alteration).

Three sets of line spacing: single, one & half and double line.

Being a 50-ties child the machine has a “car hood” instead of ribbon cover. Bi-chrome selector for red, blue and stencils on the right. Ribbon reverse lever on the left.

Speaking of cars and 50-ties, I had to compare this Remington with another bulbous machine from that era: Underwood.

Not as radical as Underwood, Remington is more toned down yet has a slightly bigger footprint.

Mugshots reveal that it is also a bit higher.

Both are handsome machines, Remington being less extravagant I suppose.

They were big competitors back in the day. Shouting on each other with wide-open hoods!

Typing on this Remington is very satisfying. The action is smooth and soft but not spongy. It is a silent machine. Basket-shift, ergonomic key-tops, well spaced keyboard - suites me very well.

Typing action reminds me one of another bulbous machine from that period - Hermes 3000. I agree with Ted Munk on that: typing out on this Remington is very comforting.

Hermes is, however, even bigger and wider!

“Bulbousness” in its best, with Hermes leading in sophistication of shape.

Remington not as extravagant or sophisticated but still very robust and comfortable tool for serious writing. And not an eyesore either!

October 29, 2023 /Lukasz Kumanowski
1 Comment
  • Newer
  • Older

Powered by Squarespace