Boatworks

  • Main
  • Louve
  • Typewriters
  • Workshop
  • Meritaten
  • Glypto
  • Motoko
  • Inspirations
  • About

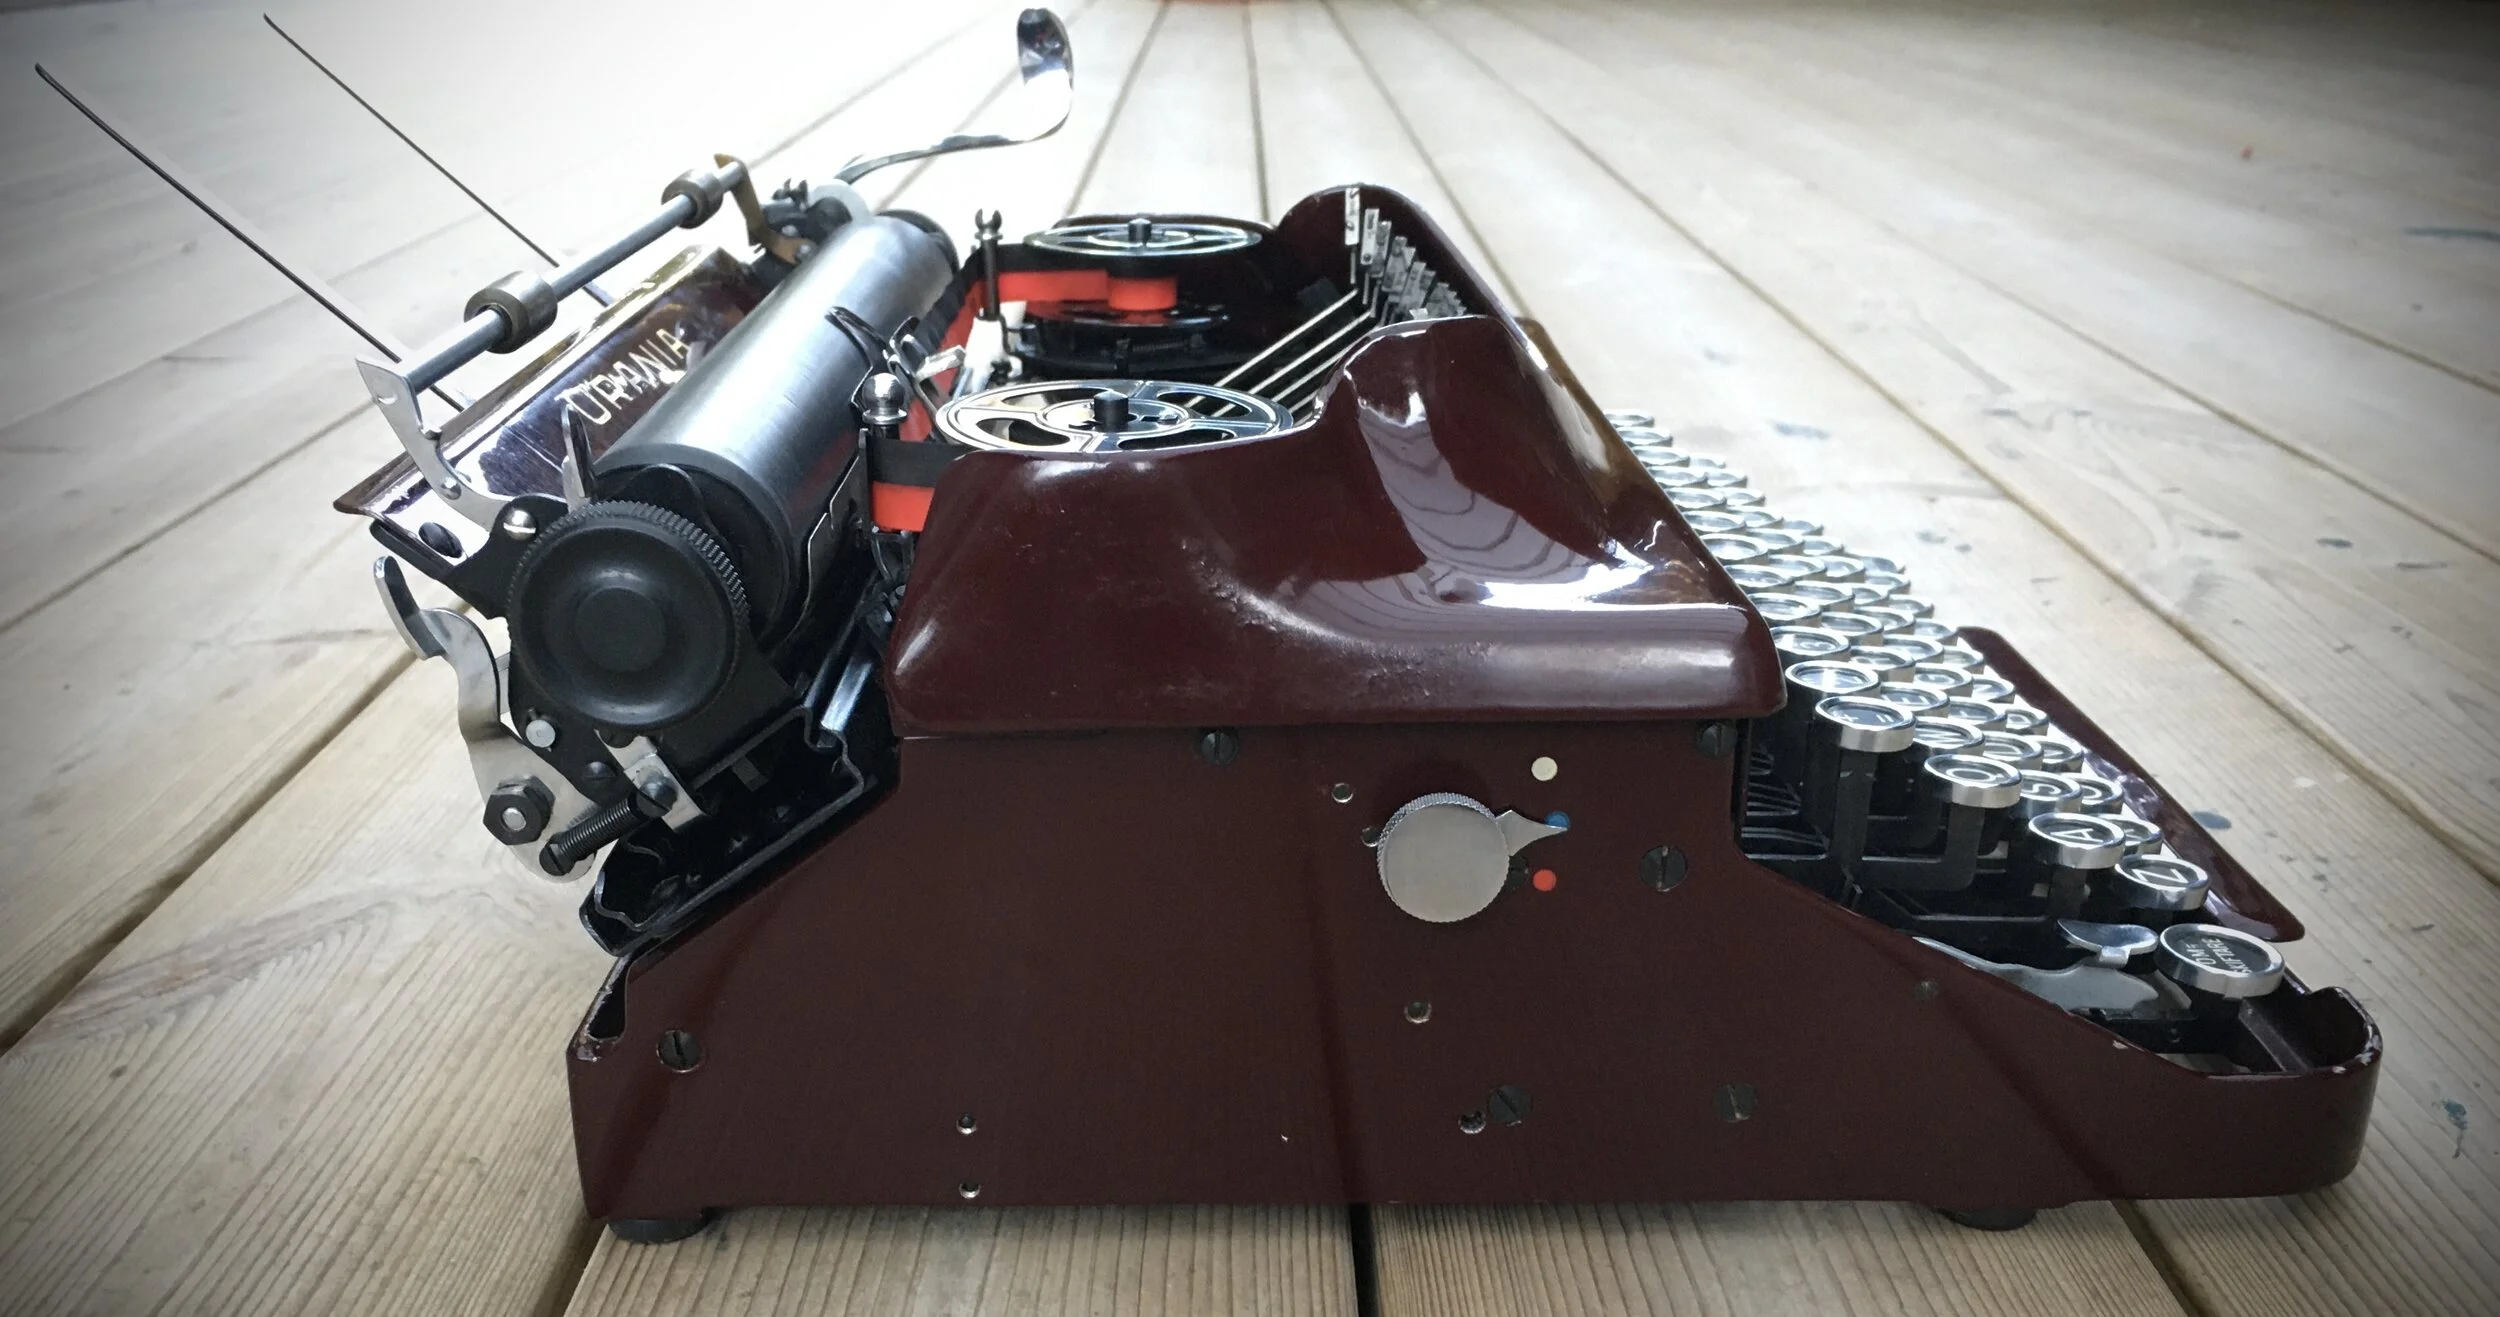
Blickensderfer No.8. German Blick.

September 08, 2021 by Lukasz Kumanowski

So far this is my first Blick.

I am fascinated by this design so I got this machine from Germany. Upon arrival it was totally non-functioning, mostly due to dirt and dried oil covering the internals.

By carefully exercising the mechanism, in conjunction to figuring out what all these levers should do, I got the machine to move. Reluctantly and with reservations it came back to life.

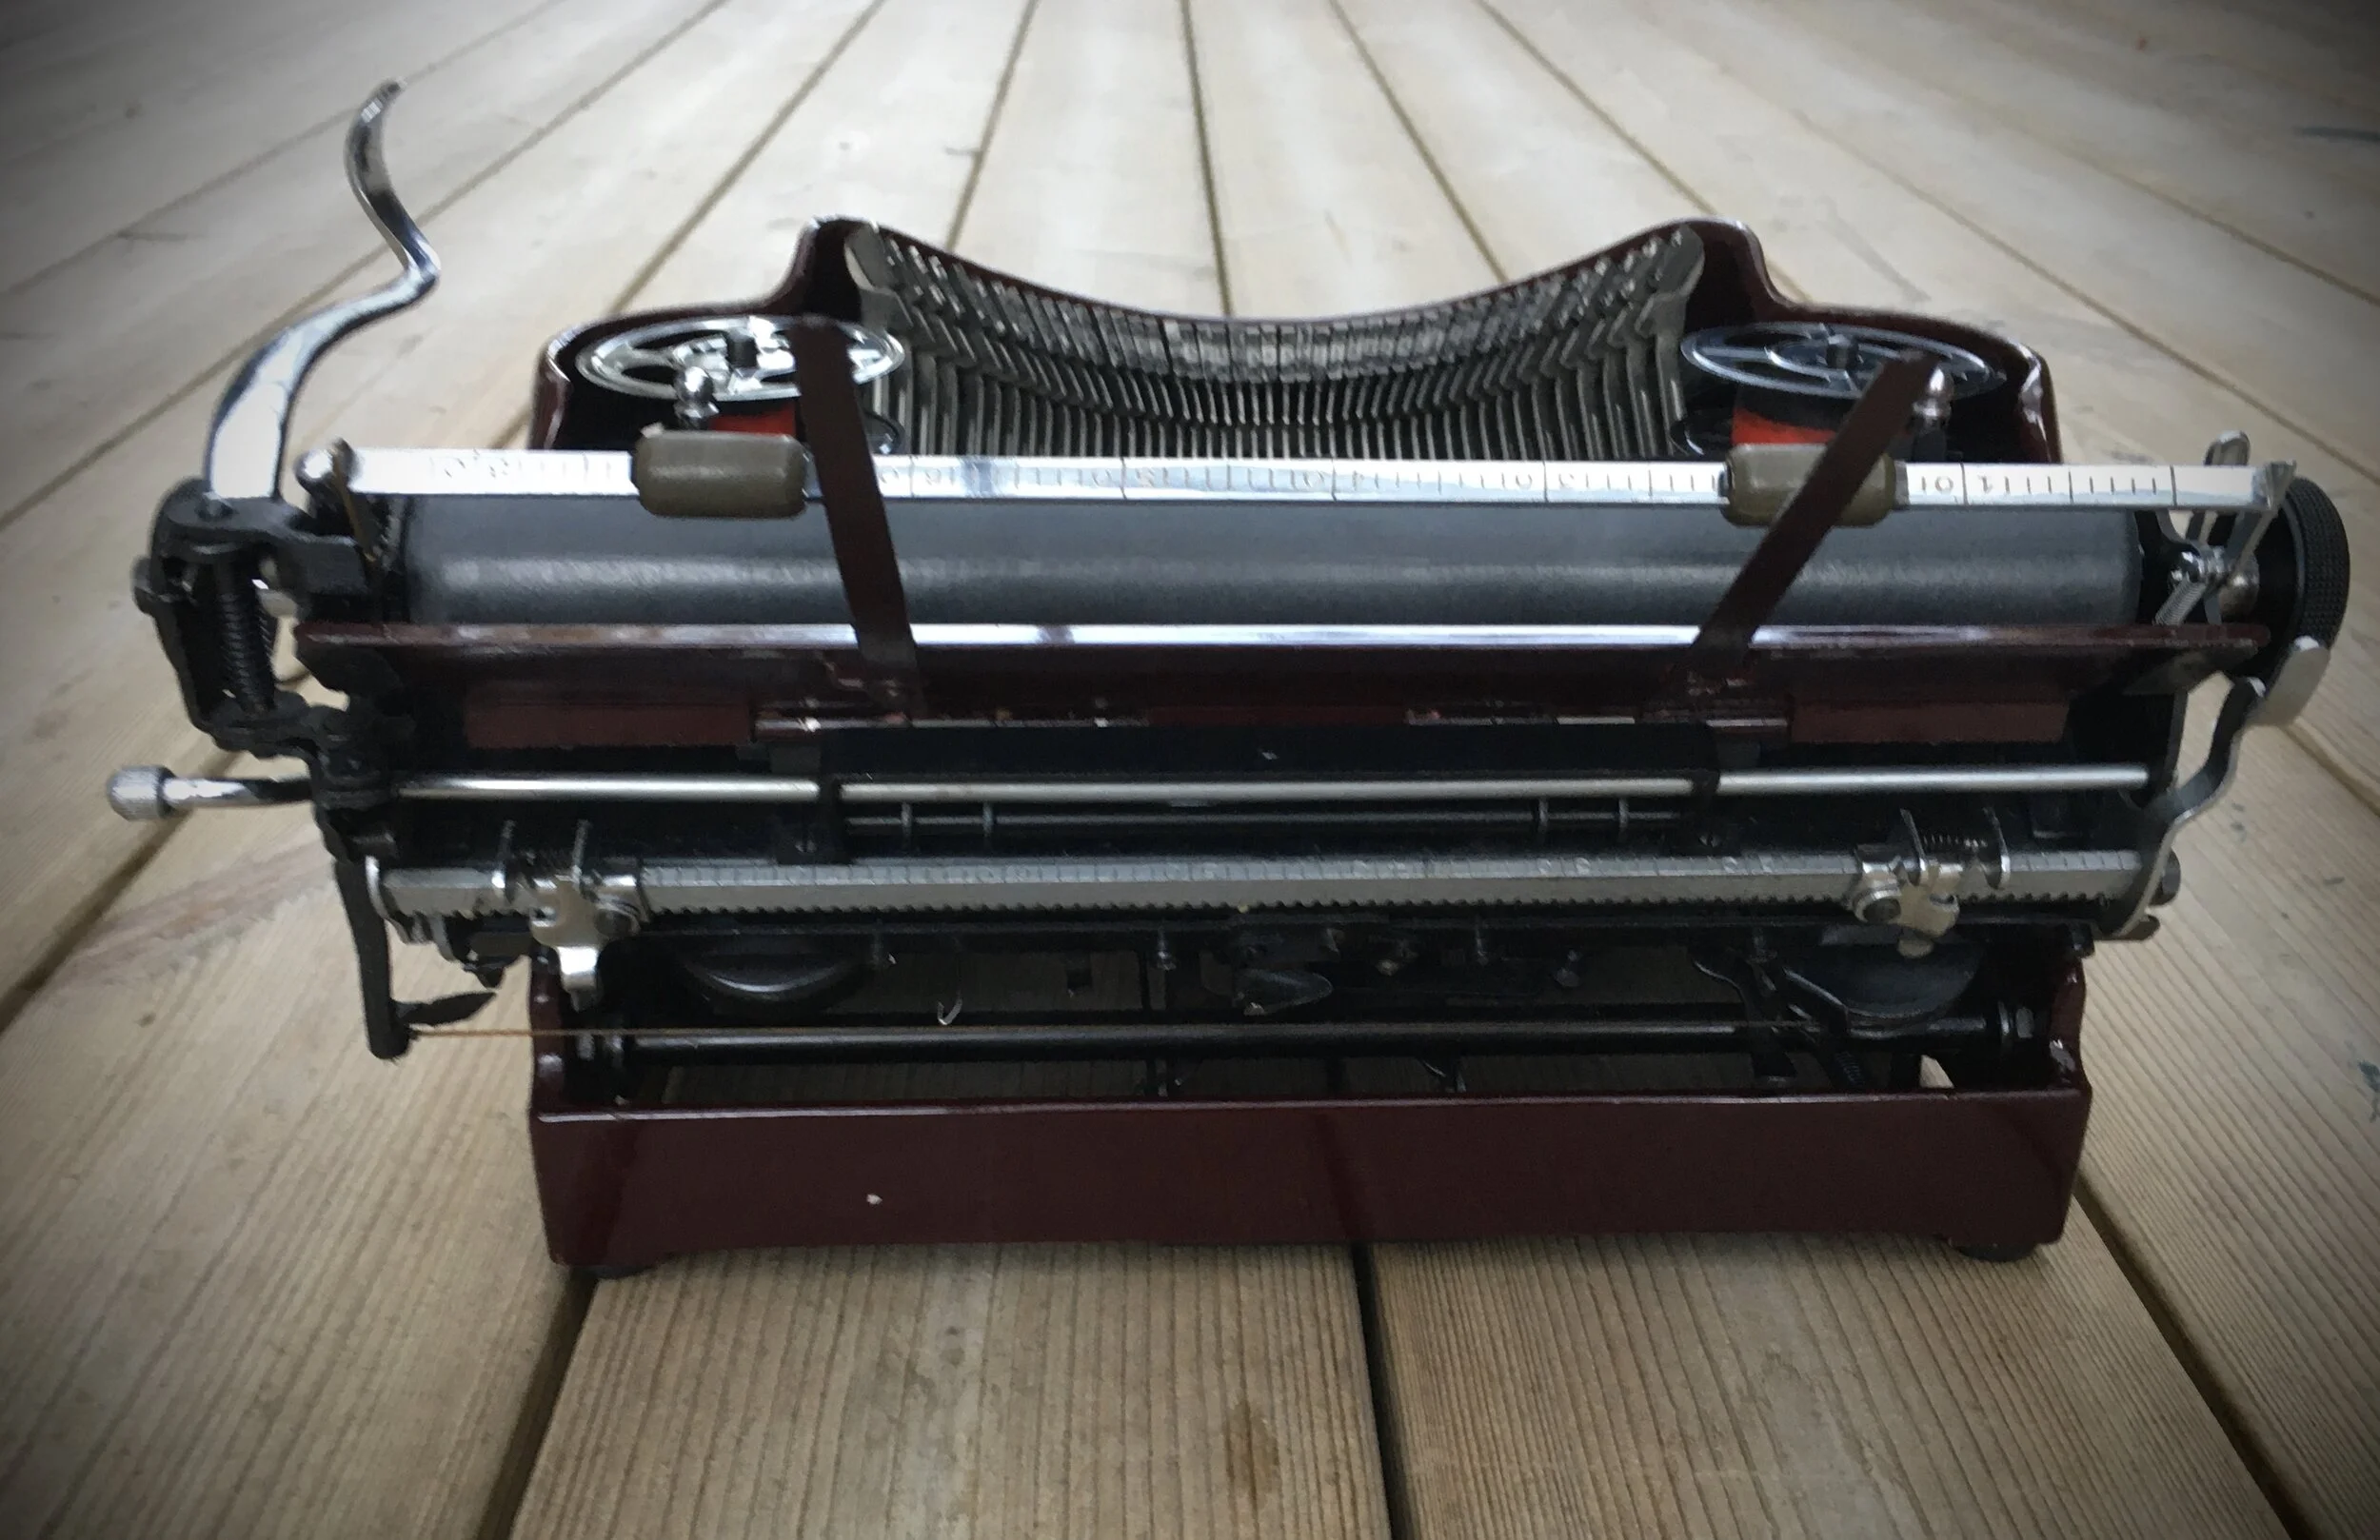
Thanks to (limited) YouTube clips and Typosphere I figured how to remove the carriage - very easily indeed, almost like on Olivers but to the right. My biggest surprise was that there is no drawband nor spring-motor in this machine. Instead Blick is using push-pull escapement. So no broken pull string nor broken engine spring - so common on Olivers.

After blowing some of the dust bunnies I reached under the machine to start taking it into parts.

Some missing springs, a few was found inside the carrying case laying loose below the machine.

Dirty but luckily with no surface rust. I remove them one by one.

Removing the type wheel was scary as it is hollow and entirely made of hard, vulcanised rubber. Being more than 100 years old it was sitting hard on its axle. With some isopropanol I got it loose eventually and managed to remove it without the damage.

There are two types of springs under the key levers. Those with short loop at the end are hooked onto the universal bar. Only handful of them, the rest - with straight end - are for each key lever.

I continue with removing the main push-bar. It is enough to remove one screw to tilt the side arm, the whole subassembly can be then slid out of the frame.

Now I gain access to the remaining springs.

By loosening three screws one can remove the plate holding key levers in place.

Here is the picture of the keyboard just before I start removing each key. Now I know that, apart from this I should have numbered the keys in the order I removed them. It would simplify re-assembly procedure as this single photo does not clearly say in which order they sit in their guiding combs - many levers are bent so as they pass over their neighbours but top-side view has this often obstructed.

Removing key-levers is easy: unhooking them from their respective, short bars and lifting out of the mechanism. A few dead spiders were found in the process.

To me one of the crucial parts of any typewriter: a bell. Here the bell sits on its own arm. I remove the subassembly for cleaning.

Left margin rail follows.

Almost there. I gained good enough access to internals for cleaning.

Should I stop here?

This front comb is chrome plated. I want to polish it properly. I move on with further dissection.

Back of the machine, under the carriage. Escapement is now fully accessible.

While figuring out how to proceed further I remove key tops for proper cleaning. Key legends are made of thick cardboard, sitting tightly in key cups, with convenient side-slots for lifting cardboard rings. Springy key rings are safe to remove, unlike more common design with soft, folded tabs which can easily brake.

Back to the front comb: I remove Figure and Shift lever.

Cast-iron keyboard frame comes next…

… but the locking lever - spring-loaded - must come out first.

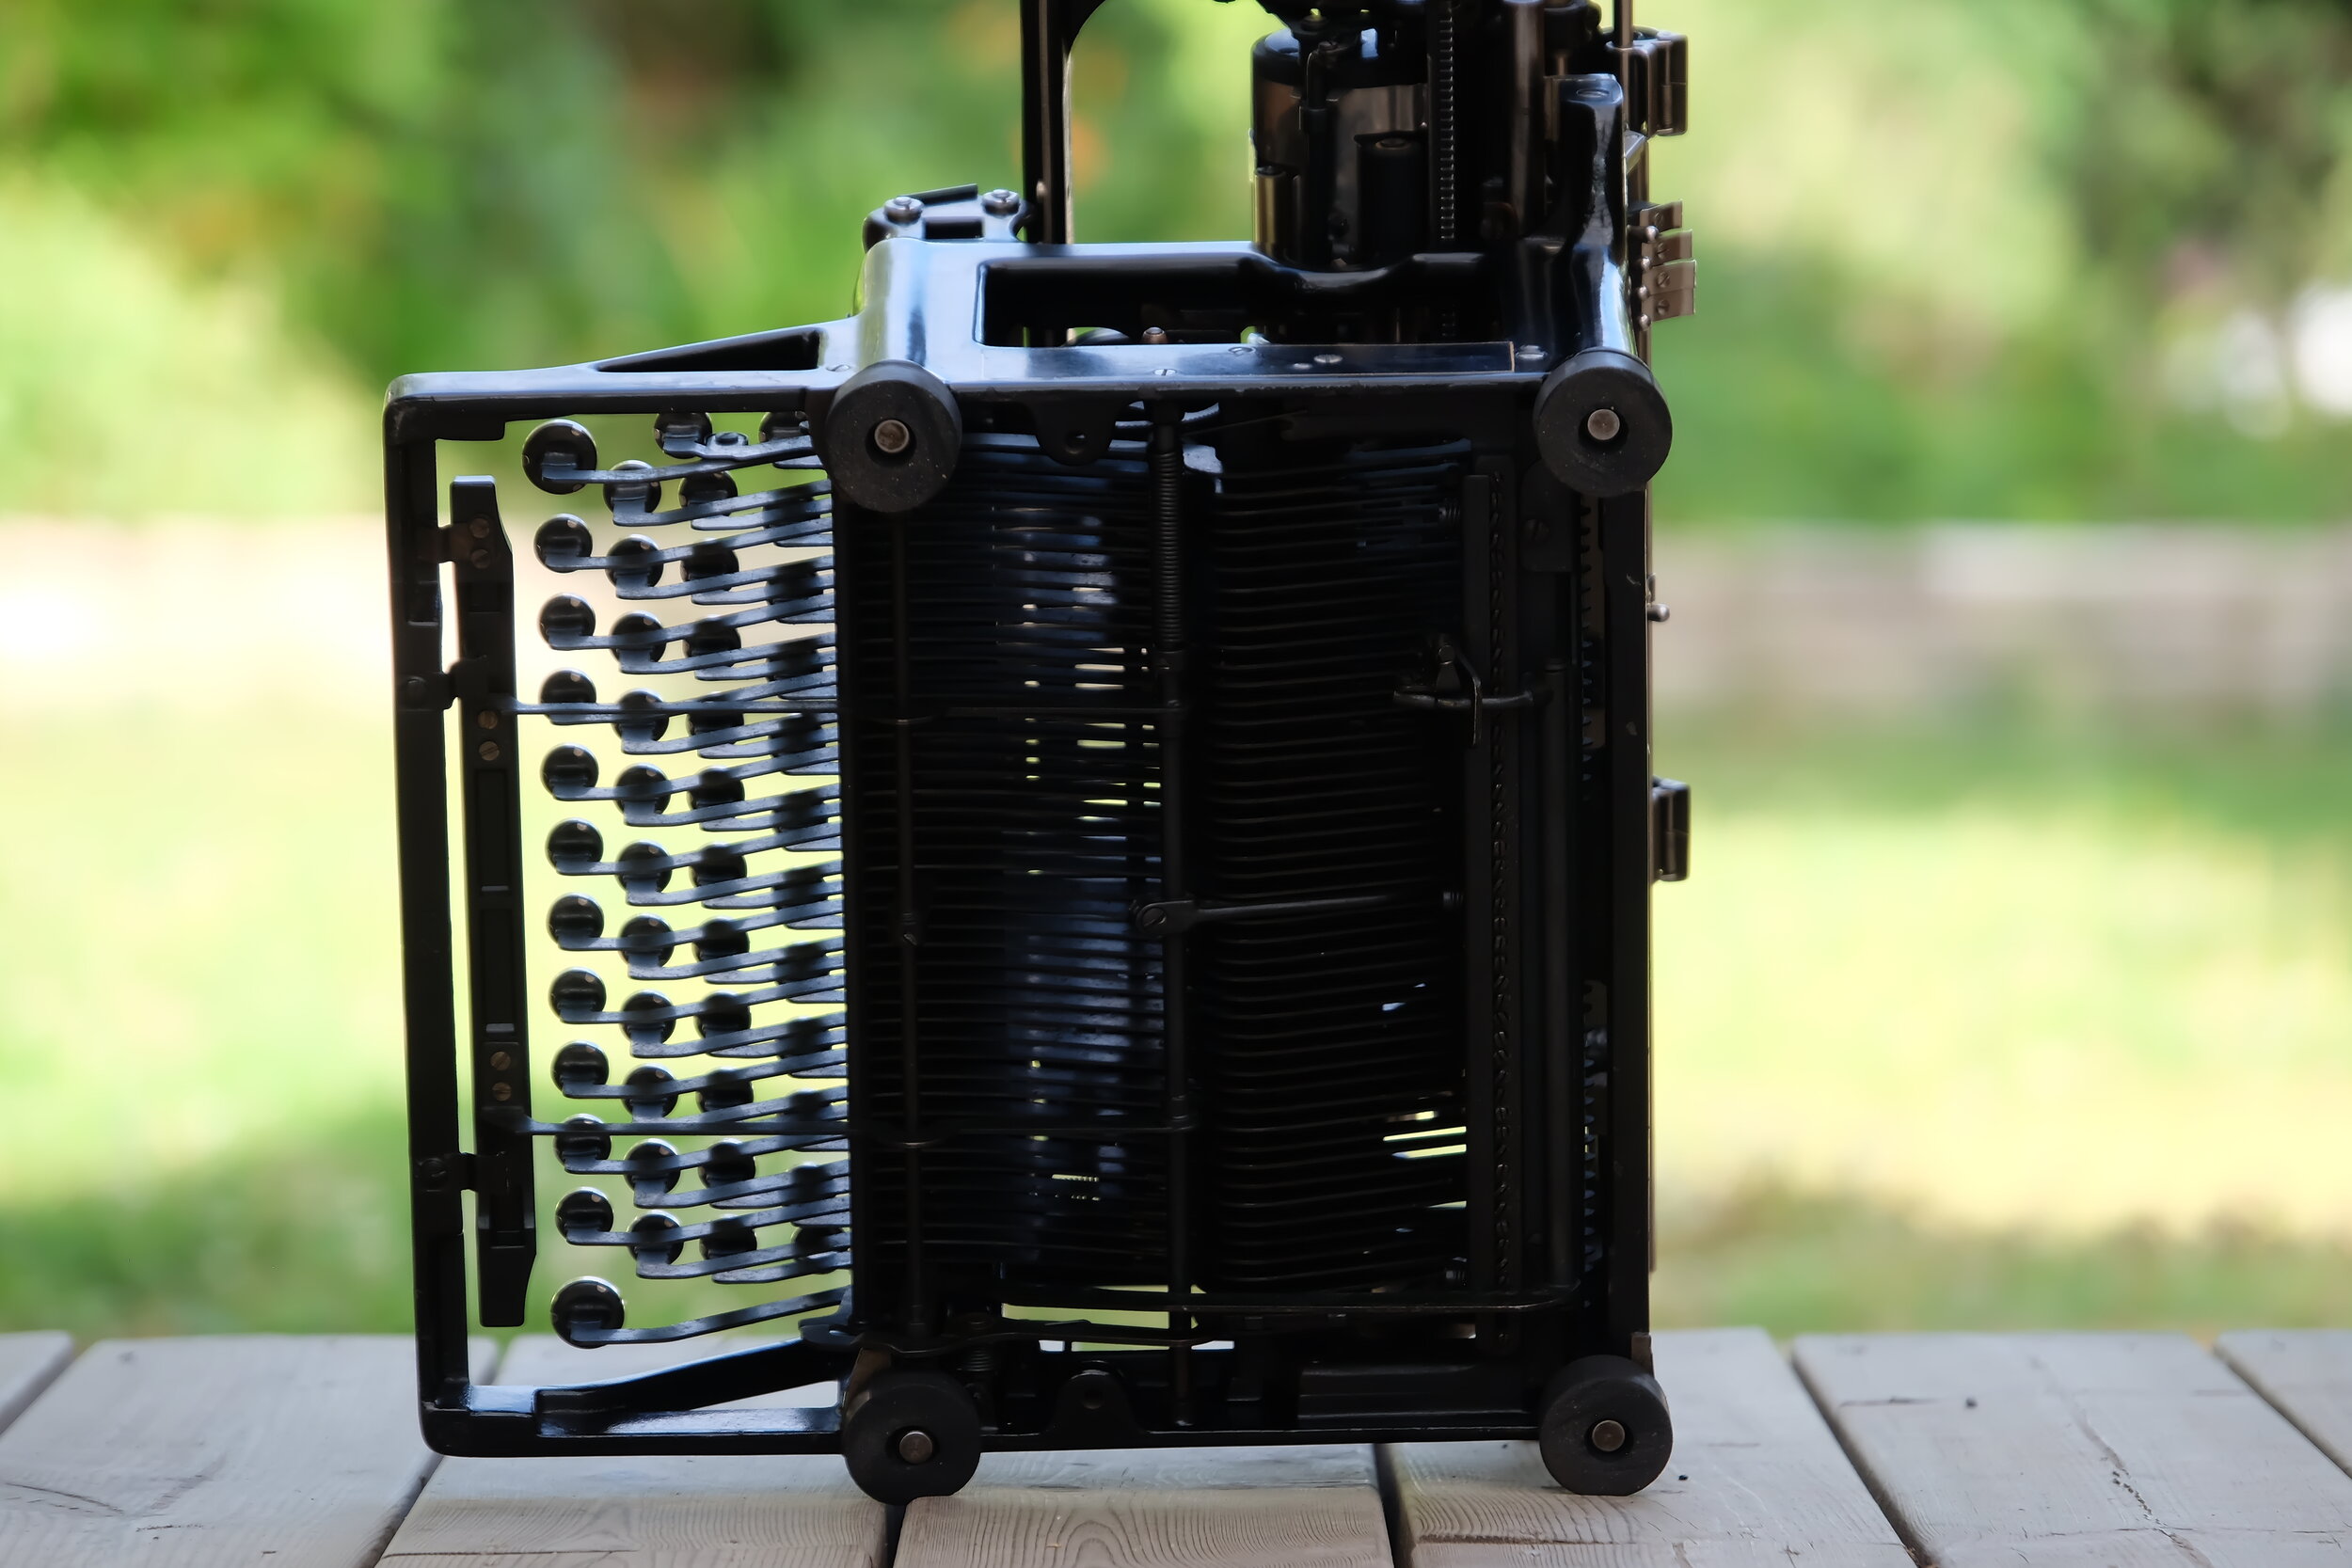
The machine looks now like it’s older brother Blick No.5, skeleton-typewriter.

Before the comb can be removed I need to unscrew Shift bottom screws. They determine how high the print roller moves so I measure their height before moving locking nuts.

Finally both combs can be removed.

A bit of wiggling and flexing was needed to get this guy out.

There I reached the mental stop: to remove last key levers I would need to unscrew them but that would require disassembling the heart of the Blick - and I was wisely advised not to do it, only if absolutely necessary.

Until I get another Blick - to have a reference in case I mess up synchronisation of the mechanism - I keep my hands away from Blicks’ heart. These remaining three keys will be cleaned in situ.

Bare bone machine (almost) ready for next step.

Key-base turned out to be brass - I clean them from dirt. Oxidation - by some referred as patina - will be back very soon so I don’t sweat over it.

Brushing with my mixture of white spirit & some engine oil.

Rubber feet are in acceptable shape after external layer of oxidised rubber is removed.

They are, however, not grippy enough and moreover they are too small to keep the machine from moving inside wooden case cavities. I decided to make new feet from fresh rubber compound, wider in diameter to mach the case.

There! Cleaned frame and remaining part of the mechanism which I didn’t dare to remove. I put back keyboard frame and space bar.

Moved to most tedious part: cleaning and polishing each key and keylever. That took me a while.

Key-top rings were originally coated black but on many keys the paint deteriorated and steel got rusty. To repaint them I needed first to clean the old, damaged coat and remove rust. After seeing the effect of cleaning I decided to leave them with white, bare metal tops for now. The machine will get some brighter accent with shiny keys. Jeweller-maker’s clamp helped a lot with holding these small rings when polishing.

Then came the time for springs - thin and tiny. I cleaned each one with soft abrasive pad.

After putting back all the keys I finally install their respective springs. Shiny and clean they please the eye, even though they live on the bottom of the Blick, not visible normally.

It turned out that only one spring is missing. I make a copy from thin-gauge piano wire.

The rest of removed parts got cleaned and polished, frame waxed with Fulgentine. Nice and shiny! I oil all parts which move under load leaving everything else oil-free.

Time for a carriage!

Unlike minimalistic Blickensderfer 5 this Blick 8 is a luxury machine - it even has carriage return lever integrated with line advance mechanism! I remove it as first, noting weak spring for keeping it in upright position.

Springy rod which decouples escapement and enables shifting the carriage is removed next. It holds in place small paper table which now can be removed, too.

To unscrew the line spacing wheel - almost like a knurled screw - I had to soak it for a few hours in penetrating oil. Meanwhile I continued dissection of the surrounding mechanism.

Unhooking springs is risky here as their ends are bent around their fittings. I decided to keep them hooked to avoid the risk of braking them.

Line advance wheel finally gave in!

Diving deeper into this side of the carriage.

Carriage release lever sits on a small collar washer. Good to not loose it in the process.

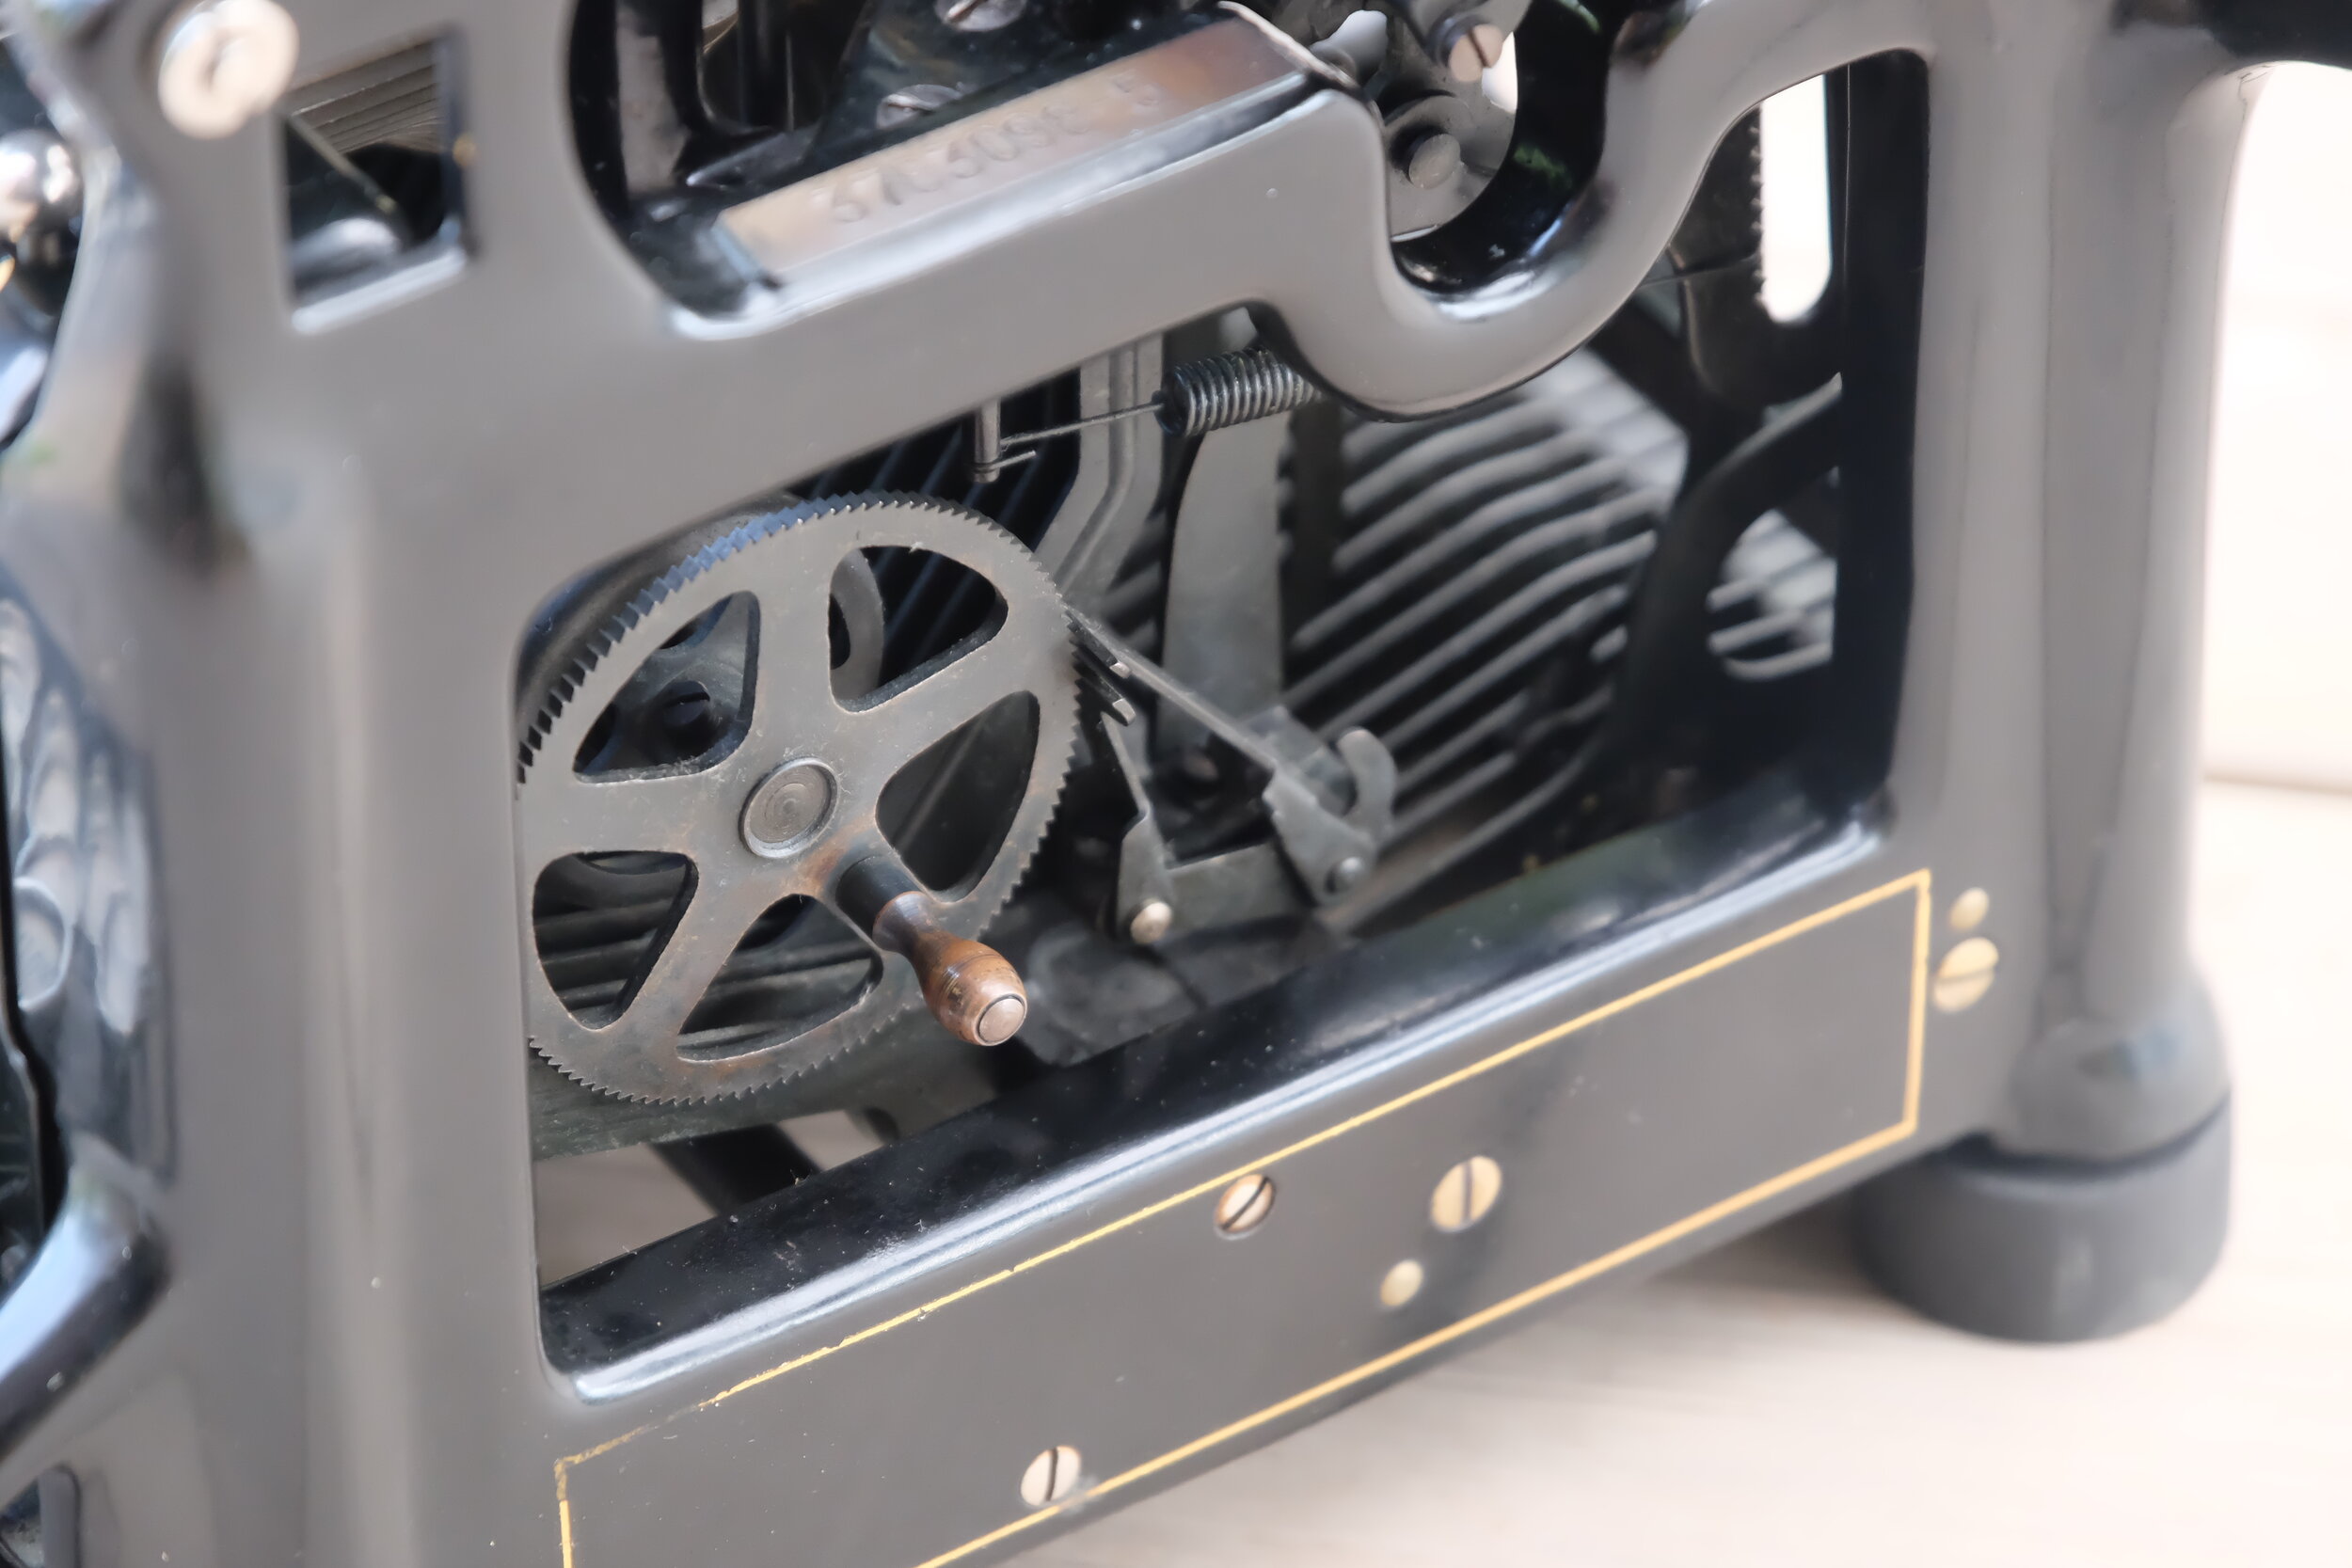
Blick is a fascinating machine also with regard how many adjustements are available to the user. Not only line spacing can be adjusted to whatever distance - unlike on other machines where only “clicked”, predefine spacing is available - here one can decide how early the ring will rang (black screw) before end-of-the-line blockade engages (spring-loaded tongue above) and stops the carriage from moving!

Front ruller is spring loaded on both sides, keeping the page pressed towards the platen. Off goes even this!

And so I ended up with bare, cast-iron frame, all accessible for cleaning.

Lastly I unscrew both holding brackets for polishing.

I always have doubts at this stage if I will manage to put all these parts back together…

After cleaning and chrome polishing, ready for assembly. The platen is in good shape, I only sanded it to remove oxidised layer of rubber. It is still rubbery after all these years!

Putting it all back was surprisingly easy. The last part is the type wheel. I clean it in isopropanol.

Quite a bit of old ink went off.

I fabricate a new ink roller by punching it from natural felt. I want to experiment with different types of ink, keeping the original roller reserved for black ink.

Oak-case got repaired, lightly sanded and varnished.

I used traditional varnish (Epifanes) as it was certainly what was used originally. The case is curing in the evening sun.

That concluded the restoration.

Ready for typing!

Bell-lever spring (for Ricardo)

On my machine the bell-lever is actuated by torsion-spring which is installed on lever´s pivot axle:

Spring´s one arm is extending through screw-head and is barely visible where the arrow points below:

Now when I look closely I see that there are two opposite holes which could indeed accommodate a small, “flatish” spring which could do the same:

I imagine on Bruno´s machine it is like that but the spring is too tall and is in a way of moving carriage.

September 08, 2021 /Lukasz Kumanowski
8 Comments

German Blick

September 07, 2021 by Lukasz Kumanowski

This little fellow came to me from Germany. It is Blickensderfer No.8, with German-optimised keyboard layout.

We are now in the very beginning of XX century, around 1909. Strange as it may seem QWERTY keyboard was only recently de-facto standard. Most, if not all, typewriters had this layout already adapted. Only one manufacturer kept his ingenious idea of making it better, more optimised for particular language: George Canfield Blickensderfer.

Most people do not realise that QWERTY layout comes originally from limitations in machine design. If one places most commonly used letters close to each other there is a high risk that a fast typist will strike two letters quickly enough to tangle the hammers and jam the mechanism.

Remedy for that was to cleverly spread these letters among others so that jamming is less likely to happen. With typewriters development the mechanism became more and more clever as to avoid it to happen and in the end it was no longer a problem but QWERTY layout stayed.

Blickensderfer machines, unlike other standard, front-strike machines, had no problems with tangling hammers upon striking two adjacent letters at the same time.

There are no hammers!

Blickensderfer designed a machine which uses a drum with 3 rows of letters on its circumference. Each key stroke rotates the drum of appropriate angle and strikes the paper, printing the letter chosen. Not only the machine could be built smaller and simpler but one was also free to design a keyboard layout which is optimised to certain language.

So came DHIATENSOR keyboard for which Blicks are so famous.
Blickensderfer studied the structure of English language and determined that most commonly used letters in written English are DHIATENSOR. He placed them on the bottom row so that the typist did not have to move hands further for ca 85% of the time. The second row contains letters used for 13% of the time and the last row contains the remaining 2%.

Clever as it was it was already too late.

Its main competitors, mainly Remington, have already flood the market with their QWERTY machines. The public was reluctant to adapt something new but Blickensderfer persisted.

In the end, not to lose the market, even he was forced to adapt so he started offering his machines with “Universal” (QWERTY) keyboard in place of “Scientific” (DHIATENSOR) layout. However - customers were asked to sign a statement that they indeed want a Blick with inferior keyboard layout!

My Blick has German-optimised keyboard. Same principle but adapted to another language.

Another interesting design feature is that the machine does not use inked ribbon. Instead the drum, on its way to strike the paper, is directly inked by felt roller, soaked with ink, rolling on the face of the letter just before it is printed.

For “mechanically inclined” crank-heads like me the Blickensderfer is an extremely interesting mechanism. One can clearly see that the man behind the design was a genius. It is elegant, simple in its nature but damn sophisticated in details. As it was nicely by Lucas Dul here: it is a “violent hellscape of mechanical hatred”.

I am still working on print quality - so far the result is quite OK but it can be much better. I use stamp ink mixed with 85% glycerine (to keep it from drying too fast) in 50-50 ratio. Probably better ink and new roller will do the trick but for now it looks as on the picture.

When I got this machine it was not working. Layers of dirt and dried oil clogged the mechanism. As it was totally new mechanism for me I proceeded very carefully and eventually I got it to move. Apart from dirt, broken carrying case, missing some springs, lacking the case key and wrong feet on the machine all seemed to be in place. My journey through the mechanism is described here.

Below are some more pictures of the machine and carrying case after the renovation.

I plugged all unnecessary holes drilled in this nice oak case and re-varnished it. Teak plugs match nicely with old red oak and are hardly visible.

Original label was in good shape, new coat of varnish will protect it for years to come.

Barbarians who found this machine, locked in its case without the key, did not bother opening it properly but they broke the lock (and part of the case) to reach the machine. I needed to play locksmith a bit to fix the lock and make a new key.

A bit crudely carved in mild steel but the key works fine and the case is useable again.

With its new feet matching cavities in the oak base the machine sits firmly and can be additionally screwed from below for safe transport.

Dirt, grit, broken springs and almost completely disassembled Blick 8 can be seen here.

September 07, 2021 /Lukasz Kumanowski
Comment

It's all about the typeface - Oliver 9

August 21, 2021 by Lukasz Kumanowski

Yes, there came another one. Another “batwing”, steampunk typewriter in my arsenal.

Why?
I already have Oliver 5, Oliver 9 is not that much different, is it?

Well, it is!
Apart from, otherwise interesting, mechanical differences no.9 has much smoother typing action and, most of all, it has Printype! This typeface for which Oliver is well known..

There is an interesting article on OZ Typewriter blog about Oliver’s “revolutionary type” claim and how non-unique this font was at that time - there were similar fonts offered by typewriter manufacturers. However, it became somehow “the Oliver thing”, especially now when most typewriters available in thrift stores or eBay are either Pica or Elite. These with special fonts (cursive, Imperial etc) tend to be sought after and reach very high prices. Oliver 9s, on the other side, all have this font. Sure, these machines are not super-common but still plenty of them are out there so one can find his machine and enjoy shaded, bold typeface which looks so great on the paper.

Fotostory of renovation of this machine, with some no.5 vs no.9 comparison photos, can be found here.

August 21, 2021 /Lukasz Kumanowski
Comment

Crocodile typewriter: Oliver no.9

August 21, 2021 by Lukasz Kumanowski

It is almost impossible to find Oliver typewriter here, on local Swedish market. They are, however, quite common in US. Being under the spell of this machine I wanted to try this famous Printype typeface which was a standard on Oliver 9 machines.

I bit the bullet and imported such machine from US. It is a nerve-wrecking experience: tracking the package’s way through Covid-cripled World, with frequent stops in airports and no update on progress for many days. Eventually, after 7 weeks I got the machine home.

It was working out of the box although a bit stiff and very dirty. It was dripping with oil which would soon atract all the dust and block the mechanism. Armed with experience of working on its older brother Oliver 5 I jumped into the job of cleaning and adjusting it.

The first thing to fix was pencil holder which got crashed, apparently when someone inverted the machine without first taking this delicate feature out of the way.

This is made of brass so, being over 100 years old, tends to be very brittle. I started very gently straightening it and it snapped instantly.

I could have silver-soldered it but I decided to glue it with steel epoxy instead.

Left overnight for proper curing.

Another thing which was entirely missing was a drawband clip. This smart little fixture enables removing the carriage assembly without untying the drawband - it simply snaps into a hook on machines’ base and jumps back into place when one returns the carriage. I borrowed the original from Oliver 5 as a template and decided to make a brass version of it.

Oliver 9 has wider catch hook - apparently an improvement over no.5 which adds stability - so I manufactured a bit wider clip to take advantage of this feature.

It is skinnier than the original but test-mounting and running the machine prove that it works equally well.

Next I focused on the carriage. There were some issues to be addressed there.

As on most Olivers the nickel-plating was mostly gone and some surface corrosion appeared in many spots. Paint job on the whole machine is heavily bubbled and resembles crocodile skin. I got this machine from California so I suspect that it was standing somewhere on the window sill as a decoration, gathering sunlight throughout all these years. Iron-casted body could get very hot so paint got damaged.

That does not concern me though, bigger problem is the platen.

The rubber is cracked and hard as wood. I intend to use this machine so this needs to be fixed.

To remove the platen from Oliver one needs to disassemble half of the carriage. Good opportunity to clean it and degrease everything.

To my joy almost all screws on the machine are in pristine shape - no butchered heads! There are only a few and one of them was carriage knob locking plunger. However I tried I could not remove it - it’s narrow head was half-stripped. I decided to drill it out.

Thuis is, of course, ANSI thread so I don’t have a substitute plunger. Anyhow, it had to be removed to take out the knob. It’s M4-ish size so I picked the proper drill, tapped the screw properly and hand-drilled the damn plunger.

It went surprisingly well, I still have threads in the opening so once I get the correct plunger I can replace the old one without re-tapping the hole.

After this obstacle was dodged the rest went smoothly.

I noticed straight away subtle differences in mechanical construction between this machine and the older Oliver 5. For example line spacing shif mechanism has a spring built in - I shifted that carefully to keep it installed and not to break it.

In a few moments the whole assembly was in parts, dismantled enough for proper cleaning.

White spirit with engine oil - typewriter soup - worked perfectly cleaning all crud. Thin layer of oil - almost not visible - which is left after naphtha evaporates will protect exposed steel from rust.

Eroded nickel plating on many parts needs to be removed or polished.

Some elbow grease and abrasive pads do the job neatly.

Paper fingers - parts which I call machine’s jewellery - needed some attention, too.

These are a little mystery to me since all Oliver 9s I saw have these fingers shaped the same as on Oliver 5 while these are just plain straight.
Old nicker peeled off and the rest was buffed to shine on the first one.

Then came the platen. It was worn and cracked in many spots - a candidate for recoating for sure.

I sanded it, to remove oxidised rubber and hopefully some surface cracks.

A bit better but why not sleeve it into a bicycle tube? This will make it possibly too soft but it is easy to remove the tube in case it becomes a problem.

It was a tight fit but after cutting all to size and sanding the platen looks much better.

I reassembled all parts and lubricated these few spots which need oiling.

Very little oil is needed for typewriter to function properly. All excess should be wiped clean, to keep dust and dirt from sticking to parts.

Next came the main body. I removed the carriage assembly - the procedure is similar to Oliver 5 so that went easy but it was interesting to note differences in construction at this stage, too.

Pivoting points for Caps and Fig positions are moved down into the body, unlike in Oliver 5 where they reside on both towers. That may be the main reason that Oliver 9 is so much smoother in operation.

Cleaned assembly dries in the evening sun.

This machine is able to type in 2 colours - simple spring-loaded screw holds ribbon holder which has a grove to slide forward or back, thus offering different parts of the ribbon to type slugs hitting it. After bathing it in degreasing solution the mechanism started to work smoothly.

Next came the main body with the remaining mechanism.

Cleaning the internals from the remaining oil and dust took some time and patience but the effect is worth it.

Paintwork is really in bad shape. I considered stripping it entirely and keeping the machine in bare-metal version but in the end I decided to buff it a bit with Fulgentin and see if that can do the trick. Parts covered with patent plates show how nice the enamel was when the machine was new.

I started to put things back together.

I inspected the main spring - it is still in good shape, probably due to lacking knurled screw like in Oliver 5 which enabled easy tensioning of this spring. Folks tend to mess with that too much and often these springs just break prematurely. Oliver 9s have this possibility removed.

“Jewellery” screwed back onto the body.

Breaking mechanism for tabulator - one which slows down the main spring so that the carriage does not move too rapidly - is changed compared to Oliver 5. On Oliver 9 it was moved into the body and only short rod is sticking directly under the main spring, pressing against wide, steel spring which slows down the main spring cylinder. On my machine it needed adjustment - it was protruding too far up and was stalling the movement.

The easiest way to adjust it is to remove it from the machine and shift the blocking collar a tiny bit lower.

It is an iterative process as very minute adjustments result in drastic changes but after a few attempts I got it nailed down.

This machine had rubber feet in pretty good shape - they were present and mostly intact but the rubber, of course, was rock-hard. I manufactured new feet from fresh rubber.

I found that the quickest and easiest way to clean the key tops is to dope them in Ajax. Dirt, nicotine and oil just slide away in a few minutes. One just needs to make sure to not leave them for too long - after several hours the keys - especially black ones - became soft on the surface. They solidify after washing in fresh water anyway but better safe than sorry. Half an hour of soaking in Ajax is enough to clean everything.

Machine starts to look proper again.

I was lucky to get the machine with original spool covers. To have them covering the ribbon spools one needs to use Oliver spools, standard spools will be too high for the covers to fit. I have not yet manufactured Oliver-type spools so to keep going I fixed Oliver-lookalike spools from bits and pieces of generic spools.

It worked pretty well.

With all back in place I could perform firs type test.

This font is stunning! It appears that the platen covered with bicycle innertube works pretty well in this machine. Type slugs are not punching through the paper although they do leave deep imprint which makes double-sided writing rather impossible.

I noticed that capital letters are not synchronised with small letters. It is easily adjusted on the back of the machine.

Now all looks good!

I happily banged nonsense, just to fill the page with this beautiful typeface. In comparison to standard font, as on Oliver 5, the Printype font is much more pleasing to the eye.

Oliver 5 typeface

Oliver 9 Printype typeface

The machine is ready for service!

I rolled in a sheet of fine paper and typed a letter. What a joy to type!

I hauled out my Oliver 5 to shoot some comparison pictures of both machines.

One can swap the carriages between machines - they differ in some details but are fully compatible.

Oliver 5 without the carriage. Tab breaking mechanism is visible on the left, running on the body surface.

Oliver 9 has it hidden in its guts.

Bottom view reveals some more differences. Manual ribbon reverse mechanism is simplified in Oliver 9.

Good dose of mechanical porn, ain’it?

That was fun and rewarding work. For now I’ll keep both machines but should I ever consider parting with one of them it would be Oliver 9 which will stay with me.

August 21, 2021 /Lukasz Kumanowski
2 Comments

Triumph Tippa 1 - carriage rack frame repair

August 18, 2021 by Lukasz Kumanowski

I bought this small typewriter when I was searching for Olympia Splendid. Both share the same streamlined body and are very small and reliable typewriters. Now, when I own both, I know that they are, however, quite different mechanically.

This Triumph Tippa was my kid’s a favourite machine - because of its light colour, in contrast to my other machines which are mostly dark in colour and much bigger. However - she does not use it and I have too many machines so I consider giving it away or selling.

As to be sure that I trade a functional typewriter I cleaned it again and run extensive diagnostics - which is typing on it really fast. All seamed good until I noticed that it jumps a letter in one certain position along the carriage.

I took a closer look and discovered a problem. I describe how I handle it in more details here.

August 18, 2021 /Lukasz Kumanowski
Comment

Triumph Tippa 1 - repairing damaged carriage rack frame

August 18, 2021 by Lukasz Kumanowski

This little fellow had a problem which I didn’t notice at first: when typing really fast it was jumping a letter. It happened always in the same position, with whichever letter and only once in the whole line which directly pointed me away from escapement gear itself but more towards rack frame.

I removed it from the carriage and upon closer inspection I found a suspected spot just about in the position where skipping occurs - in the middle of the line.

A tiny bit at the lower end of one tooth is missing. I suspect it happened when the machine was carried in its case and dropped or bumped hard into something. Probably the previous owner did not use locking mechanism which decouples the escapement and by that secures this fragile bit from damage. Tippa has this mechanism very well engineered but, of course, it serves no purpose if not used.

To be sure that this is indeed the cause of the problem I temporarily rebuilt the tooth tip with steel epoxy.

I dispensed excessive amount onto the damaged area, waited 12 hours for it to fully cure and then shaped it with needle files to become a tooth again.

Mounted back in the machine it proved to work - but for about half a page. Then it failed - but this was to be expected.

This part resides on the bottom of carriage assembly and interfaces escapement mechanism which controls movement of the carriage as one types. Schematic from US War Department typewriter manual shows more details (it shows other machine but the principle is the same).

Having nailed down the problem I employed heavy machinery to fix it. I routed out the damaged area and cut a piece of steel matching the thickness of the cavity.

Some shaping to match the cavity followed.

Once happy with the fit I pressed new steel into the cavity.

Recreating teeth with needle files concluded the repair.

Assembled machine was taken for some more tests. All works fine now and no skipping occurs regardless of how quickly or badly one types!

Now - one can argue that fixing such machine is not worth it. It would be easier to get another one and use this one as a spare parts donor.
The point is: I like this particular machine and I do not intend to get more of these. It types so well, has my favourite Elite font, is lightweight and has rubber parts still in good shape. It would feel bad to dump it just because 0.89mm of hardened steel cracked in one spot!

Besides - it was fun to fix it.

So now I feel confident to hand it to someone who wants to actually use it.

Maybe Marek’s son will like it?

August 18, 2021 /Lukasz Kumanowski
Comment

Antares Parva

August 03, 2021 by Lukasz Kumanowski

Italians have a sense of humour giving such a name.

Antares (anti-Ares in Greek mythology), know also as anti-Mars or Scorpions'-Heart is a gigantic M1 red supergiant in Scorpion constellation, close to end of its life.

Parva, on the other side, means little in Latin (as opposed to magna).

So there we have it: skinny ultraportable typewriter, relatively unknown in Typosphere. Given it’s resemblance to Hermes Rocket/Baby which I have I was not sure if I want to get yet another one. But the price was a real bargain so I bit the bullet and got it.

Oh dear, and I’m not disappointed! Oh no, indeed.

More about the machine can be found here.

August 03, 2021 /Lukasz Kumanowski
Comment

Tiny red-supergiant: Antares Parva

August 03, 2021 by Lukasz Kumanowski

It resembles Hermes Baby in a way the outer shell is covering the machine. But that is all regarding similarities.

This machine is a different and I dare to say much better than any other ultra-portable typewriter I have or tried.

It came to me at the price of peanuts and the only problem it had, apart from being dusty, was dried-out ribbon and deteriorated feet. Otherwise all was working fine - and once I test typed on it I got so impressed by the feel and smoothness that I rushed to open it, to see the guts and give it a good clean.

The whole frame and panels are made of aluminium. Very lightweight and sturdy. Sound-isolation on bottom and side panels is accomplished with thick paper-like cloth. Apparently to save space, it is an ultraportable after all.

Panels have cleaned very well, as a last touch I treated them with Fulgentin - it makes colours more vivid and stand out nicely.

Bare-bone machine started to reveal its features.

Interestingly, the crown is made as a separate piece, standing away from the basket. I recon it makes the machine more silent while performing its function of stopping type bars and causing them to “snap” onto paper.

I brushed and blew out all dust. No chemical cleaning was needed (thanks goodness nobody sprayed it with WD-40), only for ribbon vibrator’s arm I had to use a bit of my typewriter’s soup.

Quick job!

Before assembling back the machine I had to fabricate new feet as old ones were far gone.

Same with space-bar cushions. Luckily, typewriter repairmen has an easy life in Sweden - spare parts can even be bought in Biltema!
Well, they call it gummigenomföringar but don’t be fooled by that.

In this case I build each feet from three parts.

No glue needed - they sit just with friction. Final product fits the bill.

The machine is assembled in no time, the only fiddling was needed when mounting side panels - one needs to simultaneously mount spring-loaded side pins, used by the outer shell.

Unlike Hermes Baby the outer shell in Parva is made of bakelite. I’m tempted to entirely remove this paint - this amber gold material beneath can look intriguing when entirely revealed.

I leave it for now and search for new ribbon for this jewel.

Although the machine came with nice, metal spools I wanted to try carbon tape I got from Charles. My trial to use it on Urania failed miserably, I was hoping that Antares - being much more modern construction - can handle such thin ribbon.

Yes it can! As seen on used part of the tape: the mechanism spaces characters apart enough to not cause overlapping.
I was cocky enough to put Olivetti-type spools (with carbon tape already on them) into Parva. They seemed to fit although are a tad wider.

Type quality did not impress me thou. I was expecting dark, sharp print. Instead the characters are sharp, yes, but not that dark as I want.

To have a benchmark regarding how carbon text will look like - to rule out that the tape is deteriorated - I put carbon paper sheet and type through it, in Stencil mode.
This is how it must had felt before “visible” typewriters appeared on the market - typing blindly, not seeing the result directly.

Comparing both methods shows - apart from smudges caused by carbon sheet - that the print is marginally better using the sheet than with this NOS-grade ribbon.

Well, seems that Parva and Columbia tape do not like each other. I was not satisfied - such fine machine needs to have proper ink ribbon to show its full potential.

Moreover - after a while I managed to jam the machine. It turned out that Olivetti spools, being too lose on ribbon-advance shaft, were wiggling around and occasionally going too far on the side and jamming the machine.

Disappointed, I removed carbon-tape spools and winded fresh, Pelikan ribbon onto original spools. The result was stunning! How light typing became and how much darker the print is!

Now we are talking! Fresh ribbon and “Bob is yer uncle”!

Out of curiosity I took out my other ultra-portables: Groma Kollibri and Hermes Baby, to size-compare them with Parva.

Although bigger than other two - and not as sexy as Kollibri - Antares has the best typing feel of them all. It also shares carriage-tilt idea with Groma, shifting is so light that feels like basket-shift mechanism.

While Kollibri is still the smallest and thinnest of all - mechanical MacBook Air of that time - it is also very heavy, compared to Hermes Baby and Antares Parva.

Parva has nicely marked line spacing options - with free wheel setting marked as “0” position.

Overall Antares Parva beats them all, at least for my taste. Typing action is soo light and smooth that touch-typing is no problem at all.

Lightweight machine with small Elite-like font and nice design makes it a go-to typewriter to take with me on a hiking trip.

August 03, 2021 /Lukasz Kumanowski
1 Comment

Cherry-red Urania, one of its kind

July 31, 2021 by Lukasz Kumanowski

I remember that to acquire this machine I had to stand rather unusually hard fight on the auction. Not that there was big money involved but most other machines I own had no more willing buyers than me.

This Urania was different: there were folks willing to get her. I’m glad that in the end I won and here she is.
Machine came with - quite rare these days - original instruction and a small bag with spare screws!

As most old machines she had standard problems to address:

  • dusty & dirty mechanism

  • hardened platen

  • deformed paper-feed rollers

What was saved to her was WD-40 and thanks for that!

I removed the panels for cleaning and to remove the platen. That caused me a bit of trouble as the construction is not quite standard. That is exciting but sometimes frustrating to the point that hammer comes into hand if things don’t move the way they are expected.

Luckily I inhibited the impulse of hammering and finally lifted the platen. The trick was that most things in this assembly are the other way round, compared to standard machines.

No, this is not a machine for left-handers, rather opposite. It is just the way herr Clemens Muller thought is the best regarding functionality. And I admit that it works very well - with line & row advance on the right side I just use my stronger hand instead of left hand to make the move. Like most people on the planet.
It just takes a while to switch from the standard.

Unlike other machines the paper-feed rollers don’t just pop-out free after removing the paper deflector. They form a small subassembly, with springy connector in between. Smart - this way the system is prepared to any irregularities in fed material.

Flat spots, of course, disable the mechanism so I needed to address that.

The platen on this machine is so hard that it feels like plastic. Luckily it is not cracked - with wooden core inside that would be a catastrophe.

Surprisingly, the bigger rollers were still spongy and grippy. If not for the flat spots I would be happy with them. Smaller, front rollers were totally gone.

As with most non-standard machines one faces incompatibility problems. My stock of rubber hoses does not cover dimensions needed to replicate these rollers. However, given that I want to cover the platen with bicycle inner-tube - thus increasing its diameter - it will not harm if I reduce the diameter of paper rollers a bit. After all they are spring-loaded and will anyway (to some extend) get into the platen. The only concern would be line spacing - with platen increased too much single-line space would become too tight. However - the inner tube I mount is circa 0,5mm thick after sanding. That should not affect anything too badly.

Smaller rollers were far too gone so I replaced them with silicone tubing. Not epoch-correct but works like a charm.
Bigger rollers, still grippy, were turned into smaller diameter, almost entirely removing the flat spots.

Left roller assembly after turning, the right one is yet to be reworked.

Standard cleaning followed - but no chemical treatment was needed. Keys were cleaned and I straightened some inverted key-legends.

Unfortunately the trick with gripping the glass with a sharp compass and turning it to correct the direction did not work here. It is a real glass, not celluloid, it just didn’t want to move. I had to disassembly these keys to get things straight. Risky operation with these soft-metal tabs underneath - easy to break them.
I wish I had key-punching tool like repairmen had in the old days.

As this machines has ribbon-spools exposed I wanted to substitute ugly, plastic spools with something more classy. Luckily Olivetti spools which I traded with Charles fit the bill!

First I tried using carbon tape which was on these spools. The result was not impressive - it seems that the ribbon advance is too slow on this machine to take advantage of so thin ribbon. Characters were crowded on the tape, yielding bad quality text.

A bit disappointed I decided to keep the spools but rewind the precious carbon tape onto other spools. There are many meters of this tape winded onto the spool so doing it by hand was too boring. Drill machine with simple silicone adapter solved the problem in 2 minutes.

Rewinded with fresh, 2-colour ribbon the machine types perfectly.

Inner-tube covered platen works fine and looks quite OK. Good enough for me at least - I can now use the machine without waking up my neighbours.

Carriage locking and escapement release, for transporting the machine, is on the right side. Nice and sturdy although not as robust as on machines from later era. It can be easily tripped if the carriage is pushed to the right so I would not rely on it when shipping the machine in a package.

And so is Urania ready for use!

View fullsize IMG_3038.jpg
View fullsize IMG_3043.jpg
View fullsize IMG_3044.jpg
View fullsize IMG_3045.jpg
July 31, 2021 /Lukasz Kumanowski
Comment

Hey handsome! Underwood no.5 standard typewriter

July 19, 2021 by Lukasz Kumanowski

Handsome.
This is a word which comes to my mind when I look onto this machine. Its form is very classic and very balanced.

It is an archetypical typewriter, one which comes to mind when thinking about old, classic, desk machines: standard typewriter. Open, skeleton frame made of cast iron, no covers except on the front.
Mechanism proudly presented to bystanders and the user.

This particular machine was in generally good shape. Just very dirty and with all rubber components decayed. All decals are original.
It bears “honest patina” - places where hands of people before me rubbed the frame, wearing out the paint and decals. I like it and keep it intact as a part of machine’s history.

No butchered screw heads. She was either serviced by a proper mechanic or not serviced at all.

Most of all - it types like a dream.
I put it hand-in-hand with Royal KMM or even Erica machines. Even though there are decades between them the experience of typing with these machines is similar. Pure joy.

Below is a gallery of restored machine.

For those interested in “screws & dust” here is more detailed story of restoration.

View fullsize DSCF5385.JPG
View fullsize DSCF5383.JPG
View fullsize DSCF5381.JPG
View fullsize DSCF5382.JPG
View fullsize DSCF5386.JPG
View fullsize DSCF5390.JPG
View fullsize DSCF5388.JPG
View fullsize DSCF5389.JPG
View fullsize DSCF5392.JPG
View fullsize DSCF5393.JPG
View fullsize DSCF5379.JPG
July 19, 2021 /Lukasz Kumanowski
Comment
  • Newer
  • Older

Powered by Squarespace