Boatworks

  • Main
  • Louve
  • Typewriters
  • Workshop
  • Meritaten
  • Glypto
  • Motoko
  • Inspirations
  • About

Pentry rebuild

February 02, 2020 by Lukasz Kumanowski

During the week I was investigating different options for re-building my pentry. Metal lining felt too cold (stainless steel) or too troublesome in maintenance (copper or brass) and expensive. Tiles - or mosaic - seemed to suit the purpose but after closer inspection I dropped that idea: wet work, special cements and temperature requirements for laying them were not appealing. Besides - I was really leaning towards Albert’s comment to keep it retro and make it from mahogany.

That had a drawback though - the wood I have is at least 10mm thick mahogany. It feels bad to plane it to 3mm just to get it thinner, wasting the rest. Fortunately I found that I have a thin mahogany plywood laying in the workshop which will suit the purpose! This is an old pilot berth plank which I recently substituted with proper, thick mahogany plywood. This old piece, with many drilled holes, was on the way to container. Well - now I have a way to use it!

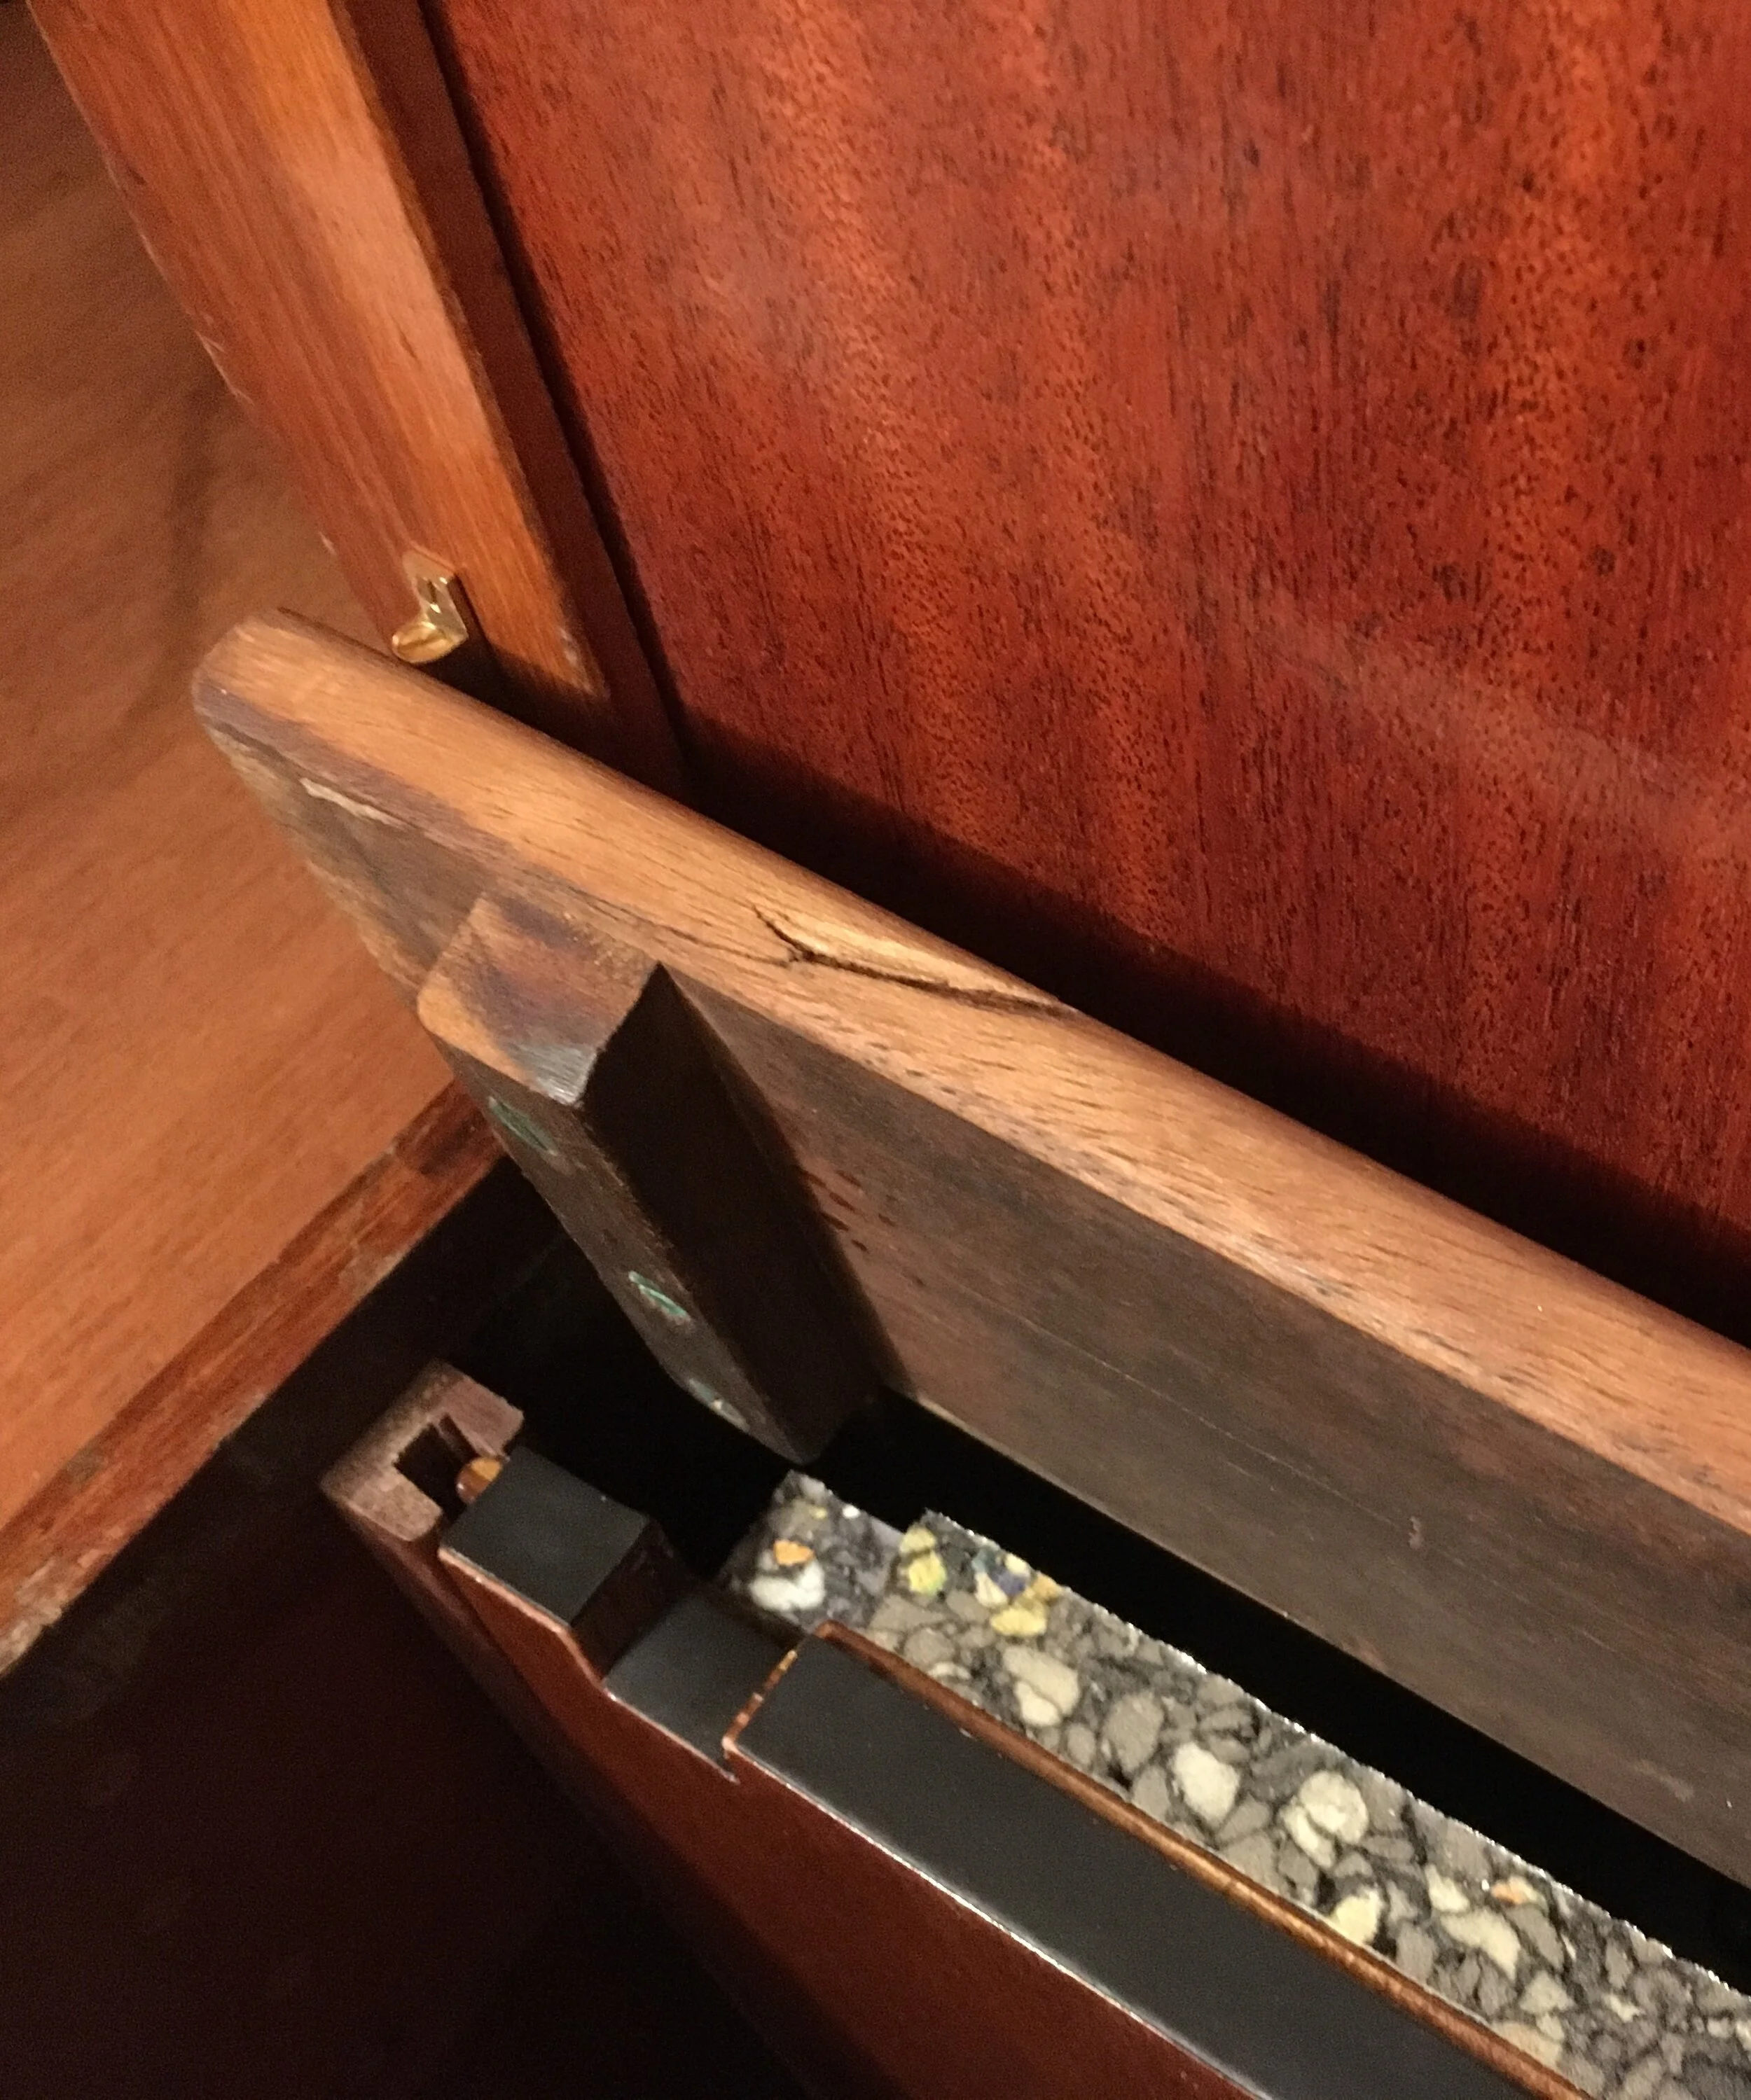
On Saturday I only have a few hours for boatworking so I started with small job - to have at least something done! Top step on cabin ladder, which hangs on piano hinge, was always driving me mad when I was working on the engine. It was constantly dropping on my head. Simple ball-spring catch added on the corner solves this problem nicely and unobtrusively.

View fullsize IMG_9157.JPG
View fullsize FullSizeRender.jpg

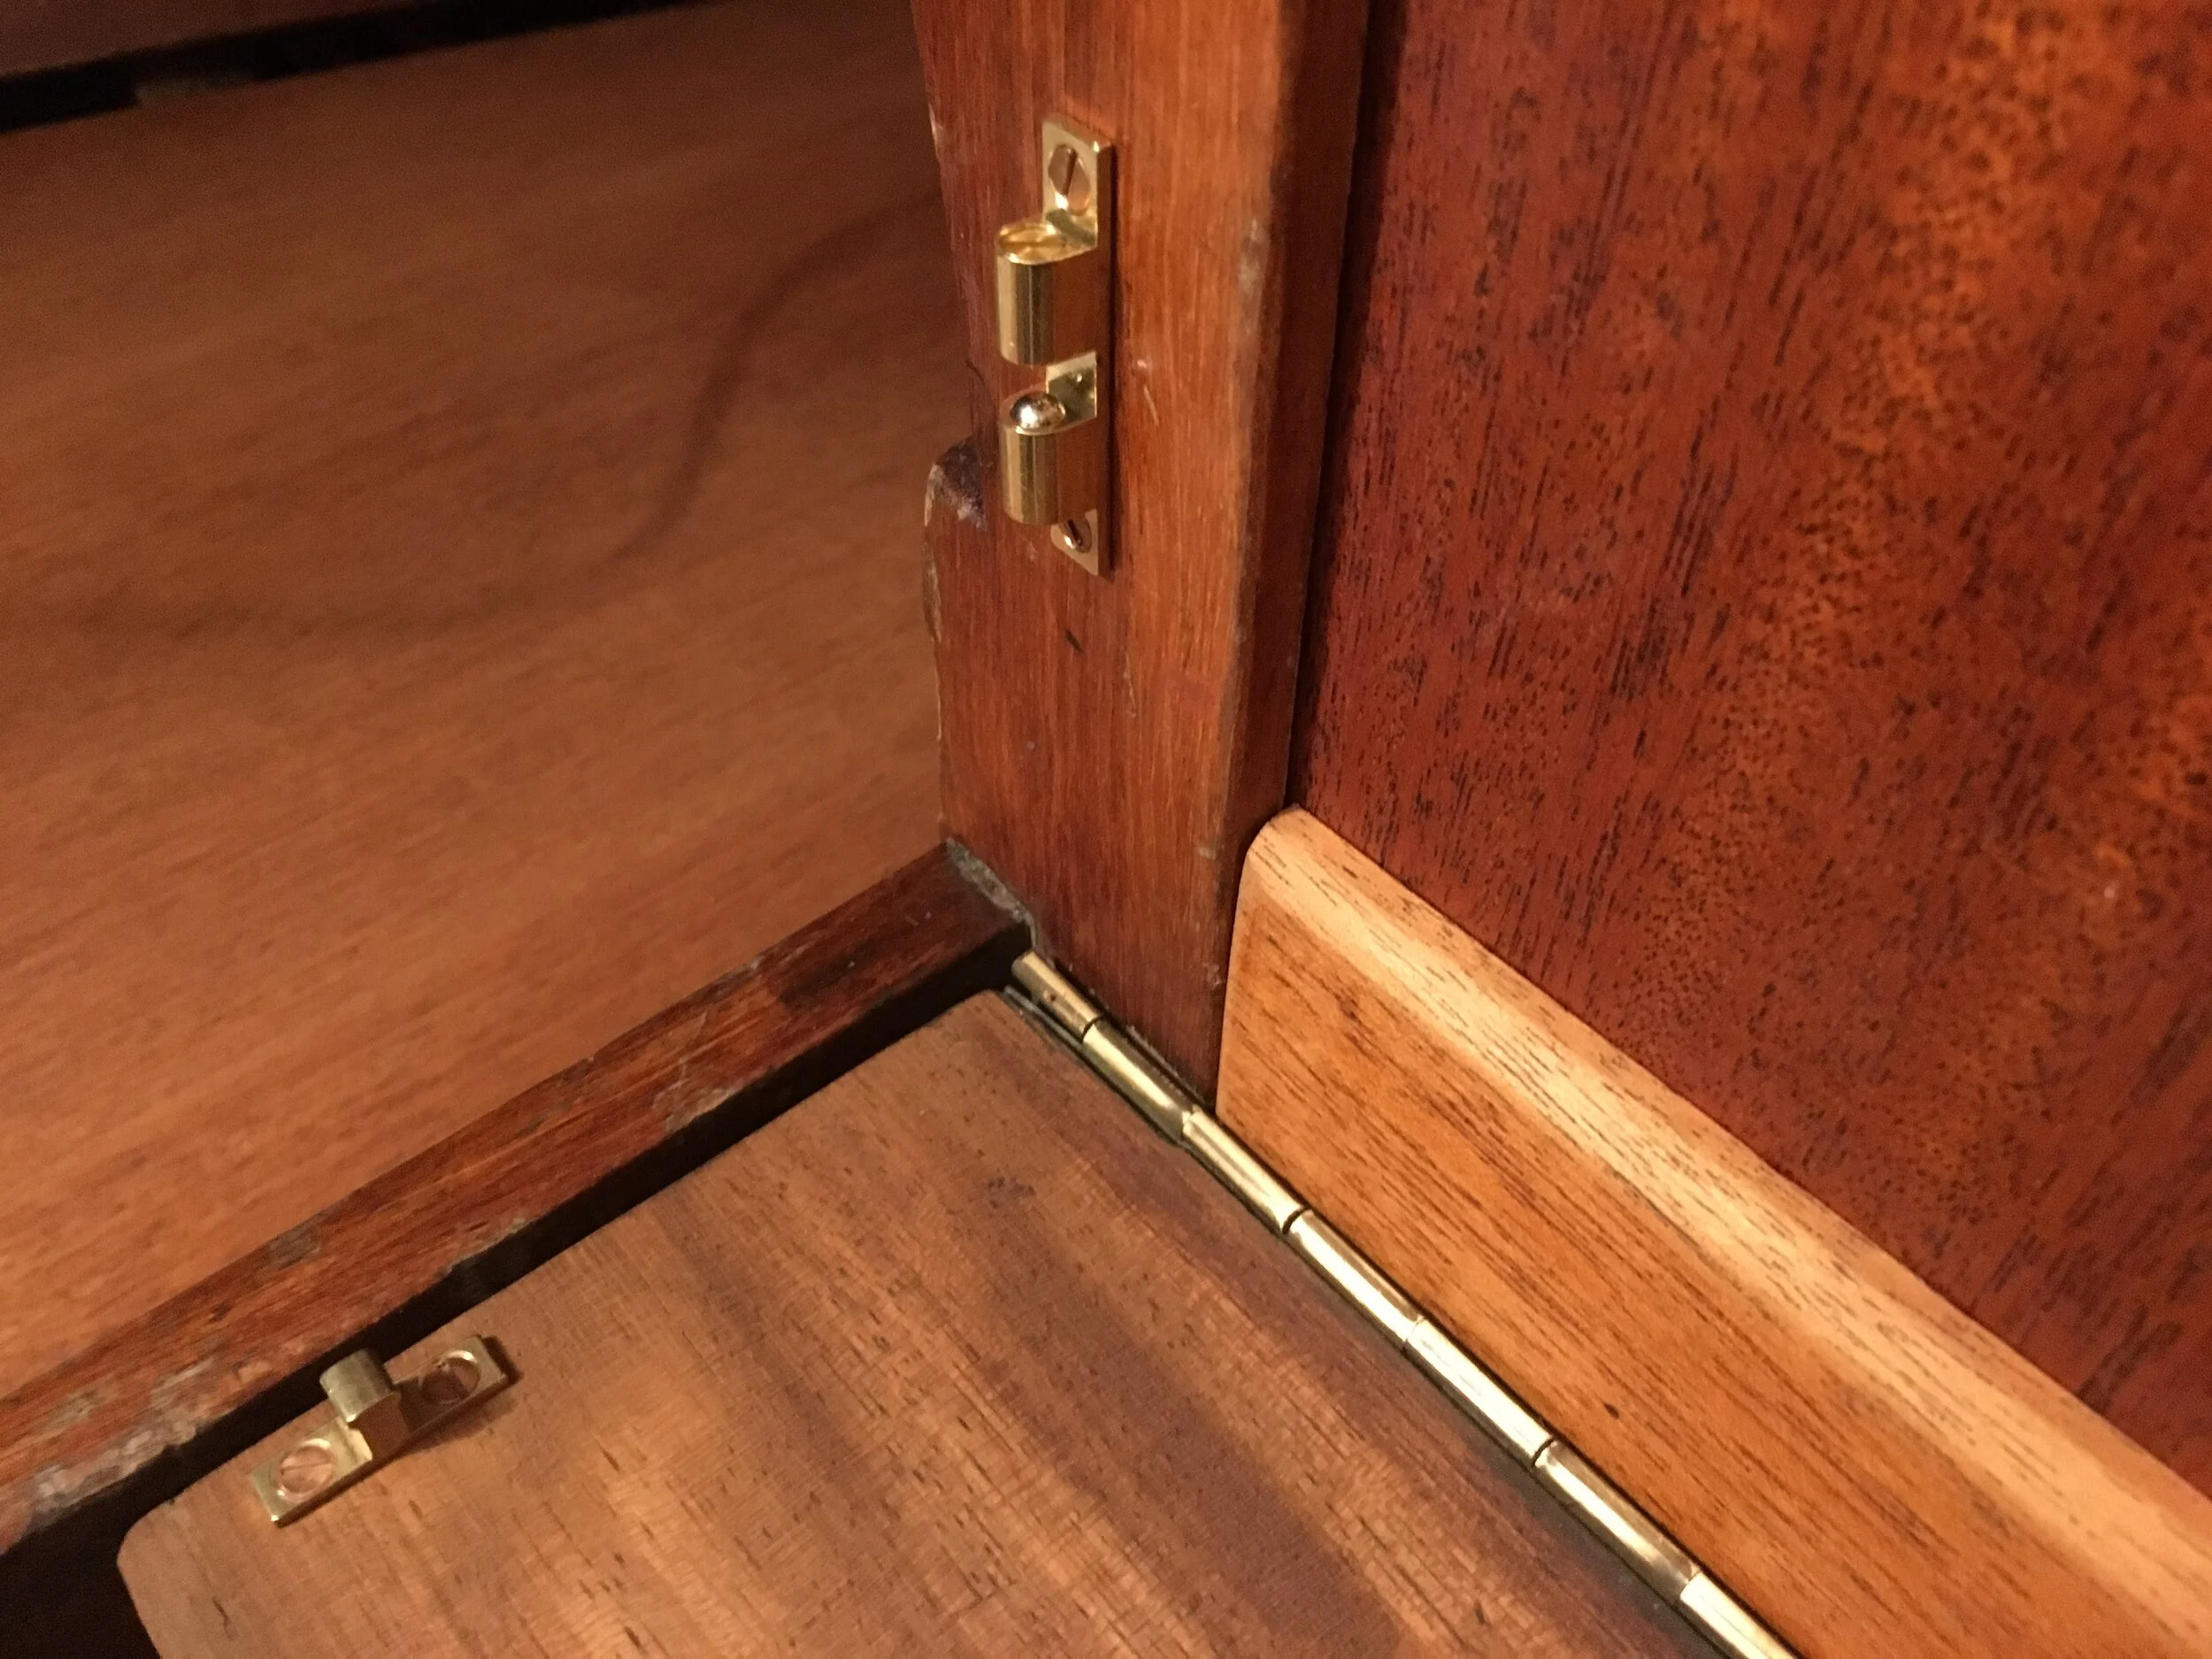
I turned then to pentry. My intended hinged work table will hang on new, brass piano hinge. I cut it from 1m stock and had enough left to replace the old and worn chromed hinge in the vicinity, holding the pentry top.

It was high time to replace it. Luckily it was attached with bronze screws but they were much oversized and looked ugly. New, properly dimensioned bronze screws fitted nicely countersinks in the piano hinge.

The next stage was to measure and cut new auxiliary kitchen top, serving also as door closing pentry cavity. For that I chose wide and relatively thin mahogany plank acquired from old boatyard in Norrköping.

It is a huge stock and on one edge it was split. To fully utilise the wood I chose to cut my component from the split edge as it was just big enough for my purpose.

Measurements and templates take much of the time during these jobs as nothing on the boat is truly square nor symmetric. It’s a pity to waste such wood with faulty or careless measurements.

Once cut I checked the fitting on the boat. Some trimming with block plane and the part fits.

This rough sawn wood needed quite a bit of plaining to get rid of band saw marks but I didn’t want to remove too much wood to maintain the thickness. Smoothing plane was called to service.

FullSizeRender-2.jpg
IMG_9167.JPG
IMG_9164.JPG

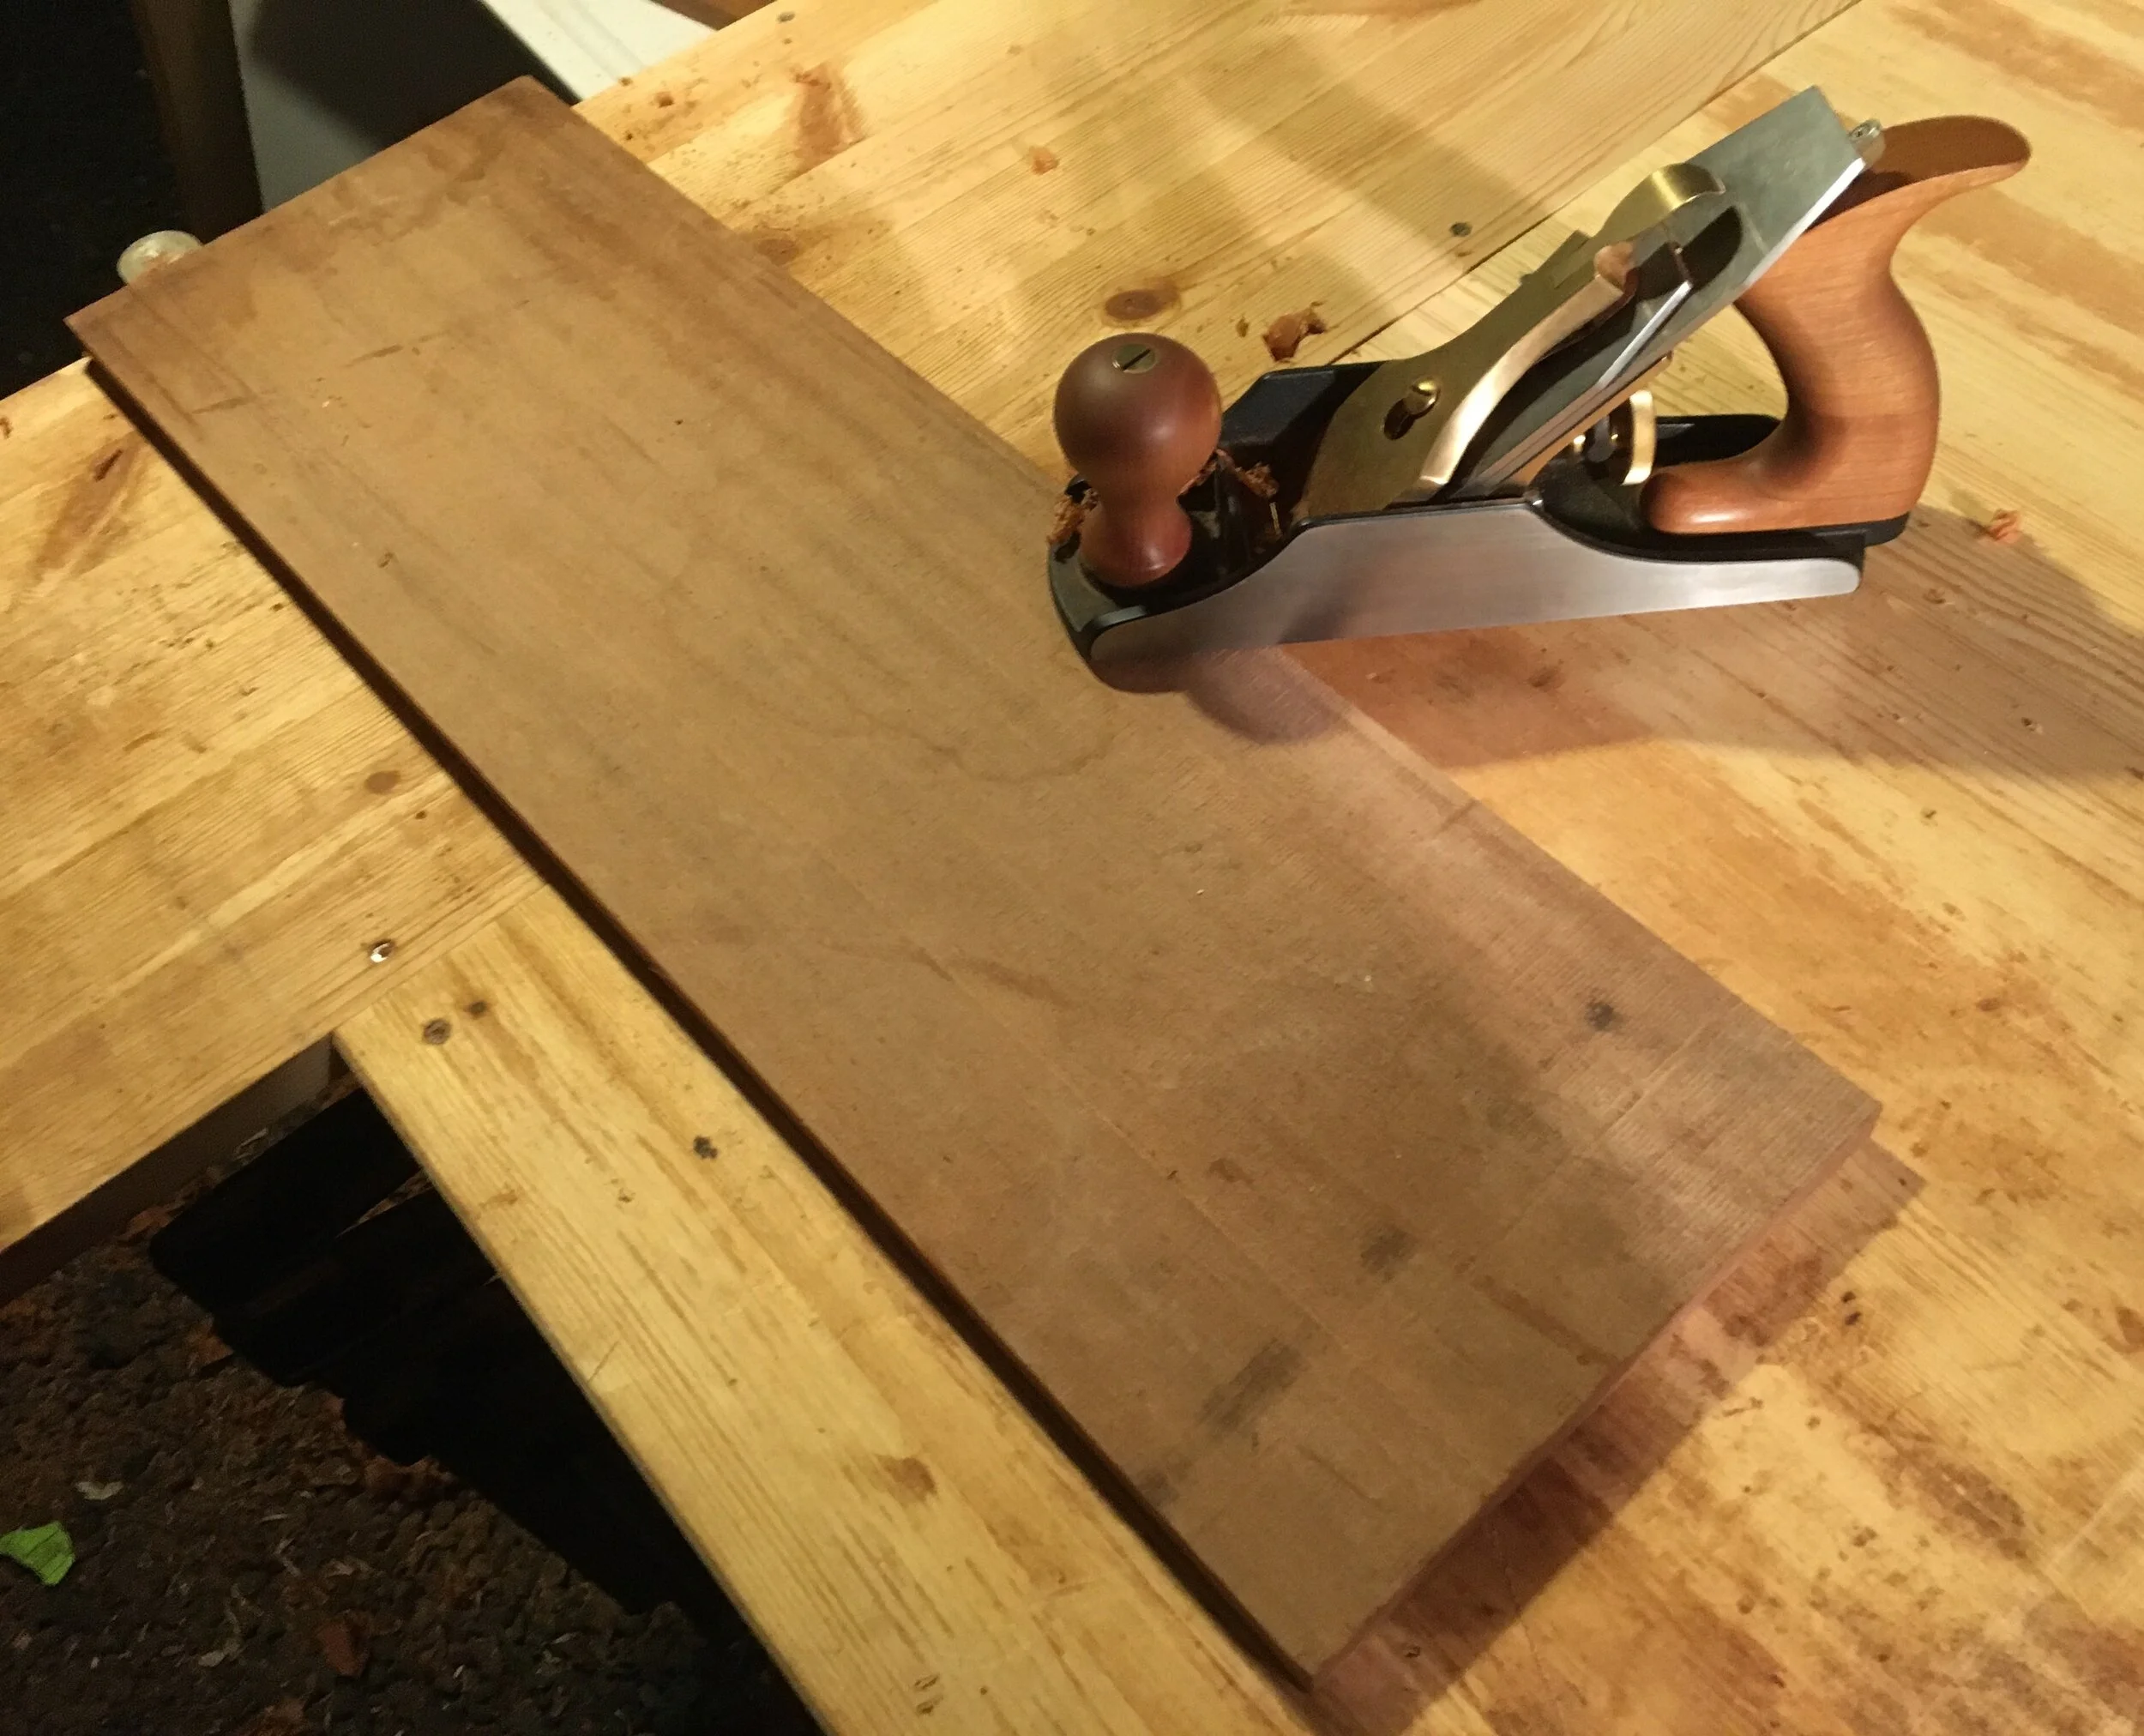
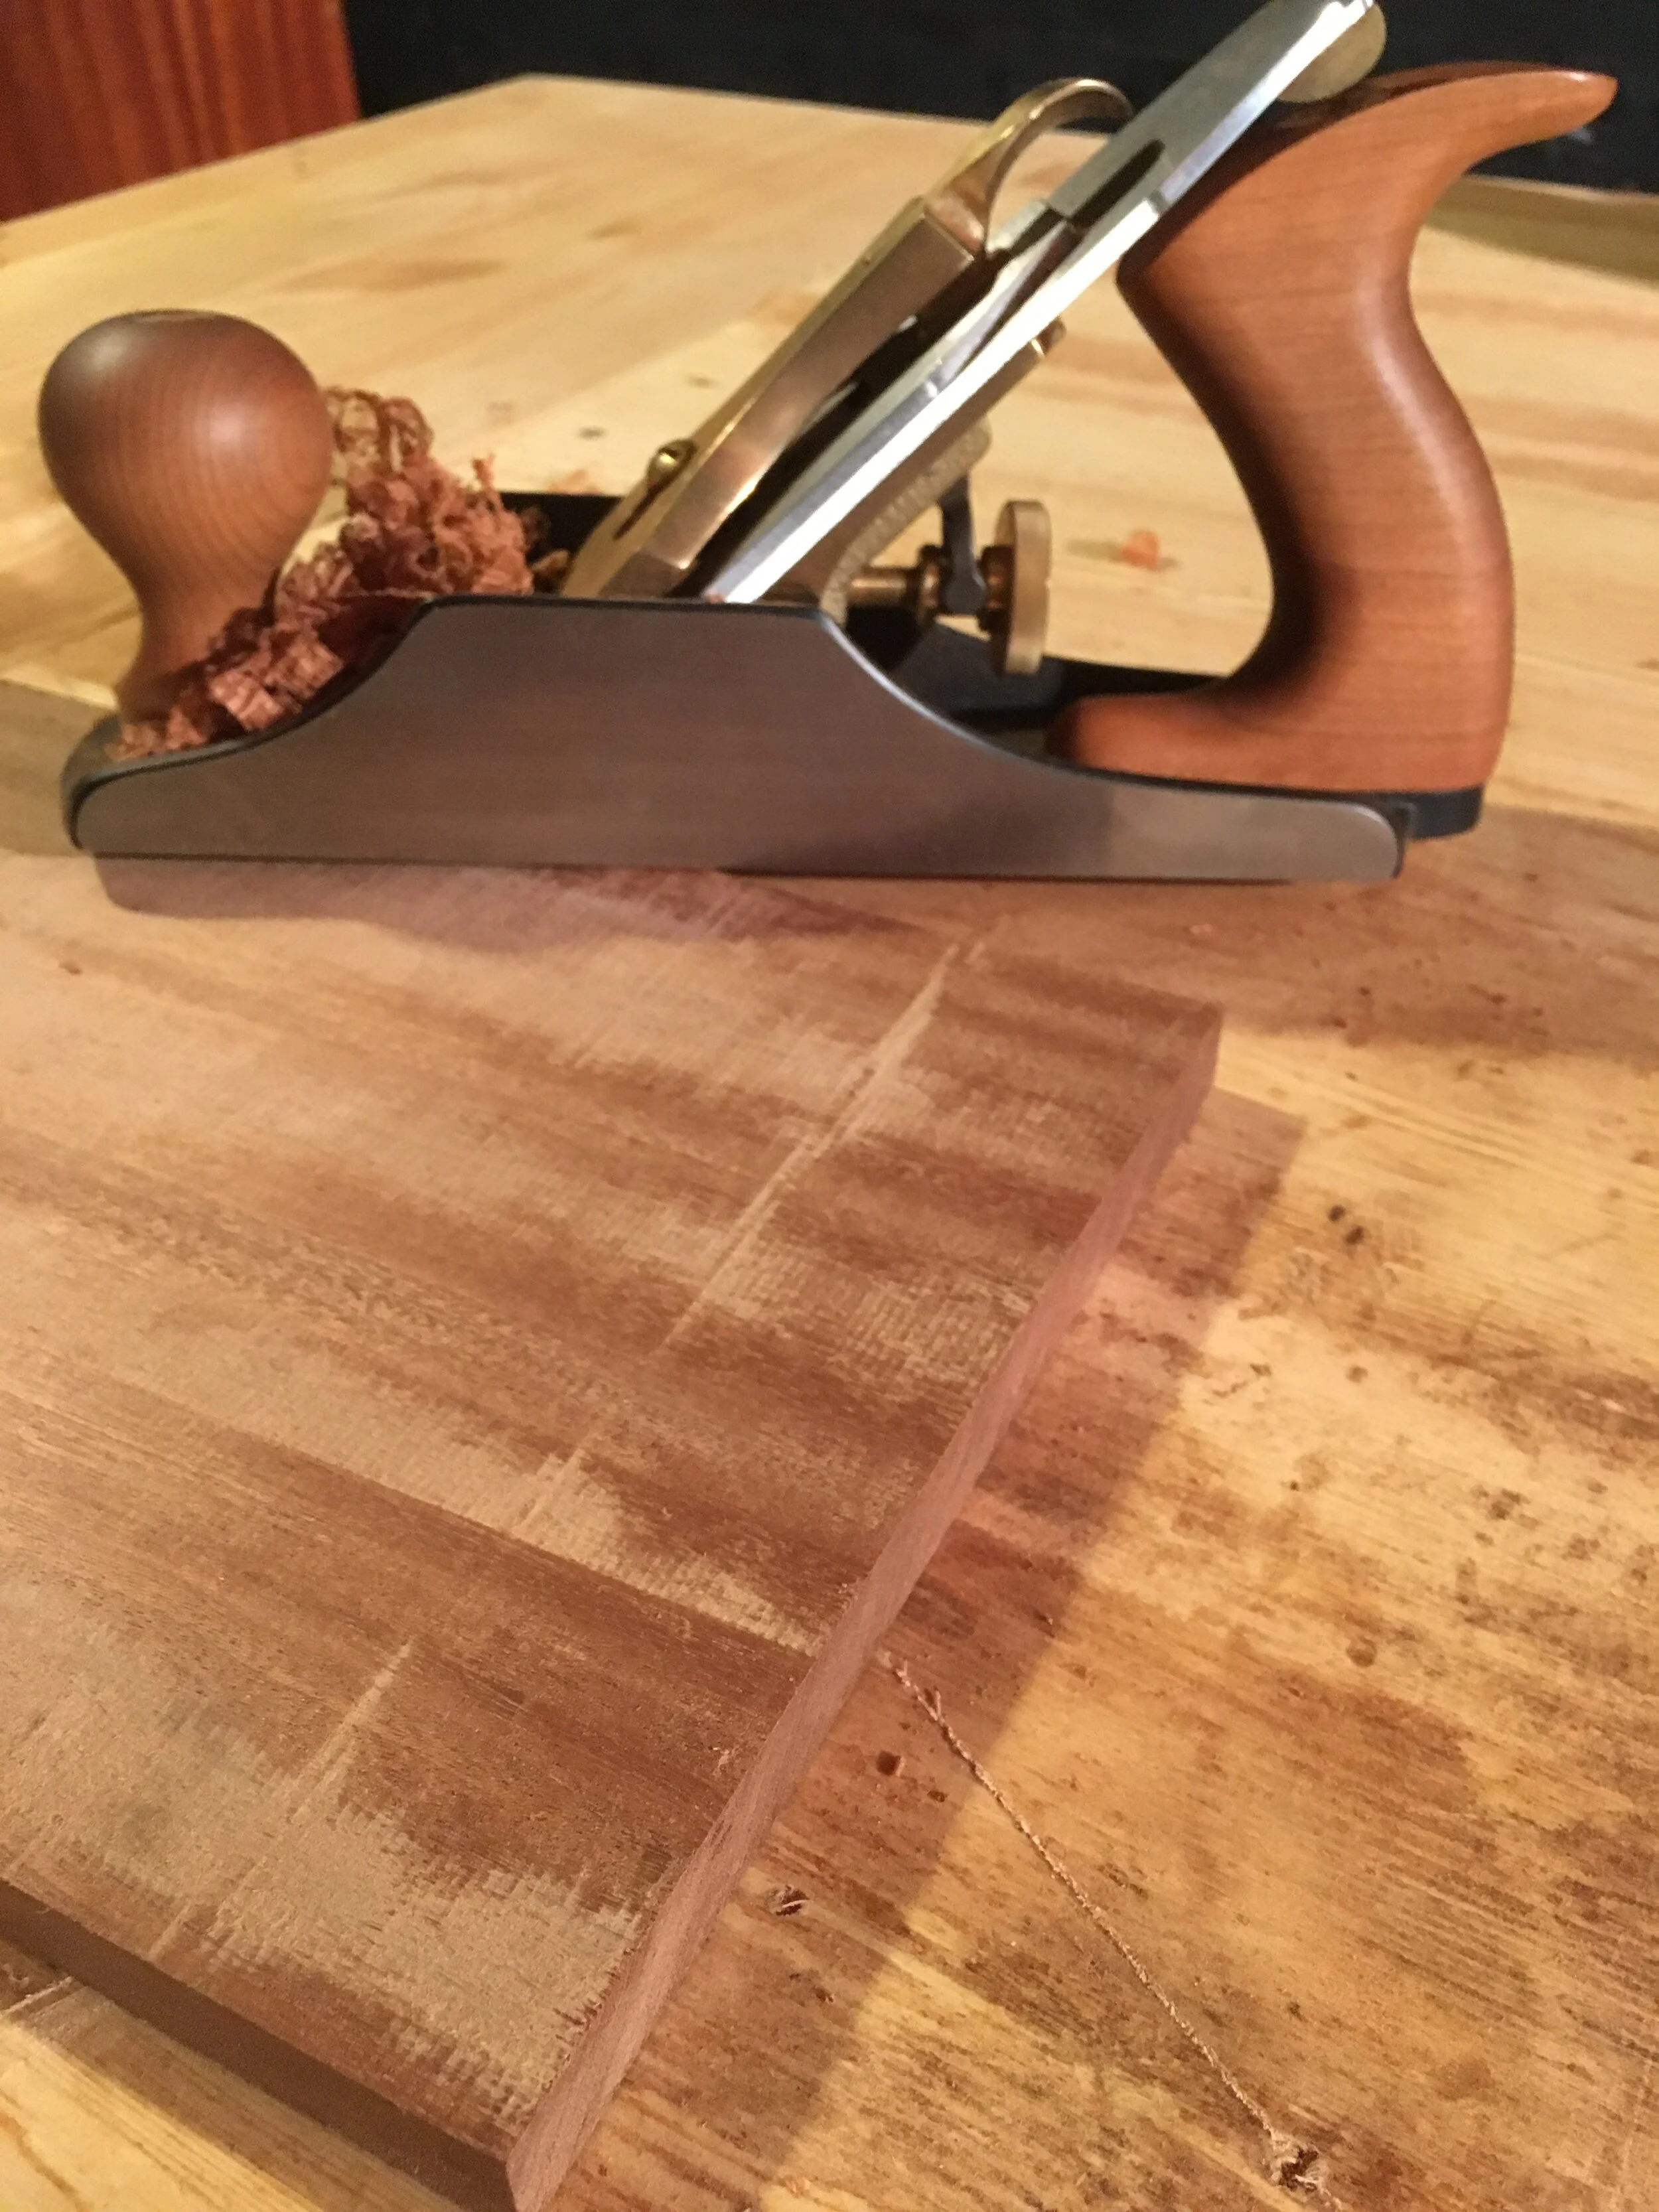
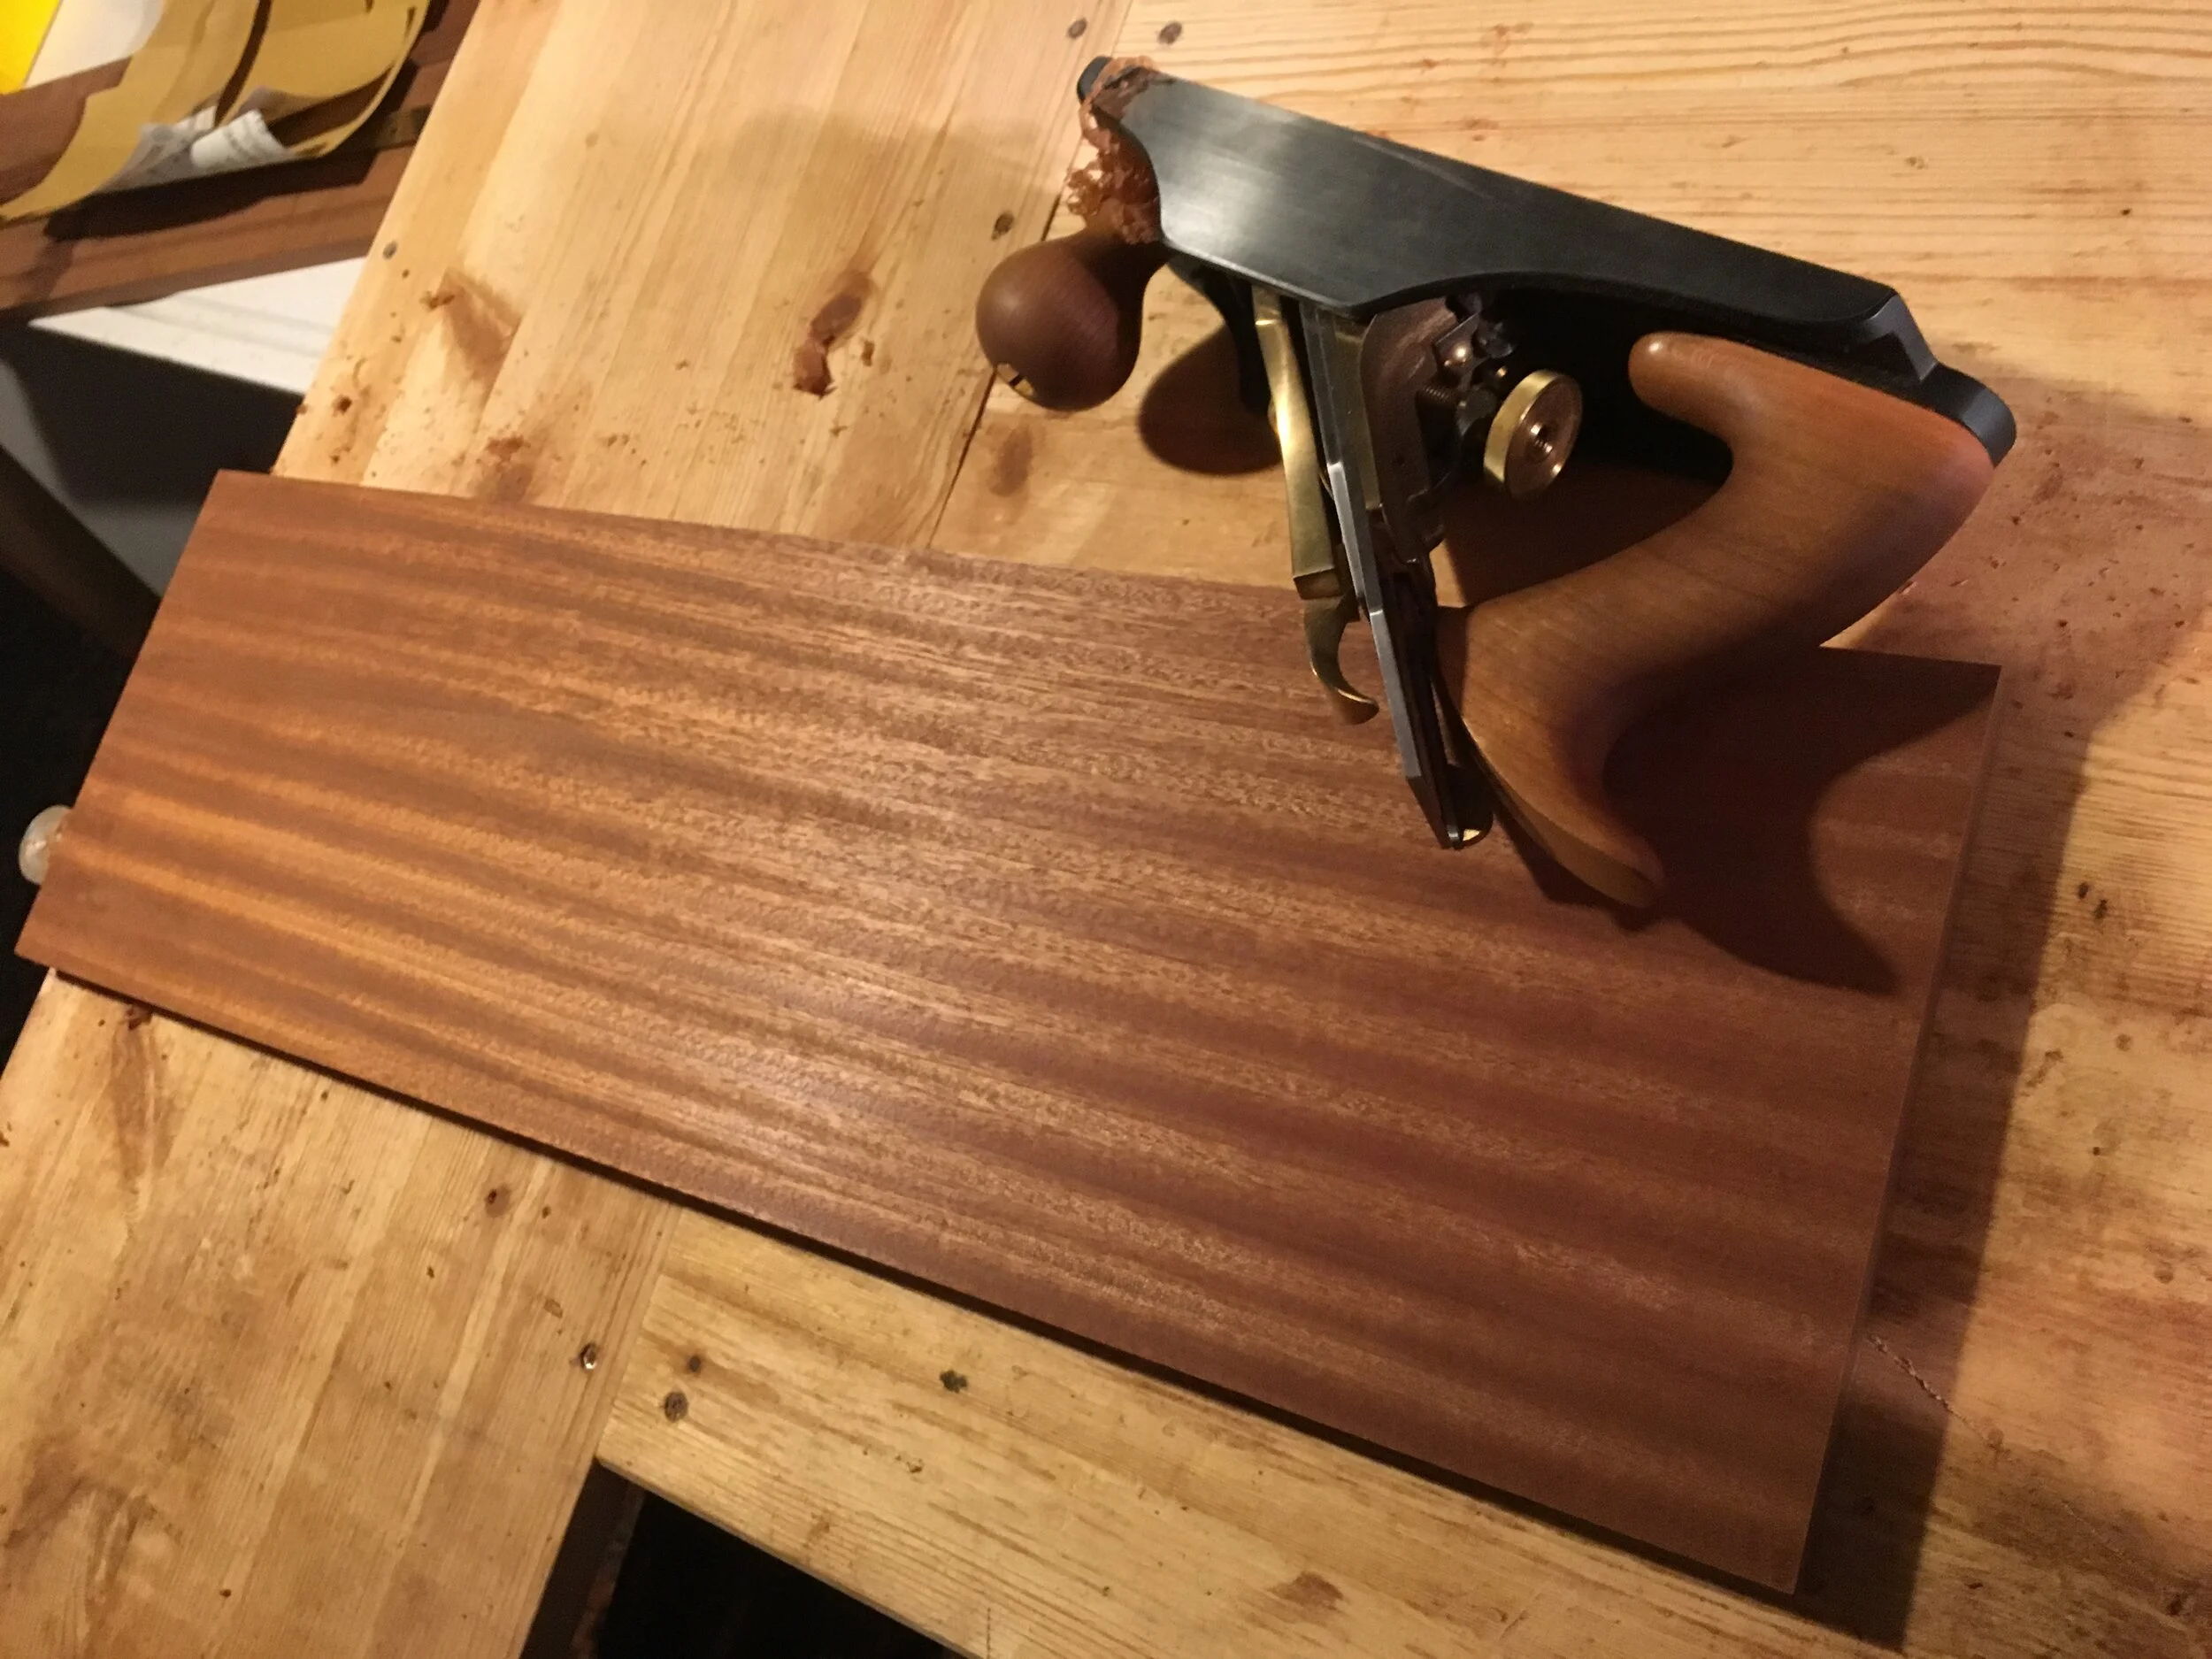
It was a good workout but in the end the wood was smooth and shiny. I mounted it in the cavity and called it a day.

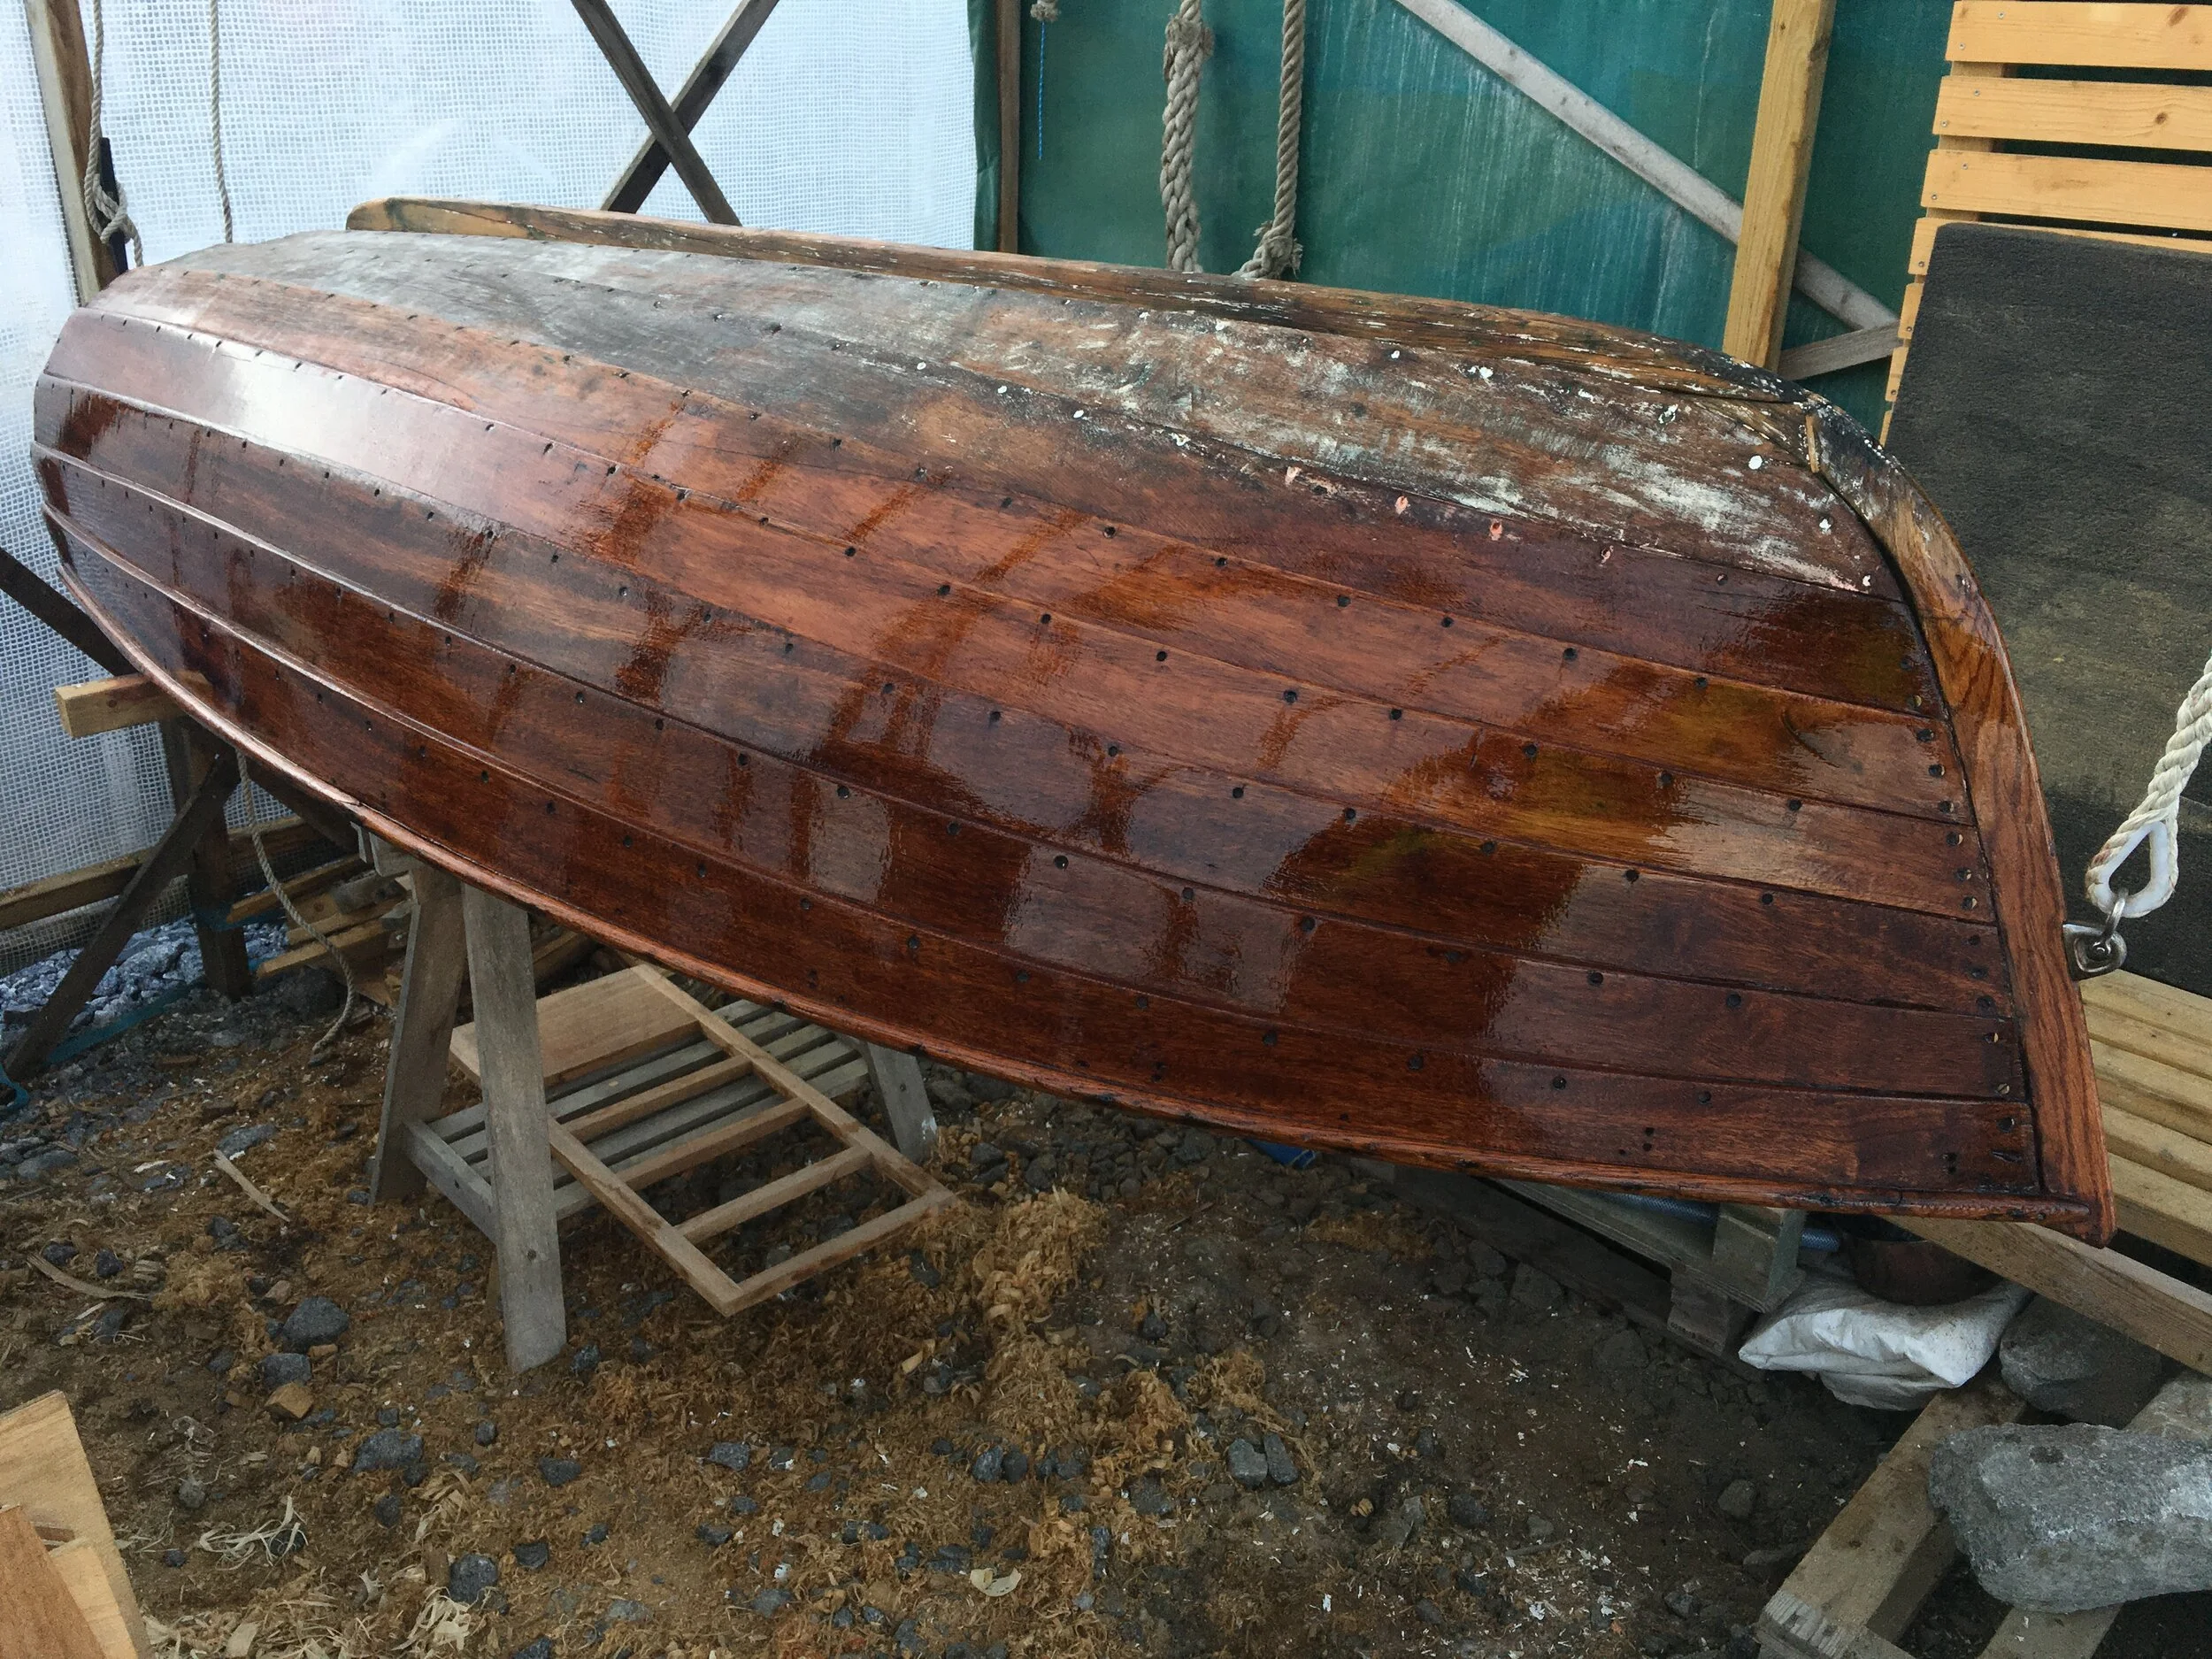
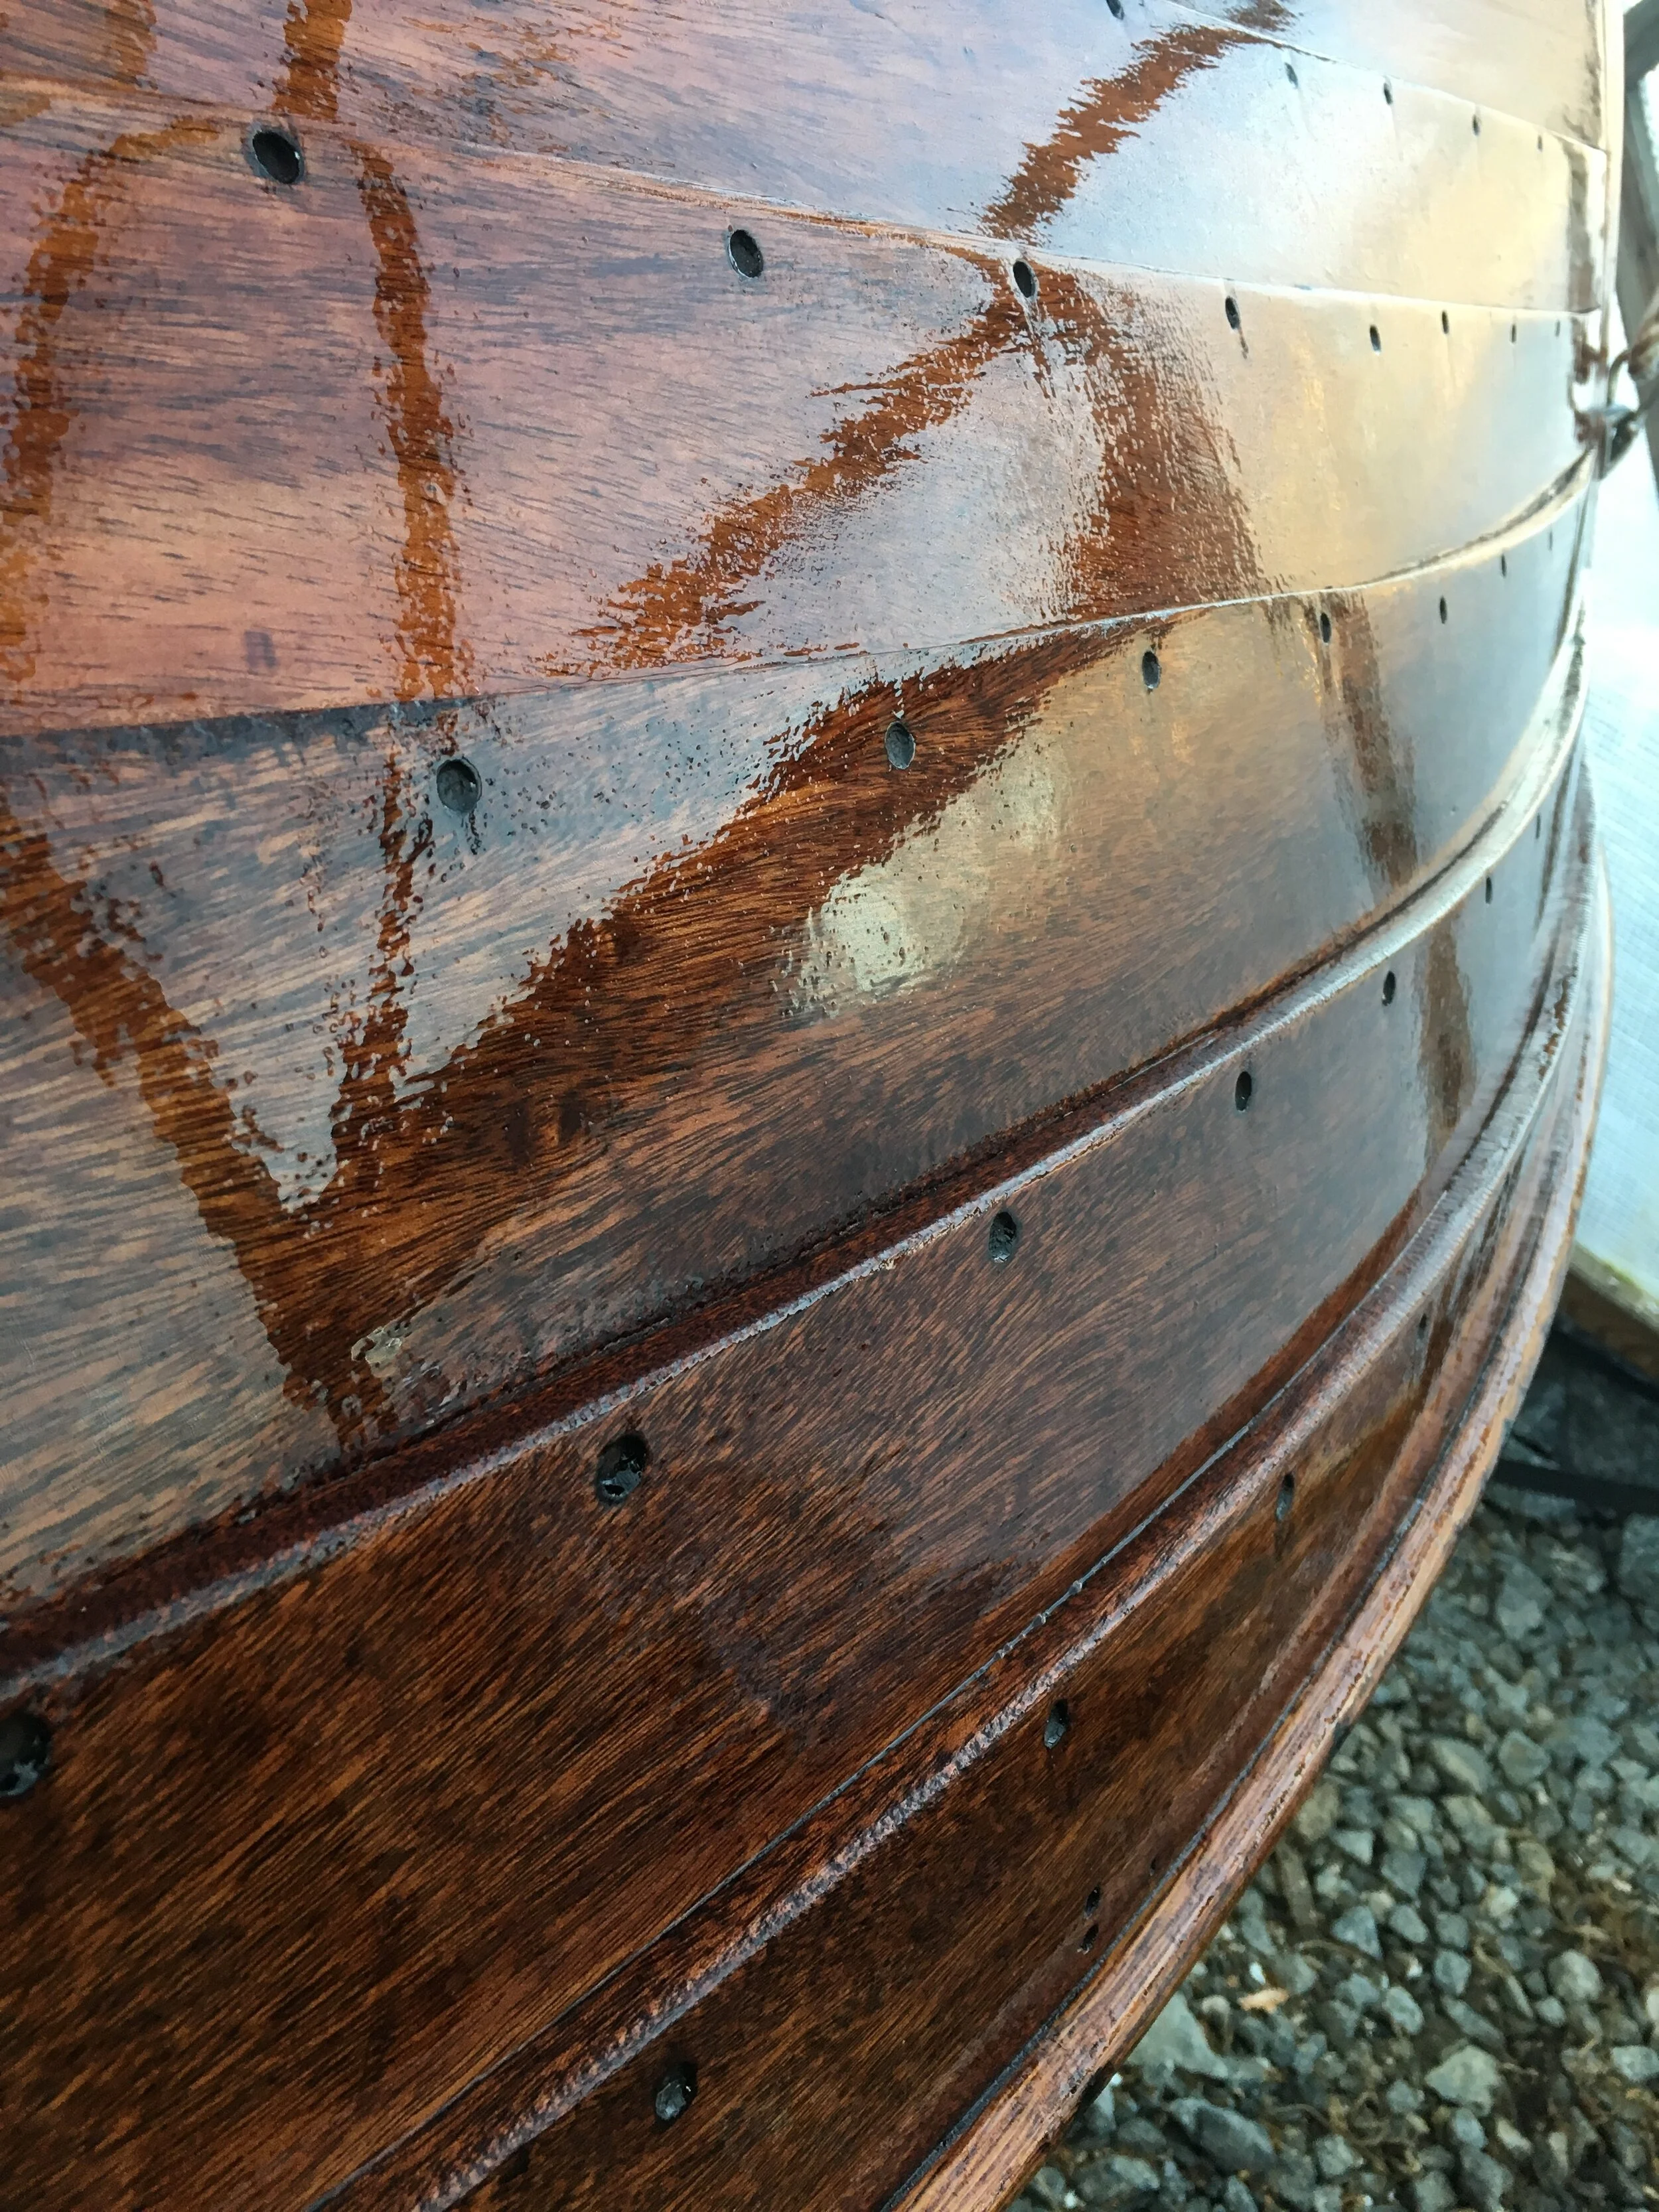
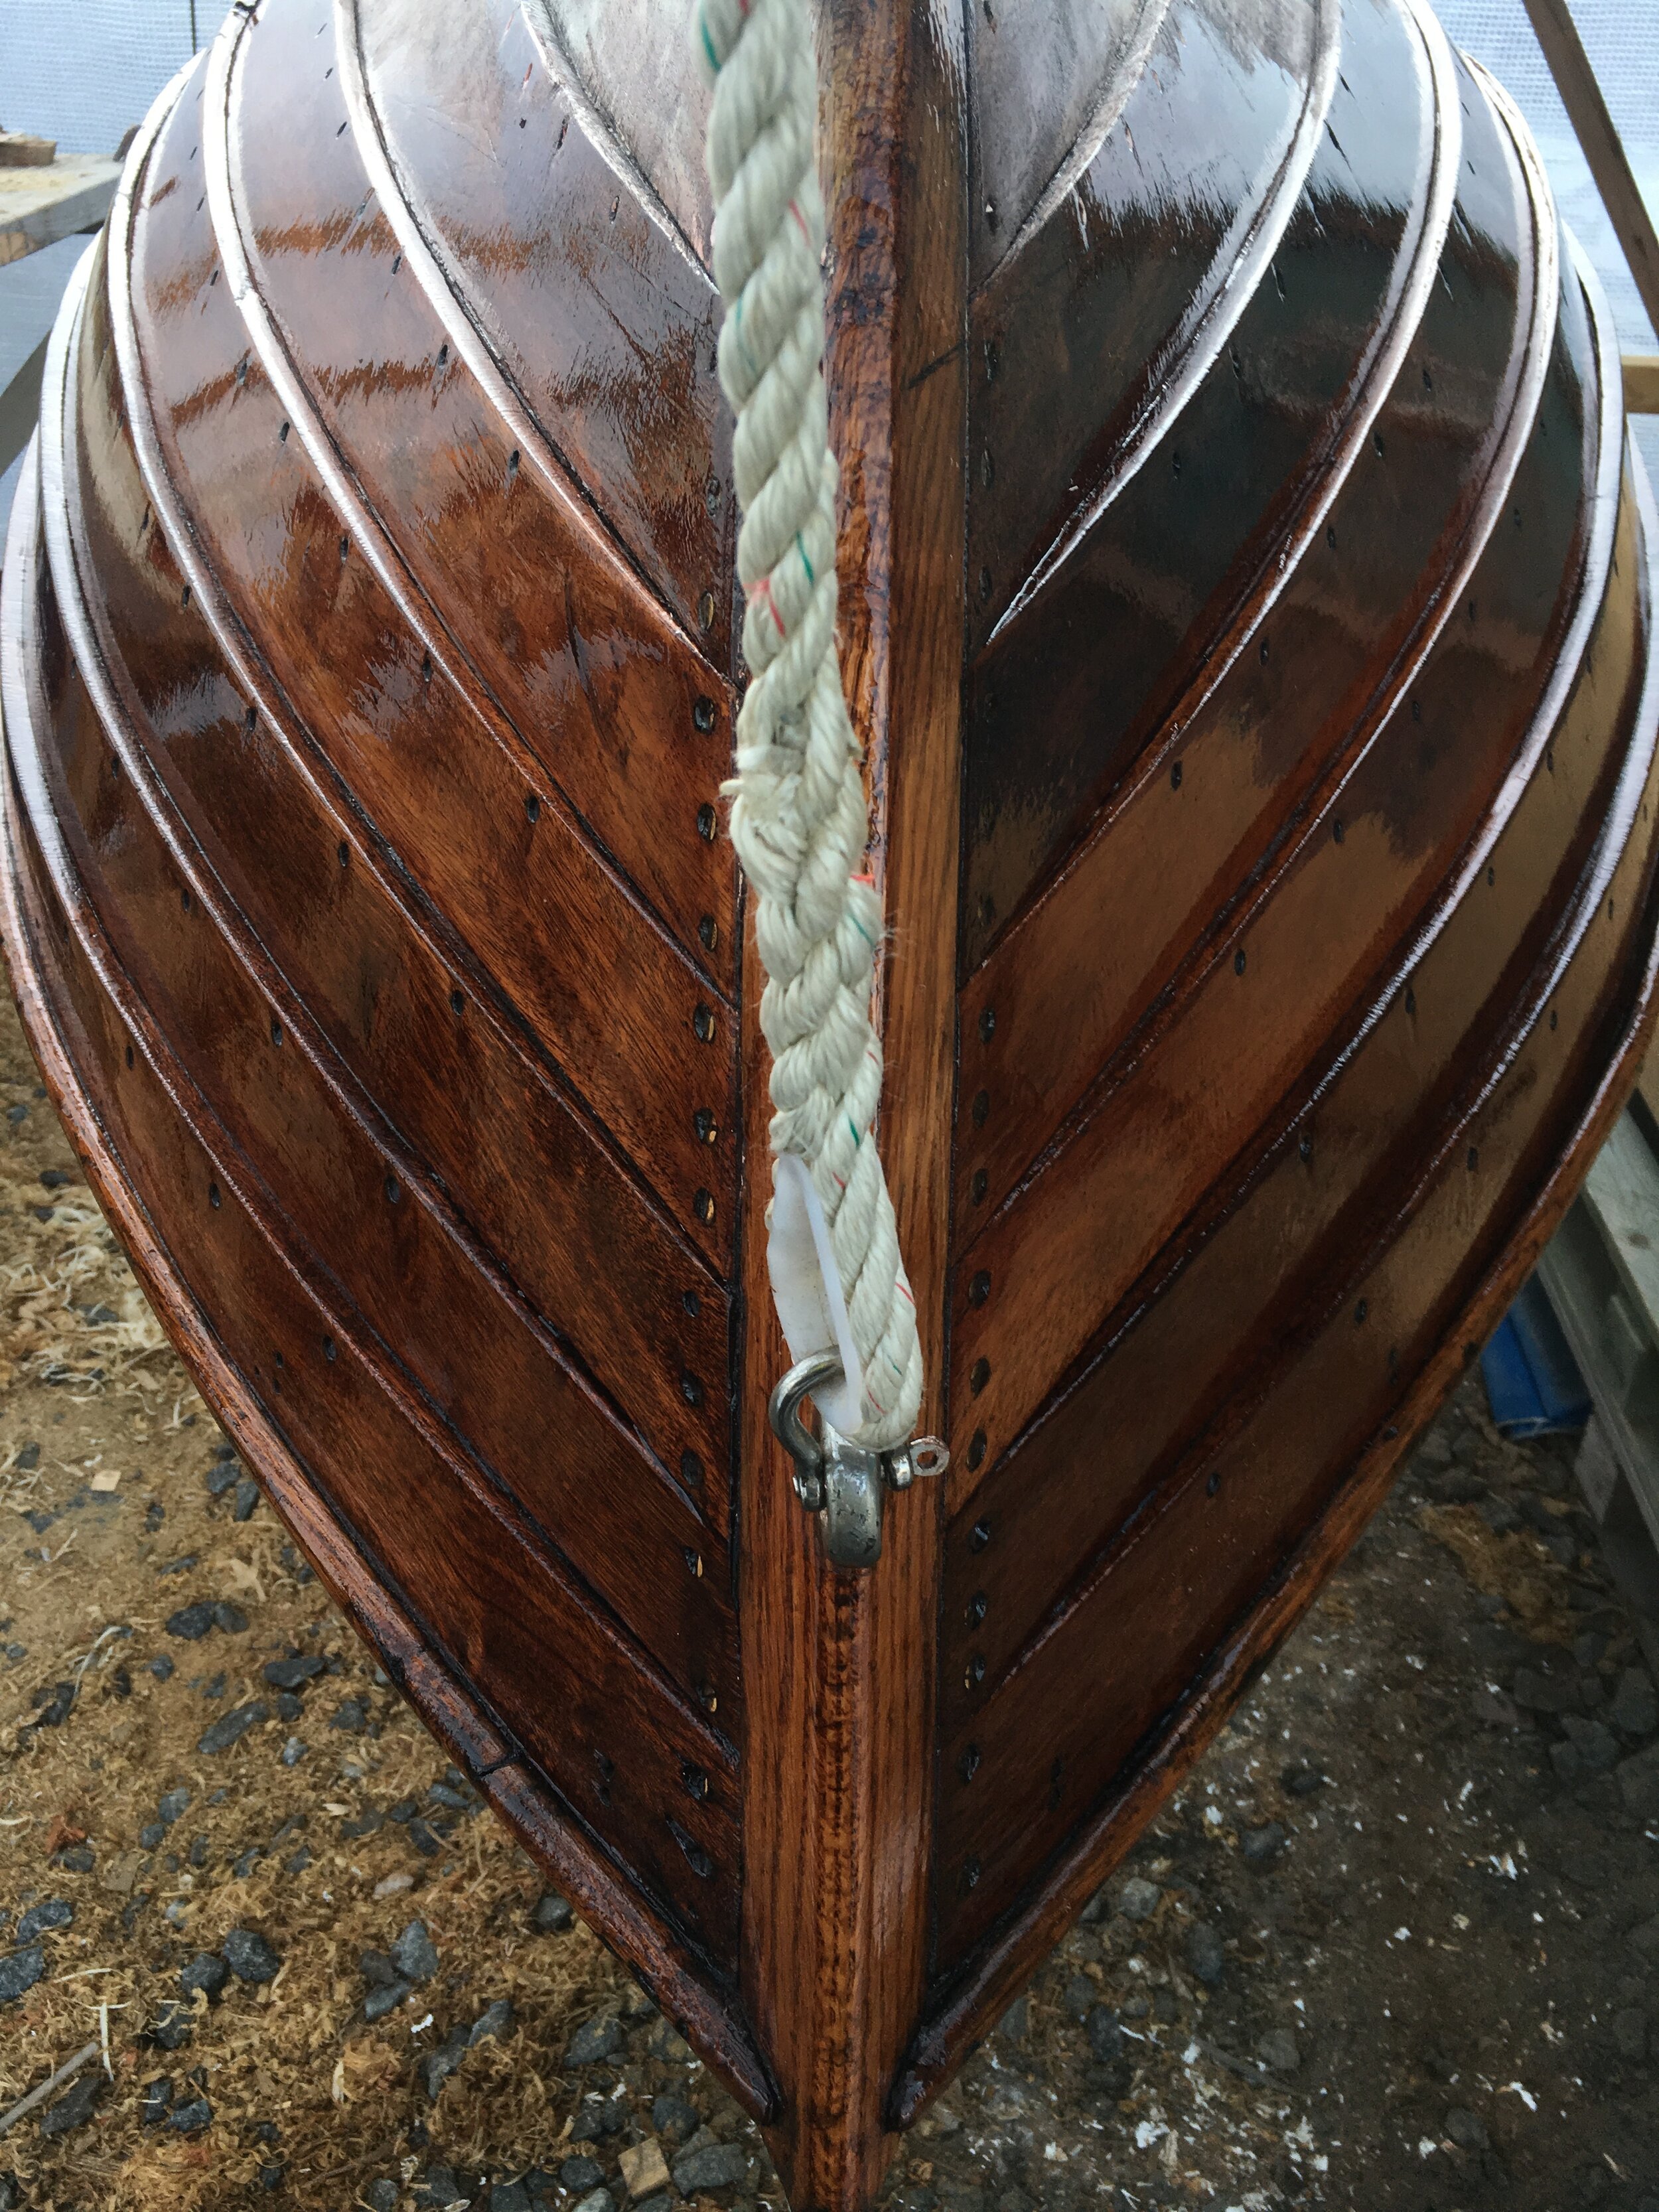
On Sunday the weather turned to sunny and dry, windy day. Quite a change compared to last weeks of rainy and foggy winter. To fully utilise the situation we went to my small workshop to apply first layer of Owatrol D2 oil on Glypto. The work went quickly and my tiny dinghy started to look lively again.

IMG_9169.JPG
IMG_9170.JPG
IMG_9172.JPG

I drove my family home and came back to the boatyard in the evening, to continue working on the pentry.

The first task was a bit of metallurgy - I needed to thin down and shape the piano hinge, to match wood thickness.

Angle grinder and then some elbow grease with sand paper did the job in no time.

I moved to measuring and cutting thin plywood plates to match pentry’s walls. As nothing is square there it took me some time but in the end all bits were trimmed to perfect match.

I assembled the whole thing and left on the boat for further work: plywood edges need to be darkened and epoxy-sealed, all parts will be screwed into the underlying layer with bronze screws with linseed oil as a filler. I chose to not use epoxy here, just varnish. It will make nicer finish and will be easier repairable in the future.

And you were right Albert - retro look is the best here!

February 02, 2020 /Lukasz Kumanowski
Comment

Kitchen demolition

January 26, 2020 by Lukasz Kumanowski

As every mayhem it started innocently: having just a few hours in the evening I went to the boatyard with a plan to simply cut mahogany plank to serve as kitchen door. I wanted to hang it on piano hinge which right now sits on cockpit locker. As I already bought new, massive hinges for cockpit locker I felt it is time to remove the old piano hinge and use it in the kitchen.

And so the troubles begin. This hinge was screwed with a mixture of different screws. Most of them brass (disintegrated upon removal), some bronze (good as new) and to my despair someone also used steel screws!

They corroded to the extend that, even after recreating the slot, I could not unscrew them. Welded into wood. Since the hinge turned out too ugly to be re-used in the kitchen anyway I sacrificed it and used it as a lever for removing damned steel screws. At least I managed to save the wood around but was sweating after half hour of this ugly job.

So back to the kitchen. I looked onto now emptied cavity where Origo spirit kitchenette sits and didn’t like these old, white resin plates sitting there. They must have been added at some point in the 80’ because originally they were not there. They sported many old holes and burns and in some places they delaminated from the underlying surface.

Heck, I thought, I’m not gonna put fresh, expensive mahogany to something like that. Let’s do it properly for once. And so I started removing these plates by prying with screwdrivers and lifting as much as possible before the resin plate was breaking.

Luckily they were glued with rubber-like glue so it went rather easily to remove them but the smell… In places where they were delaminated there was humidity causing the resin plate to smell old cupboard.

No way back - I decided to remove the whole thing and make it all again. At the end of the day I was left with a black hole covered with sticky rubber-glue.

So much for a quick job for the evening!

I need to figure now what to use as a new lining, to have it “homy” and at the same time easy to clean and keep tight. Mahogany inlay? Cork? Tiles? Stainless steel plates or copper?

January 26, 2020 /Lukasz Kumanowski
2 Comments

Cabin ladder finished

January 25, 2020 by Lukasz Kumanowski

Good day of work today in the boatyard. Jim and Lennart were also there, working on their Laurinkosters, so apart from working we could talk boats.

I took my newly made and thoroughly epoxied ladder and went into installing sound&heat isolation. A bit of marking and then cutting with Japanese saw and chisels, to match foam to the backplate.

Before gluing it in place I needed to mount lower step supports. Screw heads will be then hidden under the foam. I used original bronze screws - they were still in decent condition - but needed to countersink them by 8mm to accommodate for the bigger thickness of the base board.

Few strokes with block plane to match supports to the new plate and the job was done.

Next I could attach self-adhesive sound protection. I wrapped it a bit on the edges to improve sound-proofing. Turned out pretty neat.

Next step was to clean old mahogany steps. They were originally oiled, I think, but then left without any treatment to weather into grey-red colour. They needed some love to match other parts. Some elbow grease with 80-grid paper revealed healthy, old-growth mahogany again on the surface.

I kept the surface a bit rough after 80-grid paper - this should keep them from being slippery when wet. Oiling with Owatrol D1 followed, bringing back wood’s natural, brownish-red colour.

As the last bit I needed to make a spacer plank to fill-in a gap behind the hinge of the top step. Last year, as a quick-fix before launching, I put there self-expanding foam strip. It did the job well by shielding the gap from water ingress but now it was time to do it properly, with wood.

A piece of scrap mahogany plank was of almost exactly the right thickness. I cleaned it from old oil and aged finish, cut to size and planed bevels on exposed edges.

Sanded smooth with 240-grid and oiled was screwed into its place, completing the installation.

By tomorrow the oil shall cure and I can finally go down into the cabin in a proper way - not like till now the “monkey way” by using furniture as a ladder.

The next job in the queue is cabin main table.

January 25, 2020 /Lukasz Kumanowski
Comment

Peanut butter - epoxy mayonnaise

January 18, 2020 by Lukasz Kumanowski

Housekeeping procedures and family business kept me away from boatyard for the last few weeks. During that time I only managed to oil starboard and port berth foundations - first with Owatrol D1 and then, as an experiment, with D2. I wanted to check if indeed D2 gives varnish-like finish.
It does - after just one coat the wood starts to shine, just like after single coat of varnish. Contrary to D1 - D2 does not smell so ugly so oiling can be done at home. I’ve left berth planks with only one coat - after all they don’t need it - and keep D2 for coating Glypto and ceiling planks on Meritaten. That needs to wait until temperatures go above 5 degrees and days become less humid. D2 with water gives milky-white solution, just like Ouzo or Pastis.

Today I took both berth planks to the boat. After installation they blend nicely with the rest of the cabin.

As I have one more full-size mahogany plywood of proper thickness I went ahead and made pilot berth foundation. Two years ago when I was building it I had no thick enough plywood so I was forced to build it reinforced with wooden beams. That made it a tad too high for madrases and bulky so now I’ll make it properly.

Disassembly went quickly and I cut new plywood using old berth as a mall. The problem with this plywood was that I kept it for a year in my boathouse where it got lots of sun and occasionally droplets of water from the roof. Plywood’s side exposed to elements turned light and developed ugly stains. It took a hell of time to grind them away today - taking care not to remove too much of thin mahogany on the surface. Lessons learned - use plywood as soon as you buy it if you don’t have a proper way of storing it.

Cutting and plaining the edges went quickly. After abrading both sides with 240 paper I started impregnating it as all other - with D1. Luckily weather is mild today - with 6 degrees above zero and no rain Owatrol oiling could be done in the boatyard. Avoiding smell in my home.

As the wood was drying I turned to reparations of main cabin ladder. Due to removed ceiling at cabin sole level the ladder was hanging in the air. I fixed it temporarily last year but it was ugly so now it was time to make it properly. I cut the shape from the remaining piece of plywood using old ladder as a guide.

A bit of adjusting and trying on the boat was needed to match frames curvature. Once I was happy I could cut notches for top step.

View fullsize IMG_9083.JPG
View fullsize IMG_9084.JPG

This new plate will be glued to the old ladder. This way I don’t need to make the whole structure and will re-use old fittings. As gluing such complex and big shape is always challenging I’ll use pilot screws to keep both parts aligned. Screw holes will later be used for second step support. To get a proper grip in thin plywood I made temporary wooden blocks which will accept long screws.

Tried the assembly on the boat and everything fit nicely.

Last thing to do was to remove old varnish from the ladder and abrade all surfaces with 80 paper, for proper epoxy grip. With Bahco scraper this was a quick and pleasant job.

Once this was done I headed home for the evening, to manage gluing them tonight so I can epoxy-coat everything tomorrow.

For gluing I decided to use Swedish NM Epoxy which I had from the time I was working on my Safir Motoko. This epoxy is less convenient to use than WEST since one needs to weight both solutions for mixing but otherwise it is exceptionally good material. And it has no smell at all, making it perfect for using at home.

To make glue out of it I thickened NM Epoxy with WEST filleting blend. It gave chocolate-like colour. Gluing consistency is mayonnaise - so that it fills all spaces but does not flow so rapidly as non-thickened epoxy.

The amount of epoxy used was 200+110g and turned out to be exactly enough to coat the parts.

Assembly with screws went smoothly but as usual the job was messy. I gathered all squeeze-out and thickened it further to peanut-butter consistency, to add fillets in crucial areas. Gathering dripping epoxy took me an hour before the glue started to cure and no more excess was showing up on the edges.

As usually - you never have enough clamps. And yes - this is my bedroom with epoxy-spider!

January 18, 2020 /Lukasz Kumanowski
Comment

Ceiling - starboard

January 05, 2020 by Lukasz Kumanowski

Back to Sweden after Xmas.

Evening after arrival I found few hours to visit the boatyard and check if boathouse and my workshop are in good shape. They are.
I’ve installed starboard side ceiling in the main cabin. Owatrol shiny spots are visible on few planks so I tried to catch them with 240-grid sanding paper but the effect was bad. Then, following my father’s advice, I tried buffing the surface with soft pad but there was no effect at all. Well - so be it.

Ceiling planks were mounted in the same spots as originally, using old screw holes in the ribs. I had to only make them deeper as bronze screws I’m using are a tad longer than originals. One needs to be careful with them as any torque is killing them instantly, even with hand tools. Week point, as always, is at the end of threading.

Luckily it was so late that my cursing was not heard by anyone in the boatyard: I happened to break three such screws, resulting in dismounting the whole plank, removing screw remainings and doing all again, very carefully.

The result is fine although I don’t quite like uneven spacing between planks. It must have been like that from the beginning. Probably due to original dark stain on these planks it was not so visible.

January 05, 2020 /Lukasz Kumanowski
Comment
  • Newer
  • Older

Powered by Squarespace