Boatworks

  • Main
  • Louve
  • Typewriters
  • Workshop
  • Meritaten
  • Glypto
  • Motoko
  • Inspirations
  • About
FullSizeRender.jpg

Joggle stick

October 28, 2019 by Lukasz Kumanowski

Paid job kept me long hours today so no time to work on the boat. Instead I manufactured joggle stick from aluminium - to replace faulty cardboard pattern.

Thick aluminium plate will keep the stick straight and pointy tip should meet the target without bending or deflecting.

I’ve marked distinct features of the stick with numbers on one side and letters on the other, in case I chose to use both sides during measurements.

IMG_8509.JPG

Cutting on band saw was quick, it took little longer to remove burrs, round all edges and grind the plate on 600 grid paper.
The tool should not glide on paper but must be pleasant to use and kind to pencil’s lead. Being aluminium it will not add much weight in the toolbox.

FullSizeRender-2.jpg
October 28, 2019 /Lukasz Kumanowski
Comment
IMG_8503.JPG

Cabin sole

October 27, 2019 by Lukasz Kumanowski

It rains the whole weekend. Good to work under roof.

I continue rebuilding cabin sole boards. Measurements with joggle stick take some time to optimise the process. The main fault to my tool is that I’ve made it from cardboard. Cardboard tip can bend upon touching inclined board and without me noticing it gives the wrong dimensions. It costed me lots of time yesterday when cut boards did not fit between frames and required several interventions with a hand plane. The proper joggling stick should be made from wood or metal so that it will not rise upon meeting the surface.

To fit nice and tight between the frames and towards planking the boards need to be bevelled. In this configuration it is bevelling the end grain. Not the easiest nor favourite surface to work with a plane: easy to chip wood on the edges so I needed to plain from both sides of the plank.

IMG_8507.JPG

I considered bevelling with power grinder but that is noisy and makes a lot of dust. And gives no workout, unlike hand plane. With hand plane it is fun but it took too long to make just 4 boards yesterday so today I employed electrical plunge saw, cutting bevels at 47 degrees and finishing them with smoothing plane. Much quicker and less wood is wasted since negative bevels become positive when I turn a plank and cut next bit, with already finished one bevel.

Planks width - jointing edges - were finished with smoothing plane sliding on the bench, to make sure I have 90 degrees edges.

FullSizeRender.jpg

I’ve reached amidships where planks are almost perpendicular to the freeboard. That even further amplified progress so I’m almost in 3/4 of the job.

Before leaving the shipyard I recirculated oil. I’ve managed finally to adjust the flow so that oil is dripping at constant flow and during the week I need to re-fill the containers only twice.

I have buckets under the boat which collect dripping oil seeping through garboard joint or rudder fittings. During one week the bucket collected 2,5 litres of oil which otherwise would just soak into ground. It is easy to fool oneself that the wood takes so much oil if one does not encounter that lot’s of it just spills outside.

October 27, 2019 /Lukasz Kumanowski
Comment
IMG_8474.JPG

Gimbal-mount for old Swedish compass

October 22, 2019 by Lukasz Kumanowski

I got this compass for no-money on Blocket. It was clear that gimbal mount is broken so no surprise when it came in pieces.

It is a traditional, old Swedish Silva compass, entirely made of black-painted brass. The only parts which were made from bakelite are compass ring and bulkhead mount. Both of them broke, probably due to age.

As it should be - the compass housing has adjustable magnets, to compensate for deviation.

IMG_8477.jpg

New bulkhead mount will be made from mahogany - I will hang it in place of non-functioning VDO log.
Instead of trying to glue the ring I’ve decided to make it from brass. I took measurements and sent drawings to my friendly workshop in Poland. Today I got the part delivered.

New compass ring, brass, with original brass screws - one missing. Old, broken bakelite ring was used to make drawings

New compass ring, brass, with original brass screws - one missing. Old, broken bakelite ring was used to make drawings

I’ve specified ring finish “as machined”, so it took me some elbow grease to polish visible surfaces. Brass will develop patina after one season so it will match original parts better.

I’ve assembled all components - the ring fits perfectly!
The compass housing is mounted to the ring with several brass screws. Washers hold the compass securely in place.

IMG_8475.JPG

Entire assembly is then hanged on brass gimbal.

FullSizeRender.jpg

I needed to slightly modify the ring - it turned out that it is too tight to mount gimbal screws, just 2mm. Easy to fix with drill press.
Name plate, originally riveted to bakelite, will be mounted on the ring with original, aluminium rivets.

IMG_8473.JPG

Rivets are so tiny that pressing them into freshly drilled 1.3mm holes was a challenge.

IMG_8480.JPG

All assembled and ready to be mounted on Meritaten.

IMG_8481.JPG
October 22, 2019 /Lukasz Kumanowski
Comment
IMG_8471.JPG

Workbench

October 21, 2019 by Lukasz Kumanowski

Sjöberg woodworking benches are beautiful and it would be great to have one but: a) I cannot afford it now, b) I cannot leave it at the boatyard. I’ve decided to build a budget-option bench using three EU-palettes.
They are strong, heavy and are for free.

For a worktop I chose pine bookshelves, edge-glued. I could go with plywood but shelves at Byggmax were in the size exactly matching palettes so no wood was wasted. Besides - they allowed me to pick some pine off-cuts so I got all the wood for reinforcements for free. People in Byggmax Norrtälje are indeed very nice!

IMG_8465.JPG

Assembly was pretty straightforward - bolting all together with stainless, self-drilling wood screws, reinforcing with cross members and voila! Top side took me a bit longer because I wanted it to look good. Even cheap bench should be pleasant to work with.

I screwed pine shelves to top palette, added side reinforcement and thick pine timber as a base for retractable bench dog.
Oiling followed - to protect the timber from dirt and humidity. I picked shelves with as vertical grain as possible but anyway they will start to move with time in these conditions so oil should help here.

IMG_8461.JPG

In the space between palette legs I will make a shelf which will house my tool box. It is so damn heavy that it’s weight will further stabilise the bench. Even without toolbox the bench is rock solid.

I’ve placed the bench adjacent to my storage case. Should I need to use table saw it will stand on the box and with matching height the bench will serve as out-feed for the saw.

I’ve checked oiling status on Meritaten. Akter canister was already empty so I recirculated oil. I then noticed that canister’s valve has developed a leak. So much for Biltema’s quality. I fixed that by placing it in a bucket so leaking oil will not be wasted.

The last thing for tonight was my usual ritual of burning all paper towels soaked with linseed oil.

FullSizeRender.jpg
October 21, 2019 /Lukasz Kumanowski
Comment
FullSizeRender-2.jpg

Cabin sole boards

October 20, 2019 by Lukasz Kumanowski

It’s raining cats and dogs today but I went to boatyard anyway.

It was time to re-circulate oil on Meritaten. I’ve also replenished oil/turpentine with additional 5 liters since the hull swallowed one canister already.

After winterising chemical toilet I started preparing wood for new cabin sole.

This is task no.1 for this winter. Since I removed ceiling on the entire cabin - to see what is behind - and discovered 60 years of dust and dirt (smelly) I’ve decided to not put it back. I want to see the structure - because it is beautiful - and I want to be able to keep it clean and ventilated.
At the cabin sole level this has created gaps between floor boards and freeboard. Not only it looks ugly but everything which drops on the floor instantly rolls into bilge. Floor is also unstable and prone to tilt if one stands on the edge.

After many thoughts I’ve decided to build new cabin sole in a workboat style. I’ll use current boards as foundations and glue wider mahogany planks at 90 degrees to freeboard. I will loose 12mm of head clearance but that’s a small price to pay for stable and nice sole.

New boards will be mounted as circa 14mm strips - distance between frames. This way I’ll avoid a pain of cutting openings for each frame and the whole assembly will be stronger. Workboat philosophy.

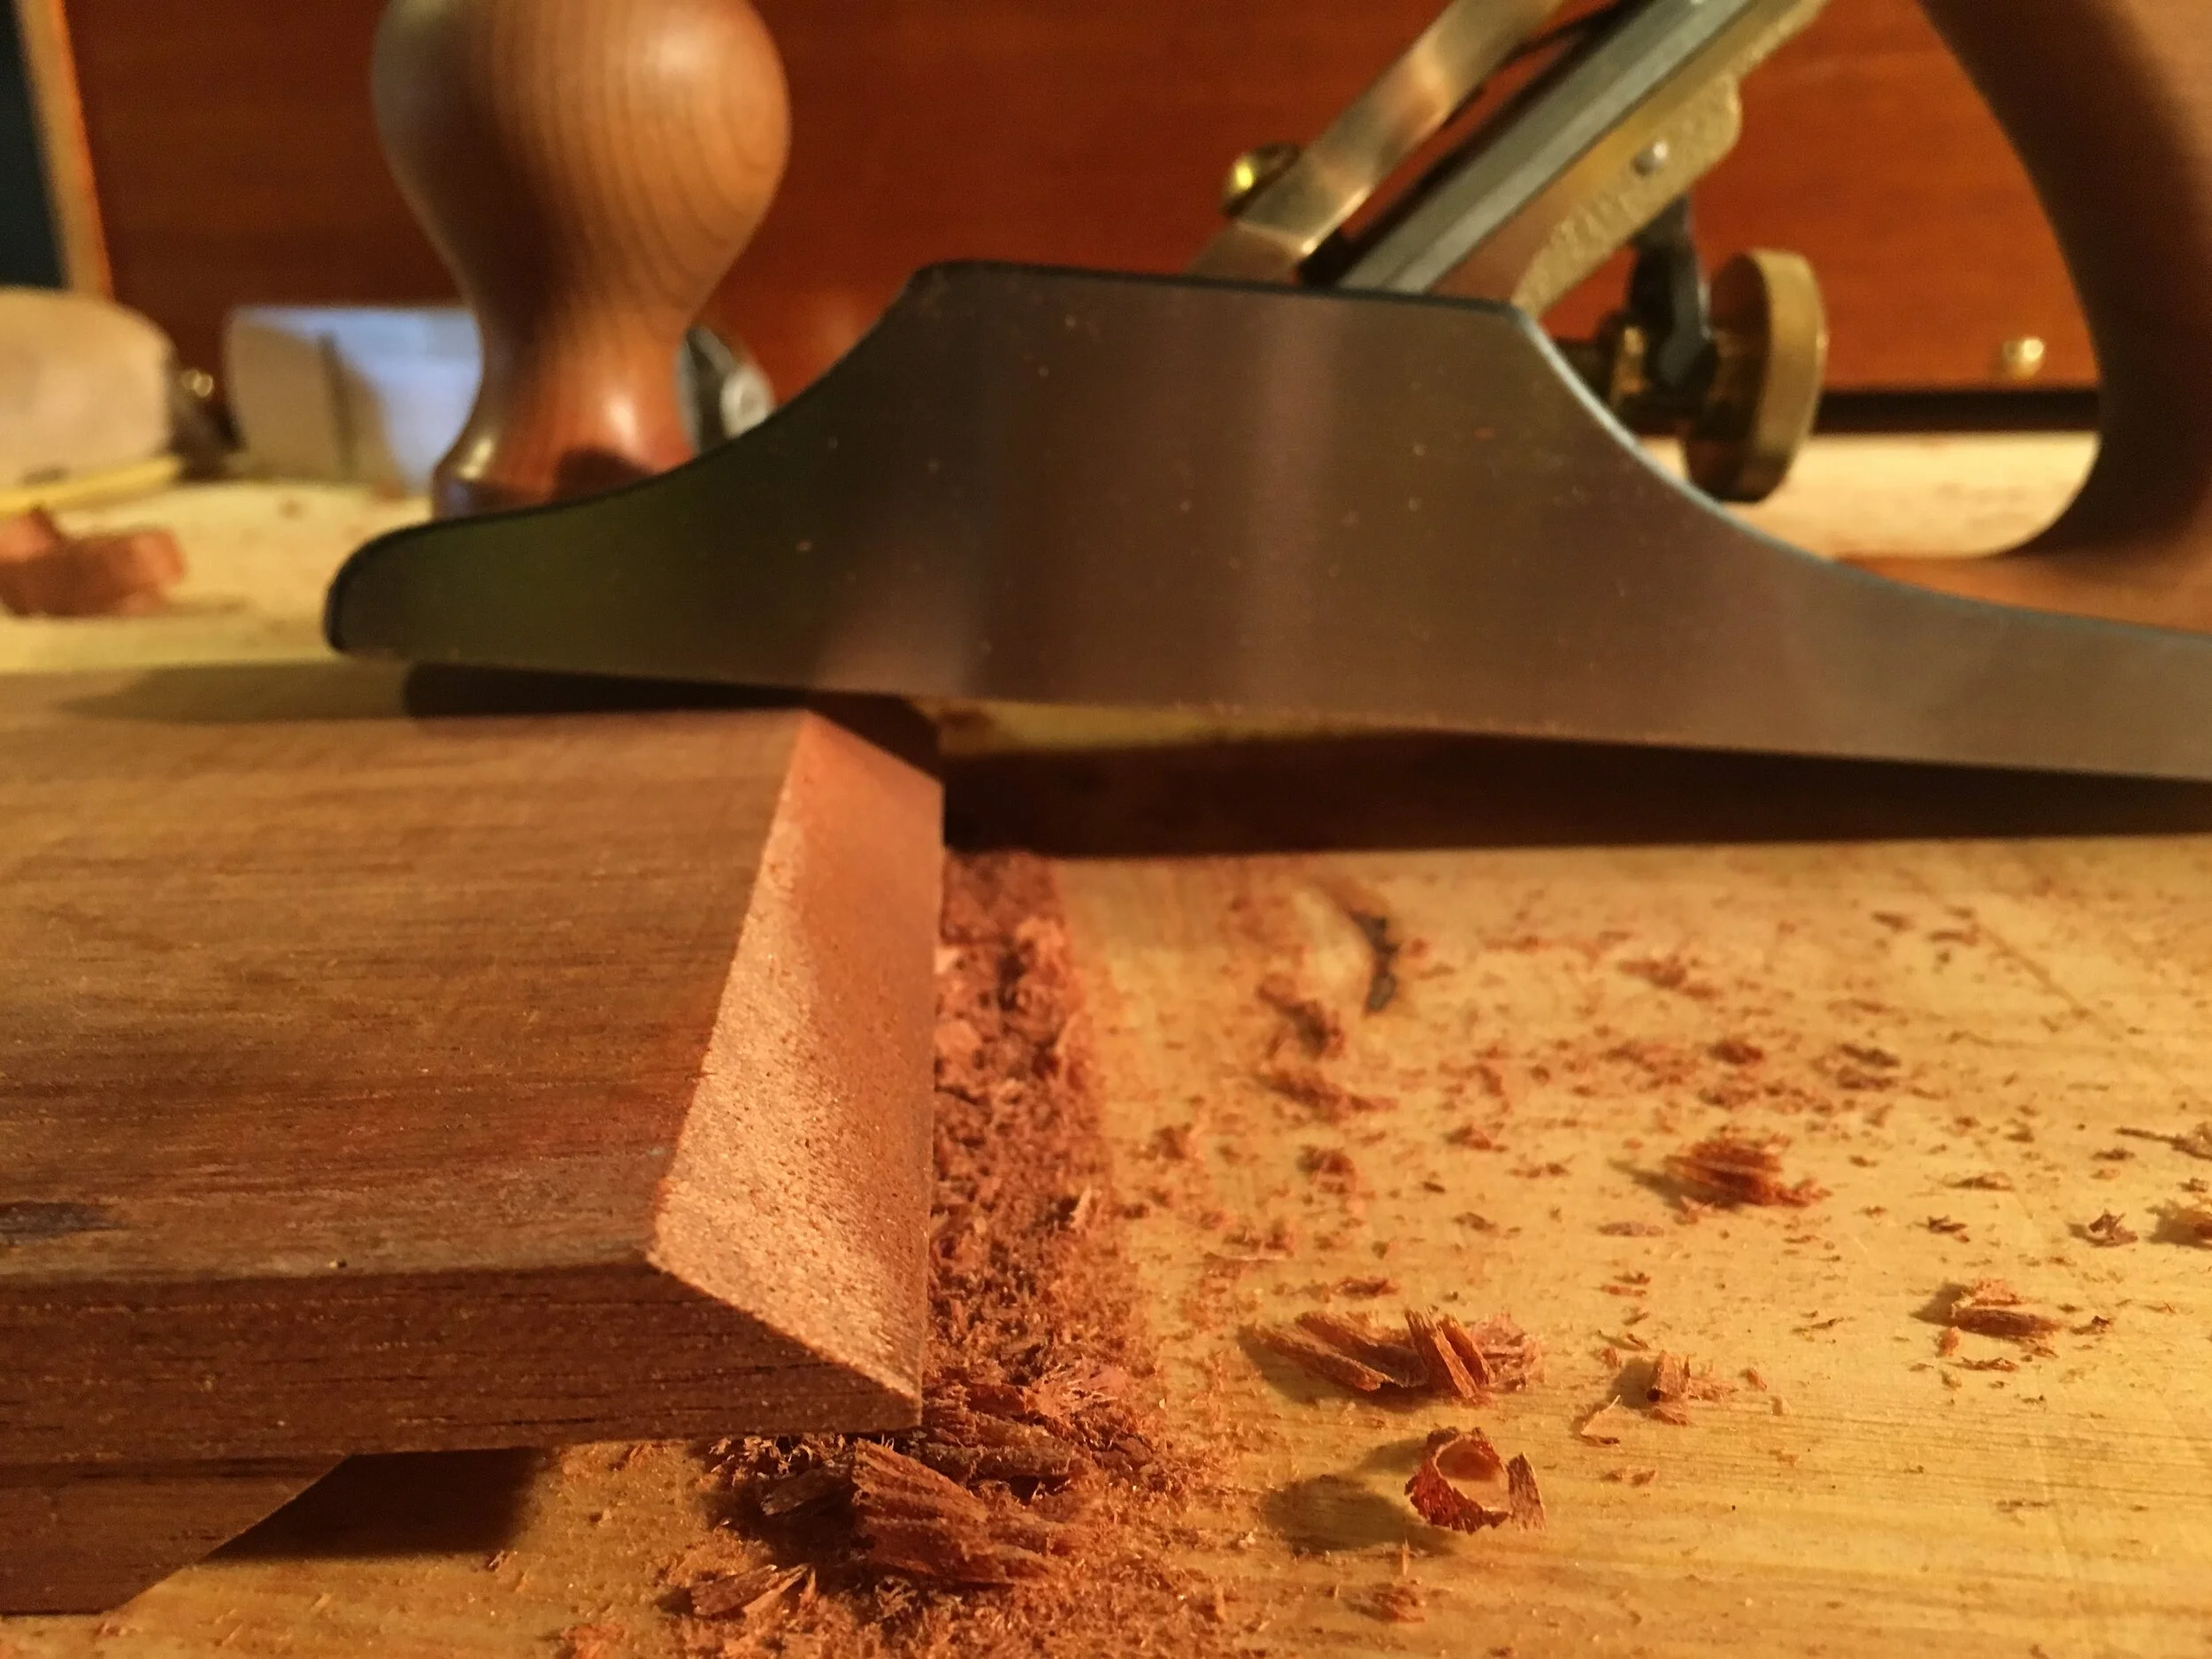
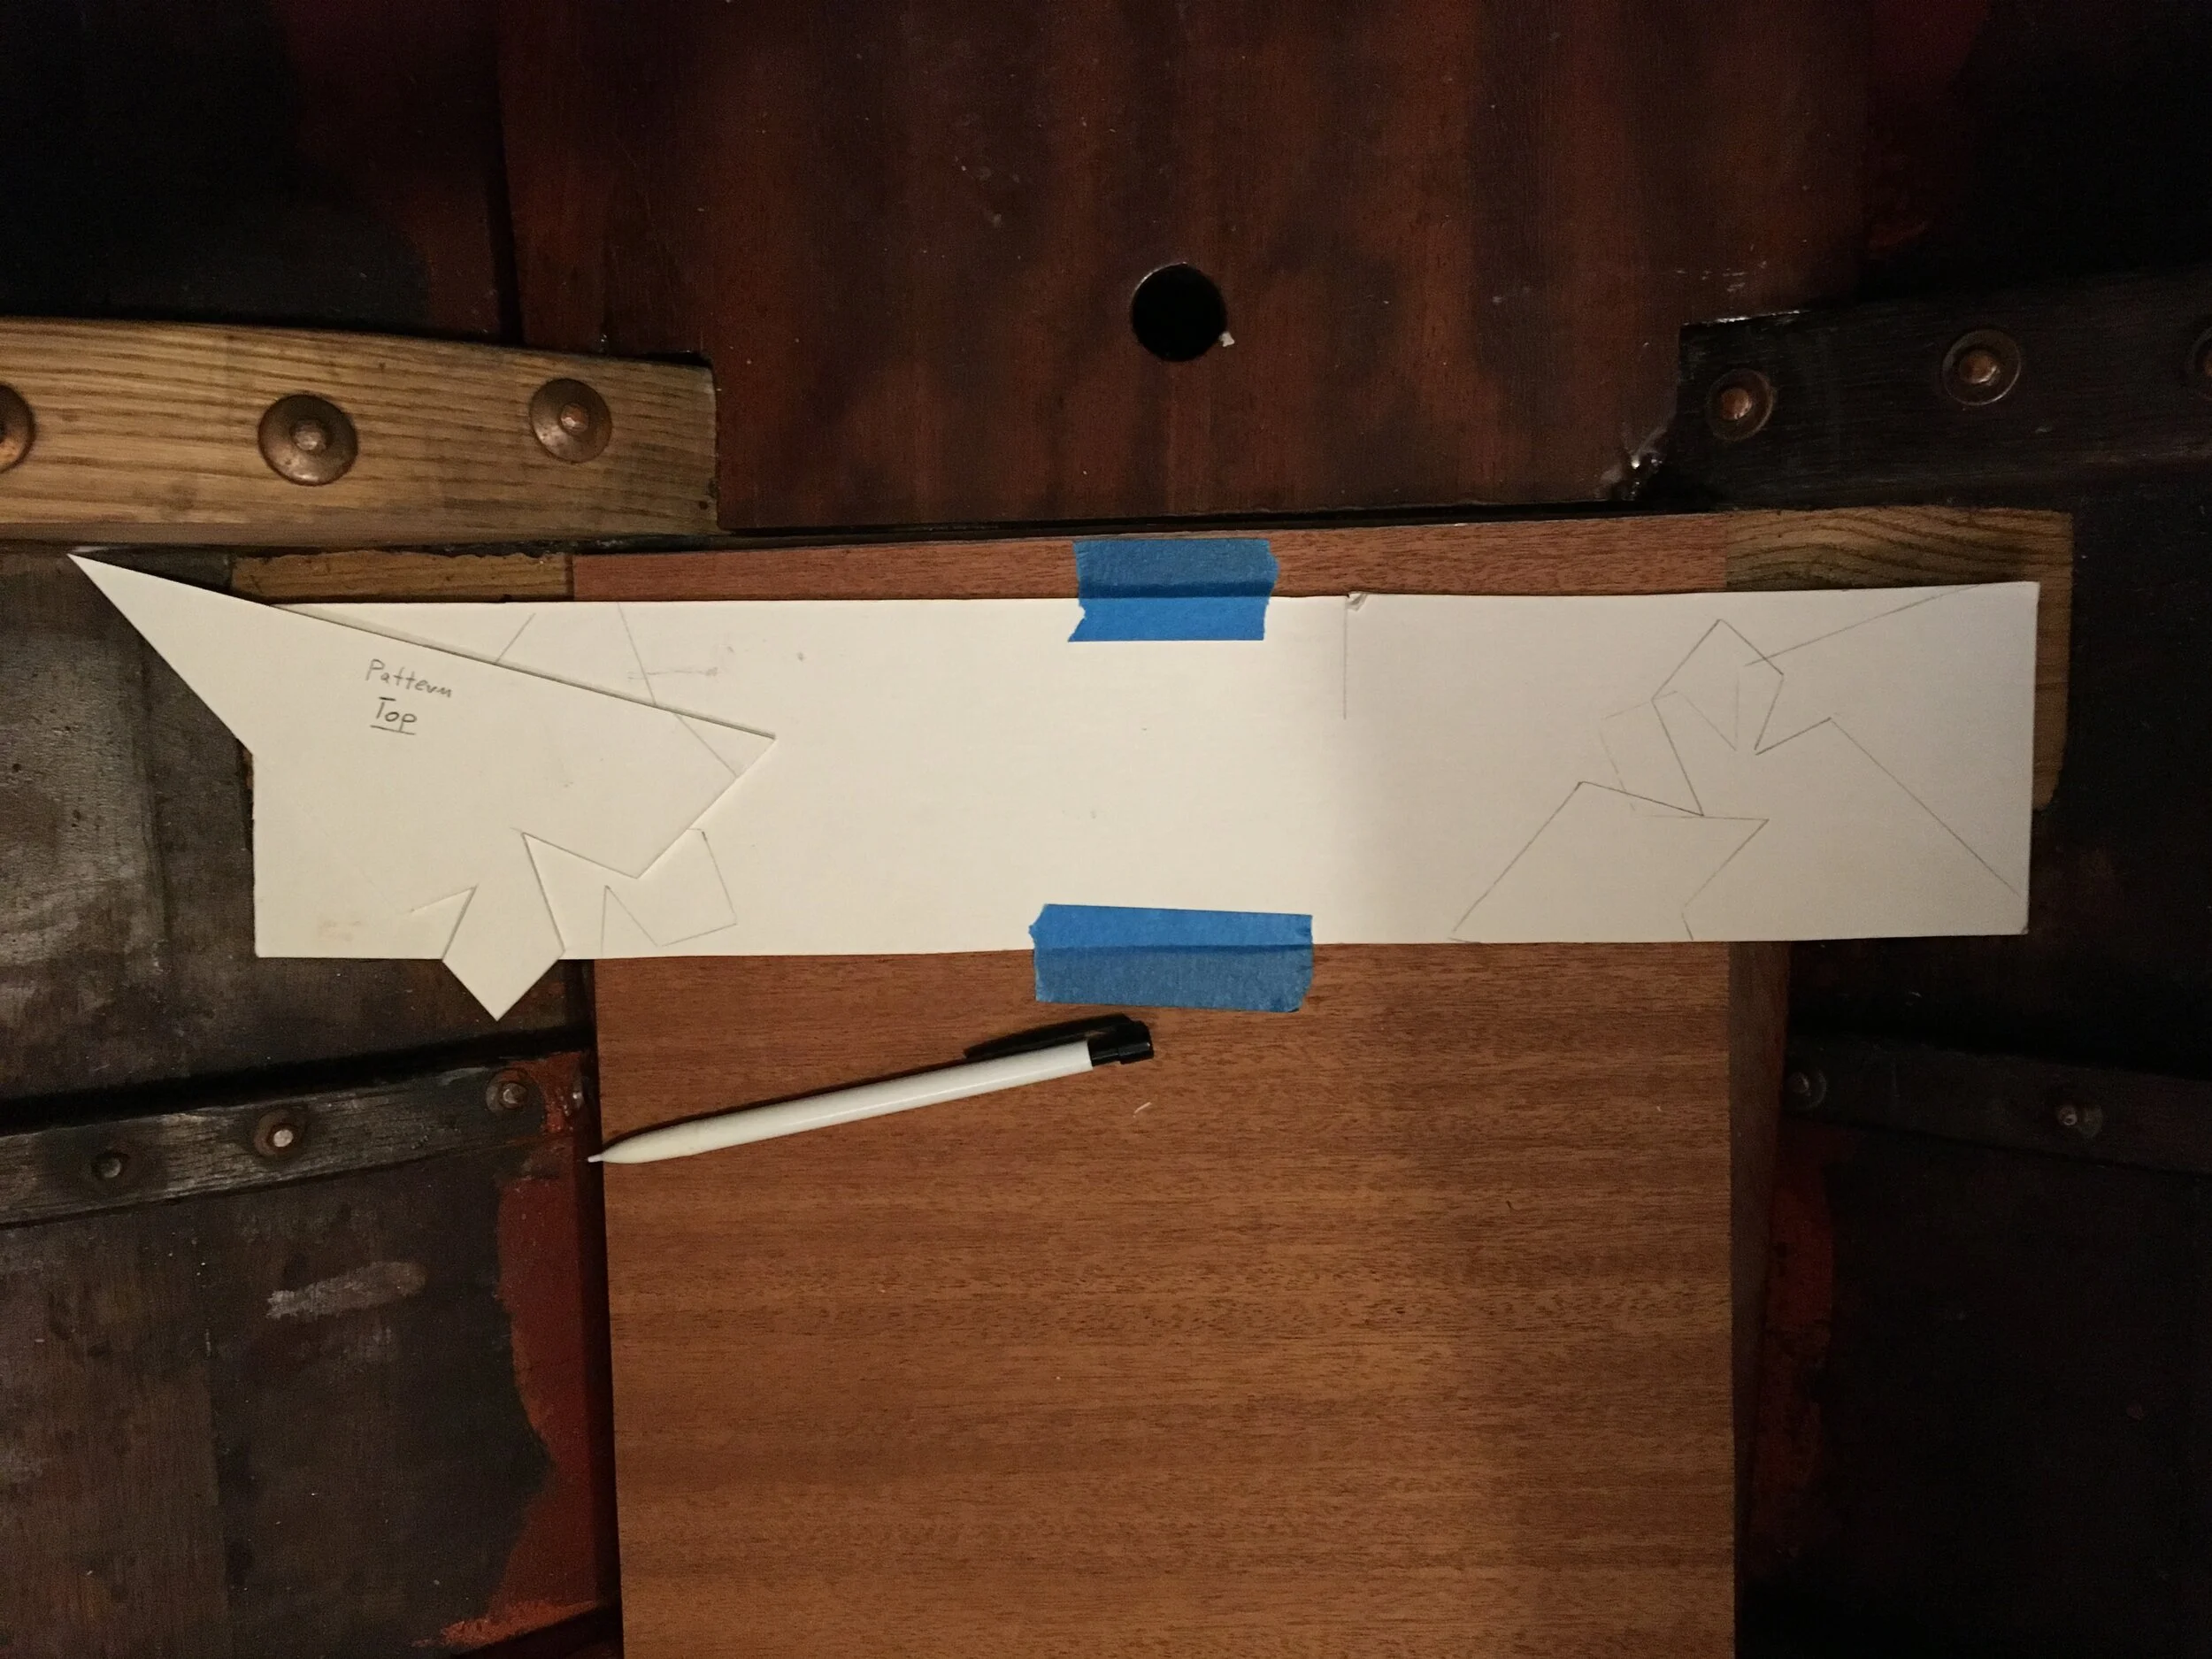
I’ve started with cutting 12mm plywood which serves as a top-level of future sole. By making templates on top surface I can cut wood to the bigger size and then bevel it to match planking bevel.

IMG_8447.JPG

There are many ways to make templates. In this case I use a joggle stick (cardboard) with few cuts which give me exact position of the stick after removing the template.

After marking positions of all corners I take the template onto my mahogany stock.

FullSizeRender.jpg

Here I simply reverse the procedure and after a while I have all points of the needed shape.

Careful cutting with a handsaw and finishing with block plane.

IMG_8453.JPG

Such jobs usually please me but today I gave up after few boards. Not only that the weather was nasty - I was alone in the yard, all sane people were at home watching TV - but also working on the gravel, without proper bench to plane these boards made me tired. These conditions are OK for prep work but now these boards need to be jointed so I need to use a proper, jointer plane - and that works only on a bench.

Going back and forth between the boat and my workshop uphill would take too much time, even with a bicycle. I need to build or buy a proper, mobile workbench. Maybe time to look closer onto Sjöberg benches?

October 20, 2019 /Lukasz Kumanowski
Comment
  • Newer
  • Older

Powered by Squarespace